Galleries & sharing
Themes, access control, proofing and sharing your work.
The payoff: a polished public gallery your clients and guests can browse, download from, and share — reachable by a link or by scanning the album's QR code. This chapter is about the visitor experience: what guests see, how to pick a theme, how to brand the page, and how to hand the link out.
The fine-grained on/off switches (passwords, downloads, watermarks, embargoes) each get a quick walkthrough here, but the full settings reference lives in Album settings. Proofing and final delivery have their own chapter too — Proofing & client delivery.
A quick word on jargon, so nothing below is a surprise:
- The gallery is the public web page guests open. Its address is
snap-flow.org/gallery/<your-album-slug>. - A theme is the visual style of that page (the layout, colours and fonts).
- Brand Studio is the editor where you customise the look — your logo, colours, hero banner and column count.
What guests see
Here's a real SnapFlow gallery (the Magazine theme):
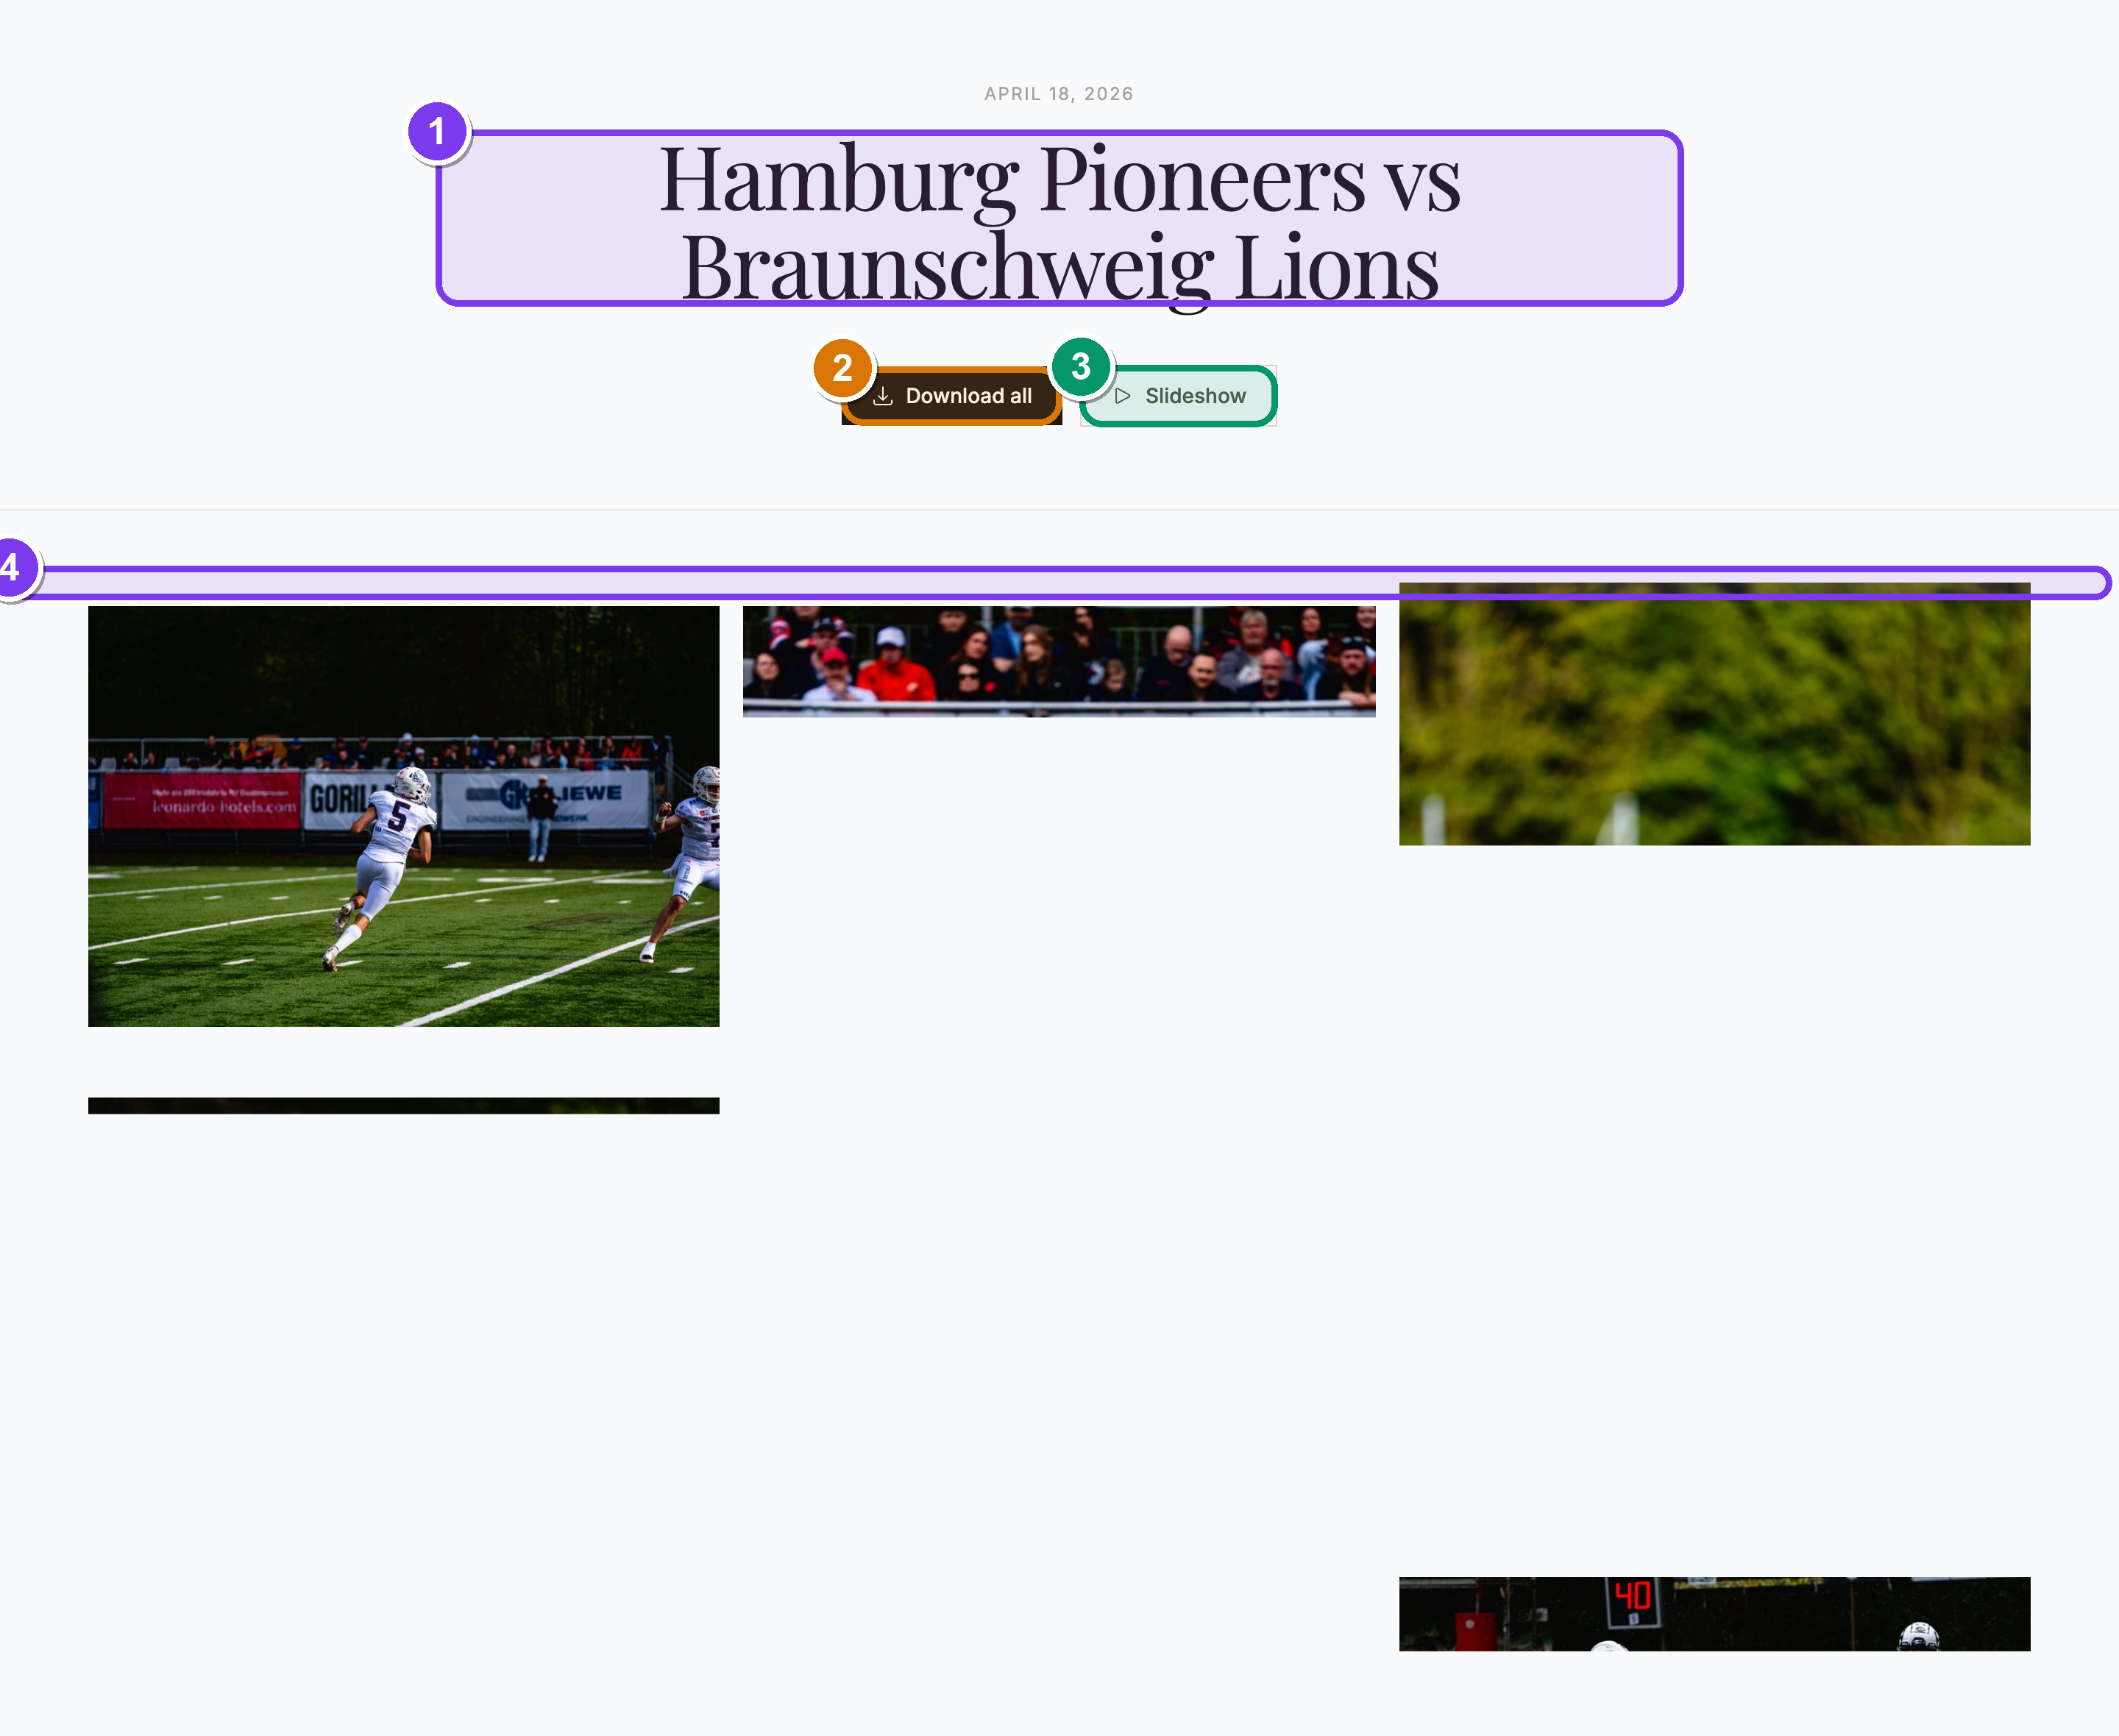 The Magazine theme. ① the serif headline at the top, ② the Download all
button, ③ the Slideshow button, ④ the photo grid below. Guests get a clean,
fast, mobile-friendly page with your branding.
The Magazine theme. ① the serif headline at the top, ② the Download all
button, ③ the Slideshow button, ④ the photo grid below. Guests get a clean,
fast, mobile-friendly page with your branding.
It works just as well for an individual athlete's race gallery — a guest who scanned a single-person QR code lands on a page showing only their photos:
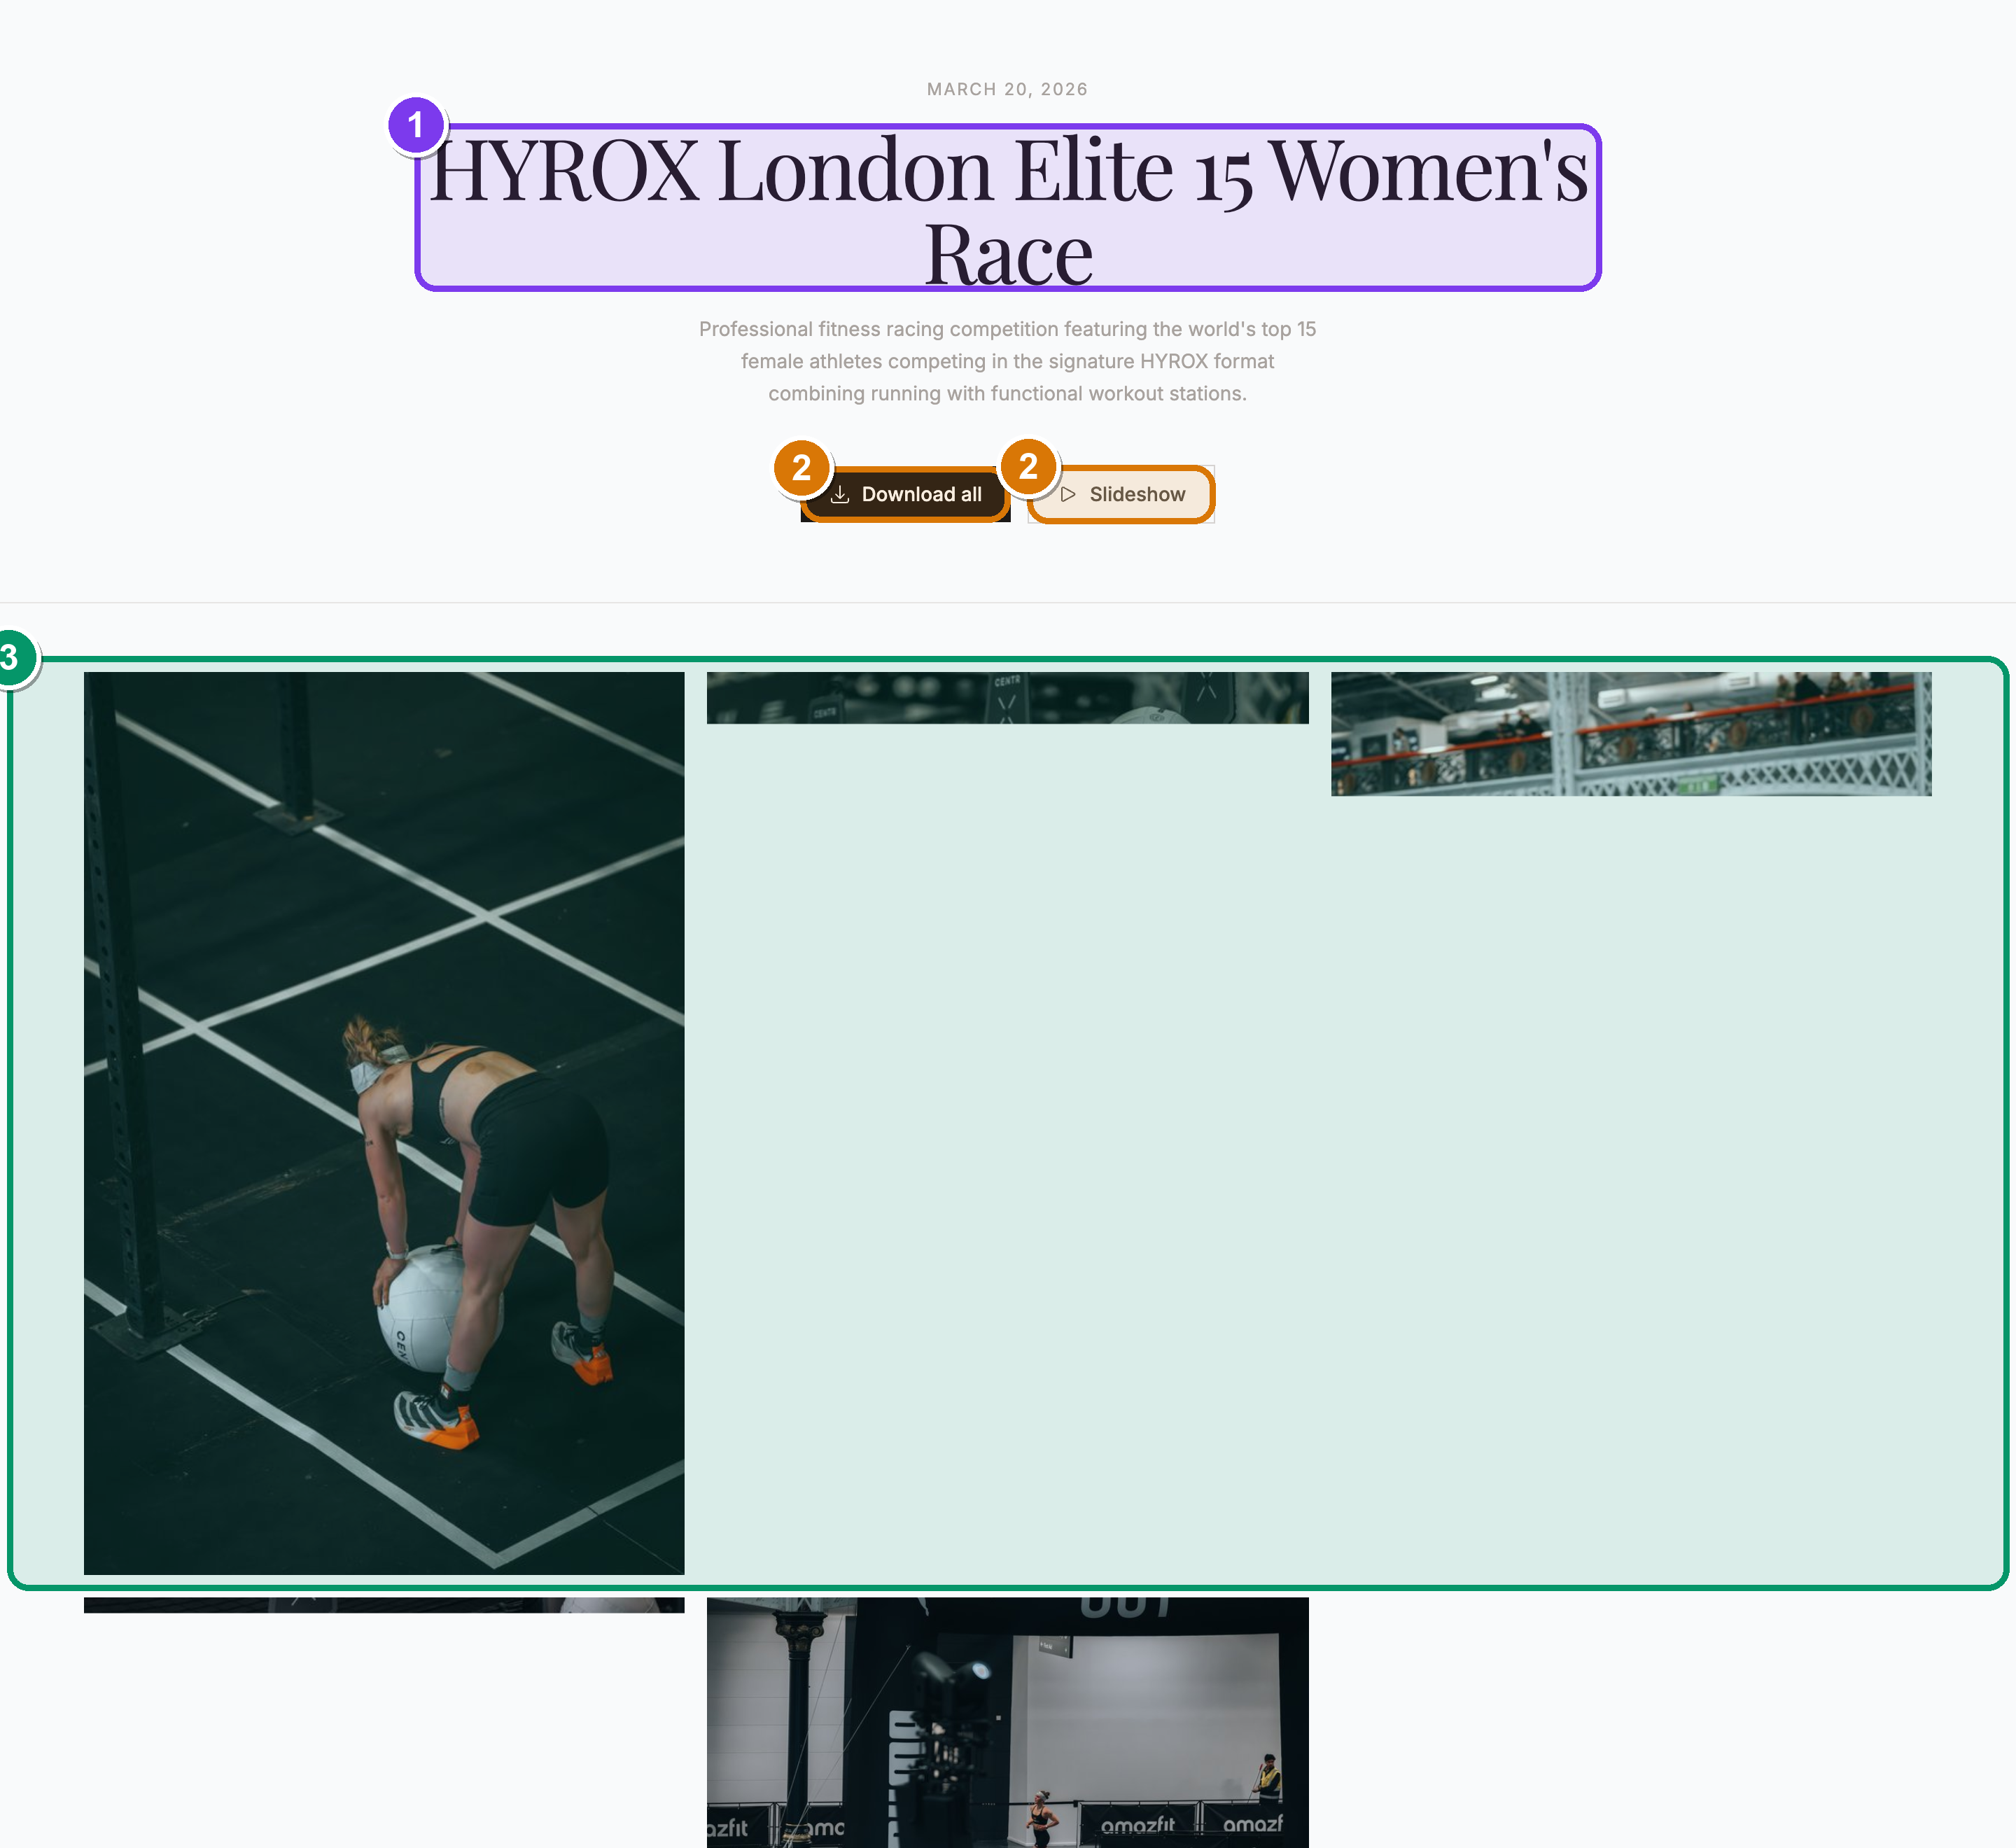 A per-athlete gallery. ① the athlete's name as the page title, ② the
Download all and Slideshow buttons, ③ only that person's photos in the
grid.
A per-athlete gallery. ① the athlete's name as the page title, ② the
Download all and Slideshow buttons, ③ only that person's photos in the
grid.
A brand-new album that has no photos yet shows a friendly placeholder instead of an empty grid:
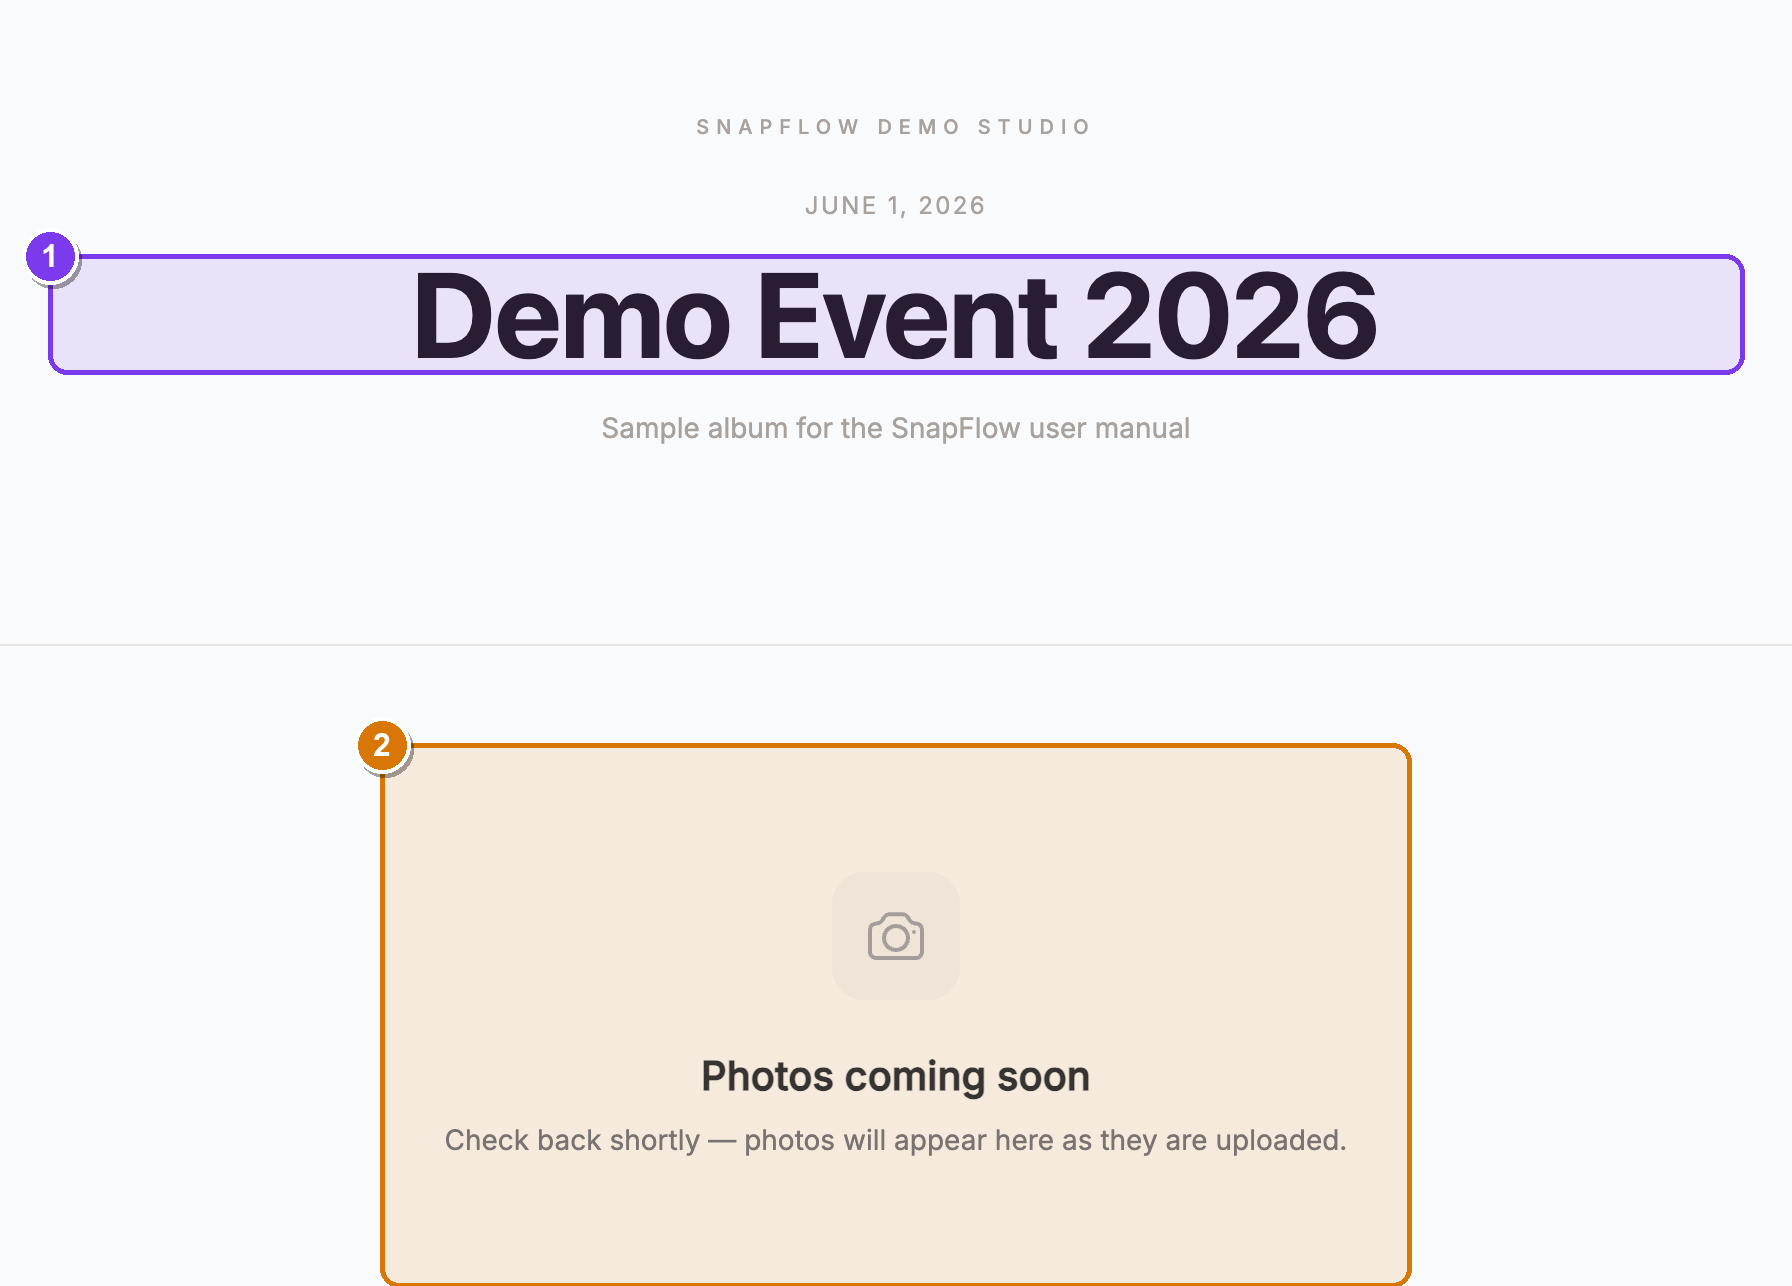 The empty state on the Classic theme. ① the event title at the top, ② a centred
Photos coming soon card where the grid will be. As soon as your first photos
finish processing, they replace this card automatically.
The empty state on the Classic theme. ① the event title at the top, ② a centred
Photos coming soon card where the grid will be. As soon as your first photos
finish processing, they replace this card automatically.
The download button's wording changes with the theme
The big download button reads Download all photos on the Classic and Hero themes, and Download all on the Dark and Magazine themes. It only appears when you've allowed downloads (see Control access & downloads below) or when finished photos are on show.
Choose a theme
The theme is the overall visual style of the public page. You pick it on the album's Edit page.
- From the dashboard, open your album. — the album page opens with its photo grid and a row of buttons across the top.
- Click More ▾ (top-right) → Edit album…. — the Edit album page opens in two columns.
-
In the left column, find the Gallery card. The first control is Theme, shown as four tappable cards. Click the one you want:
- Classic — clean white masonry grid. On every plan.
- Hero — a full-width banner image, then the grid. (Pro+)
- Dark — cinematic black background. (Pro+)
- Magazine — editorial serif headline (shown above). (Pro+)
— the card you click gets a blue border so you can see it's selected. 4. Scroll to the bottom and click Save changes. — you're returned to the album page; open the gallery to see the new theme.
Three themes need a paid plan
Only Classic is available on every plan. Hero, Dark and Magazine show a small Pro badge on a Free account and can't be selected until you upgrade. Pro
Customise the look (Brand Studio)
The theme sets the overall style; Brand Studio is where you make the gallery yours — your logo, your colours, your fonts, a hero banner, and how many columns the grid uses. Web
-
On the album page, click More ▾ (top-right) → Customize gallery…. — the Brand Studio editor opens. It's two columns: the controls on the left, a Live preview of your gallery on the right that updates as you type.
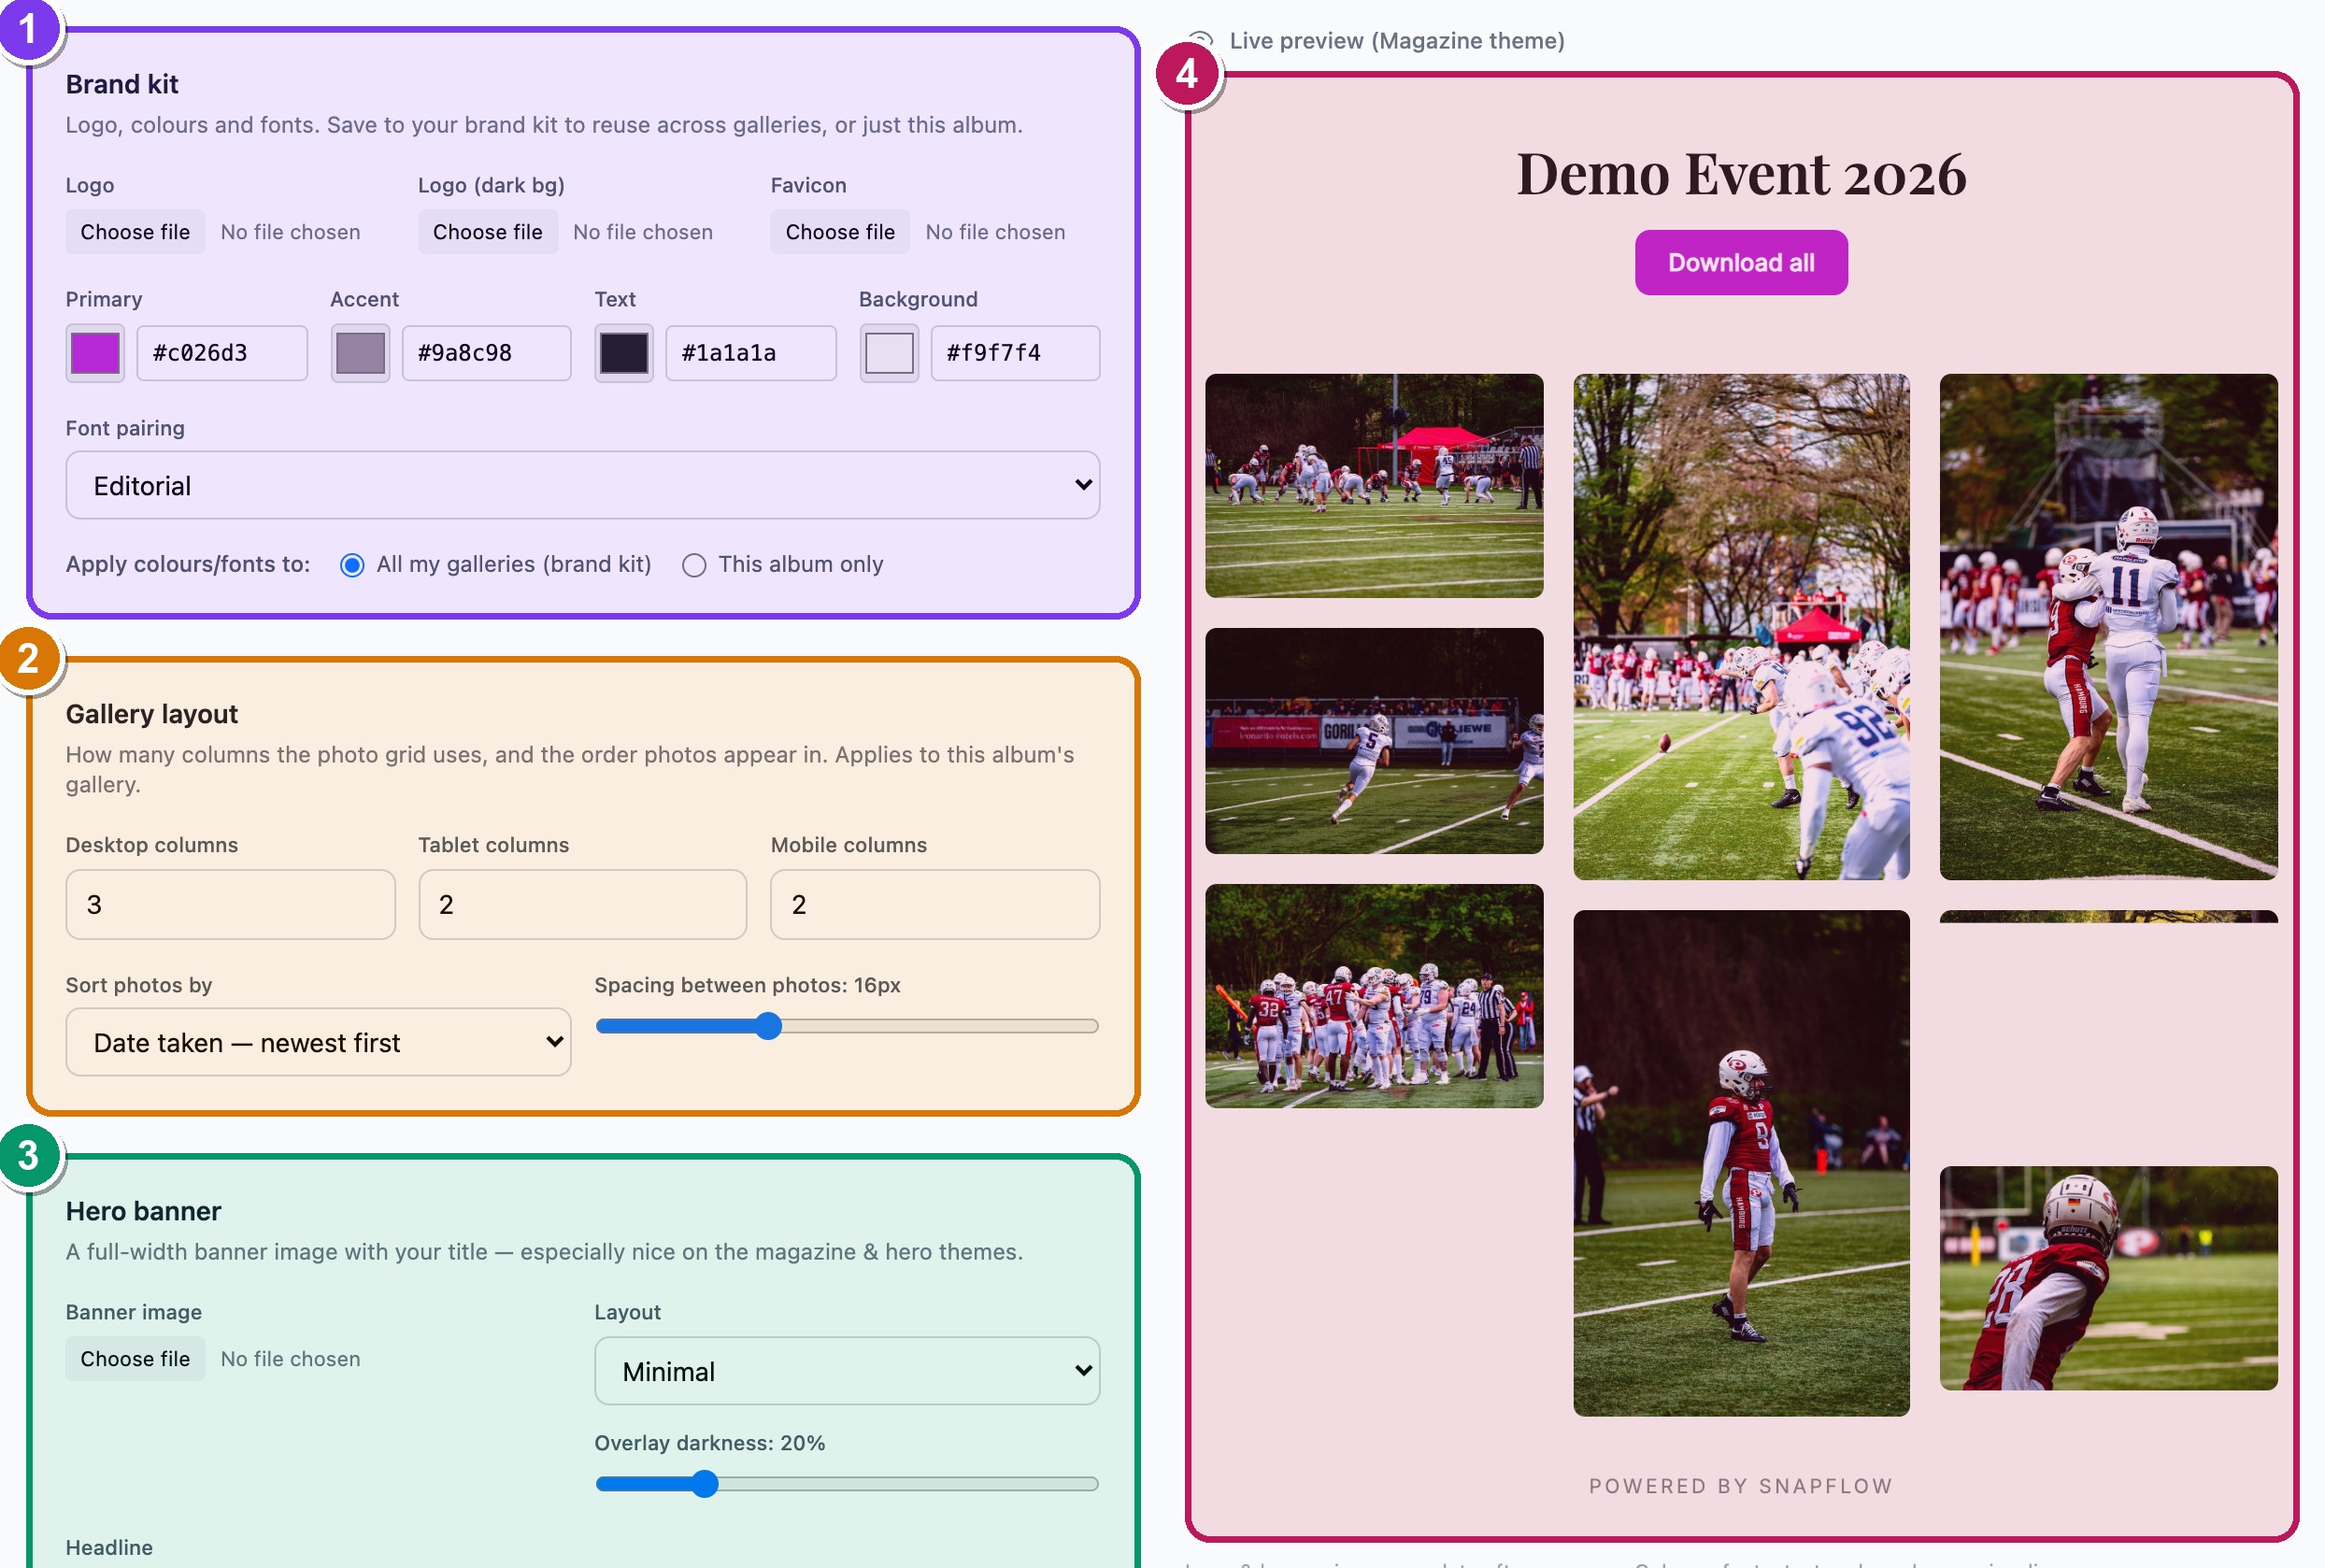 Brand Studio. ① the Brand kit card (logo, colours, fonts), ② the
Gallery layout card (columns and sort order), ③ the Hero banner card,
④ the Live preview pane on the right that updates as you make changes.
Brand Studio. ① the Brand kit card (logo, colours, fonts), ② the
Gallery layout card (columns and sort order), ③ the Hero banner card,
④ the Live preview pane on the right that updates as you make changes. -
In the Brand kit card, set your branding:
- Logo — click the file picker and choose your logo image. There are slots for Logo, Logo (dark bg) and Favicon.
- Primary, Accent, Text and Background — each is a colour
swatch plus a hex box. Click the swatch to pick a colour, or type a hex
code like
#1a1a1a. - Font pairing — choose a heading-and-body font combination from the dropdown.
- Apply colours/fonts to — pick All my galleries (brand kit) to reuse this look everywhere, or This album only to keep it to this one event.
— the preview on the right repaints as you change each control. 3. In the Gallery layout card, set how the grid is arranged: - Desktop columns, Tablet columns, Mobile columns — how many photos sit side by side on each screen size. - Sort photos by — e.g. Date taken — newest first, Filename (camera order), Shuffle, and more. - Spacing between photos — a slider for the gap, in pixels. 4. In the Hero banner card, optionally upload a Banner image and type a Headline and Subtitle. — especially nice on the Hero and Magazine themes. 5. When you're happy, click Save changes (bottom-right). — a green Saved chip appears at the top.
Some Brand Studio controls need a paid plan
The Brand kit colours and logo, Gallery layout, Hero banner and Chapters cards each show an Upgrade to unlock → link when your plan doesn't include them. The card is greyed out until you upgrade. Classic-theme galleries still work fully on every plan; Brand Studio just adds the polish. Pro
Logo and banner images appear after you save
Colours, fonts, headline text and the overlay slider preview live as you drag. The logo and banner images only show in the preview once you've clicked Save changes — that's normal.
Control access & downloads
These switches decide exactly what a guest can do. They all live on the same Edit album page (More ▾ → Edit album…), in the left column under two cards: Gallery and Privacy & Processing, plus a separate Timed Release card. Here's each one as a numbered task.
Make the gallery public or private
- On the Edit album page, find the Gallery card → Public gallery. — it's a single checkbox.
- Tick it to make the gallery reachable by anyone with the link or QR code. Untick it to keep the album private (only you can see it). — when it's unticked, the button on the album page reads Preview instead of View Gallery, because nobody else can open the link.
- Click Save changes at the bottom.
Choose the download quality
- In the Gallery card, find Downloads. There are three radio options:
- No downloads — Guests cannot download photos.
- Web resolution (2000px) — Suitable for sharing, not large prints.
- Original full resolution — Full-quality original file. This is the default.
- Click the one you want, then Save changes. — the gallery's Download all button only appears when you pick one of the two "yes" options.
Set a gallery password
- In the Gallery card, find Gallery password (optional). — a password field.
- Type a password. — guests now have to enter it before the gallery opens.
- Save changes. To remove a password later, return here and tick the remove password checkbox that appears once one is set.
Hold the gallery behind a countdown (Timed Release)
- On the same Edit album page, find the Timed Release card (right column).
- In Publish at, pick a date and time. — (optional — gallery shows a countdown until this time). Until that moment, guests who open the link see a countdown instead of the photos. You, the owner, can always preview it early.
- Save changes.
Auto-retire the gallery (Gallery expiry)
- Back in the Gallery card, find Gallery expiry (optional).
- Pick a date and time. — after it passes, the gallery link stops working and shows an "expired" page. Leave it blank for "never expires."
- Save changes.
Publish-at and expiry are in different cards
Publish at (the countdown) lives in its own Timed Release card. Gallery expiry lives in the Gallery card. They're separate settings — one holds the gallery closed until a time, the other retires it after a time.
Privacy & processing
These two controls live in the Privacy & Processing card on the same Edit album page.
Strip GPS from delivered files
- Find Strip GPS from photos. — it's on by default. — Removes location data from EXIF before serving. Recommended for privacy.
- Leave it ticked unless you have a reason to share exact GPS coordinates.
Watermark gallery thumbnails
- Find Watermark thumbnails. — Overlay your studio name on gallery thumbnails. This is a paid feature. Pro
- Tick it. — a Watermark text field appears below. Type the text you want
stamped on each thumbnail, e.g.
© Studio Name. - If the album already has photos, a button reads Apply watermark to N existing photo(s). Click it to stamp the photos already in the album (raw originals only — normally watermarking runs only on new uploads). — a confirmation box appears first.
- Save changes.
Free plans can't watermark
On a Free account the Watermark thumbnails control is greyed out with a Pro badge. Upgrade to Pro or Studio to switch it on.
Proofing & finished delivery
Two bigger features ride alongside the gallery and have their own full chapter:
- Client proofing lets guests heart their favourites, and hands you their picks back as a list (exportable to ZIP or CSV).
- Finals delivery lets you hand over the finished, edited set separately from the live event feed.
You turn both on from the Workflows card on the Edit album page. For the step-by-step, see Proofing & client delivery and Live delivery.
ZIP downloads are press-ready
When a guest (or you) downloads a gallery as a ZIP, every JPEG inside has your captions, keywords and IPTC baked in — no re-keywording needed downstream. See Metadata & captions.
Share the gallery
There are three ways to get the gallery in front of guests. All of them start on the album page.
Share the link
-
On the album page, the gallery's address is shown as a pill near the top:
/gallery/<your-album-slug>. Click View Gallery to open the public page in a new tab, then copy the URL from your browser. — that's the link to send.Private albums show Preview, not View Gallery
If Public gallery is unticked, this button reads Preview and only you can open the page. Tick Public gallery first (see above) before sharing.
Embed it in your own website
- On the album page, click Embed. — the Embed this gallery window opens
with two snippets: a JavaScript loader and a plain
<iframe>. Copy either into your blog or website to drop the gallery straight into your page.
Embed needs a fully public gallery
The Embed button only does something for a gallery that is public, has no password, is not expired, and has no future Publish-at time. A password-protected or not-yet-published album can't be embedded — embedding it would defeat the password or the countdown.
Hand out the QR code
- On the album page, click More ▾ → QR code. — the QR code page opens with a printable image and a download link.
- Print the QR code on a sign, card or banner at the event. Guests scan it with their phone camera and land straight in the gallery. — for the full QR walkthrough see Create an album.
That's the core workflow
Camera → cull → recognise → share. From here, the next chapters go deeper: Proofing & client delivery, Live delivery, and Instagram & socials.