Albums & delivery status
The album list and what each status badge means.
This chapter is for the client — the person your photographer invited to view their photos. (Photographer? You set all of this up in Album settings and Proofing & delivery.)
When you sign in to the gallery portal, the first thing you see is My Galleries — one tidy grid with a card for every album your photographer has shared with you. No folders to dig through, no apps to install. Each card tells you, at a glance, what the photos are and how far along the shoot is.
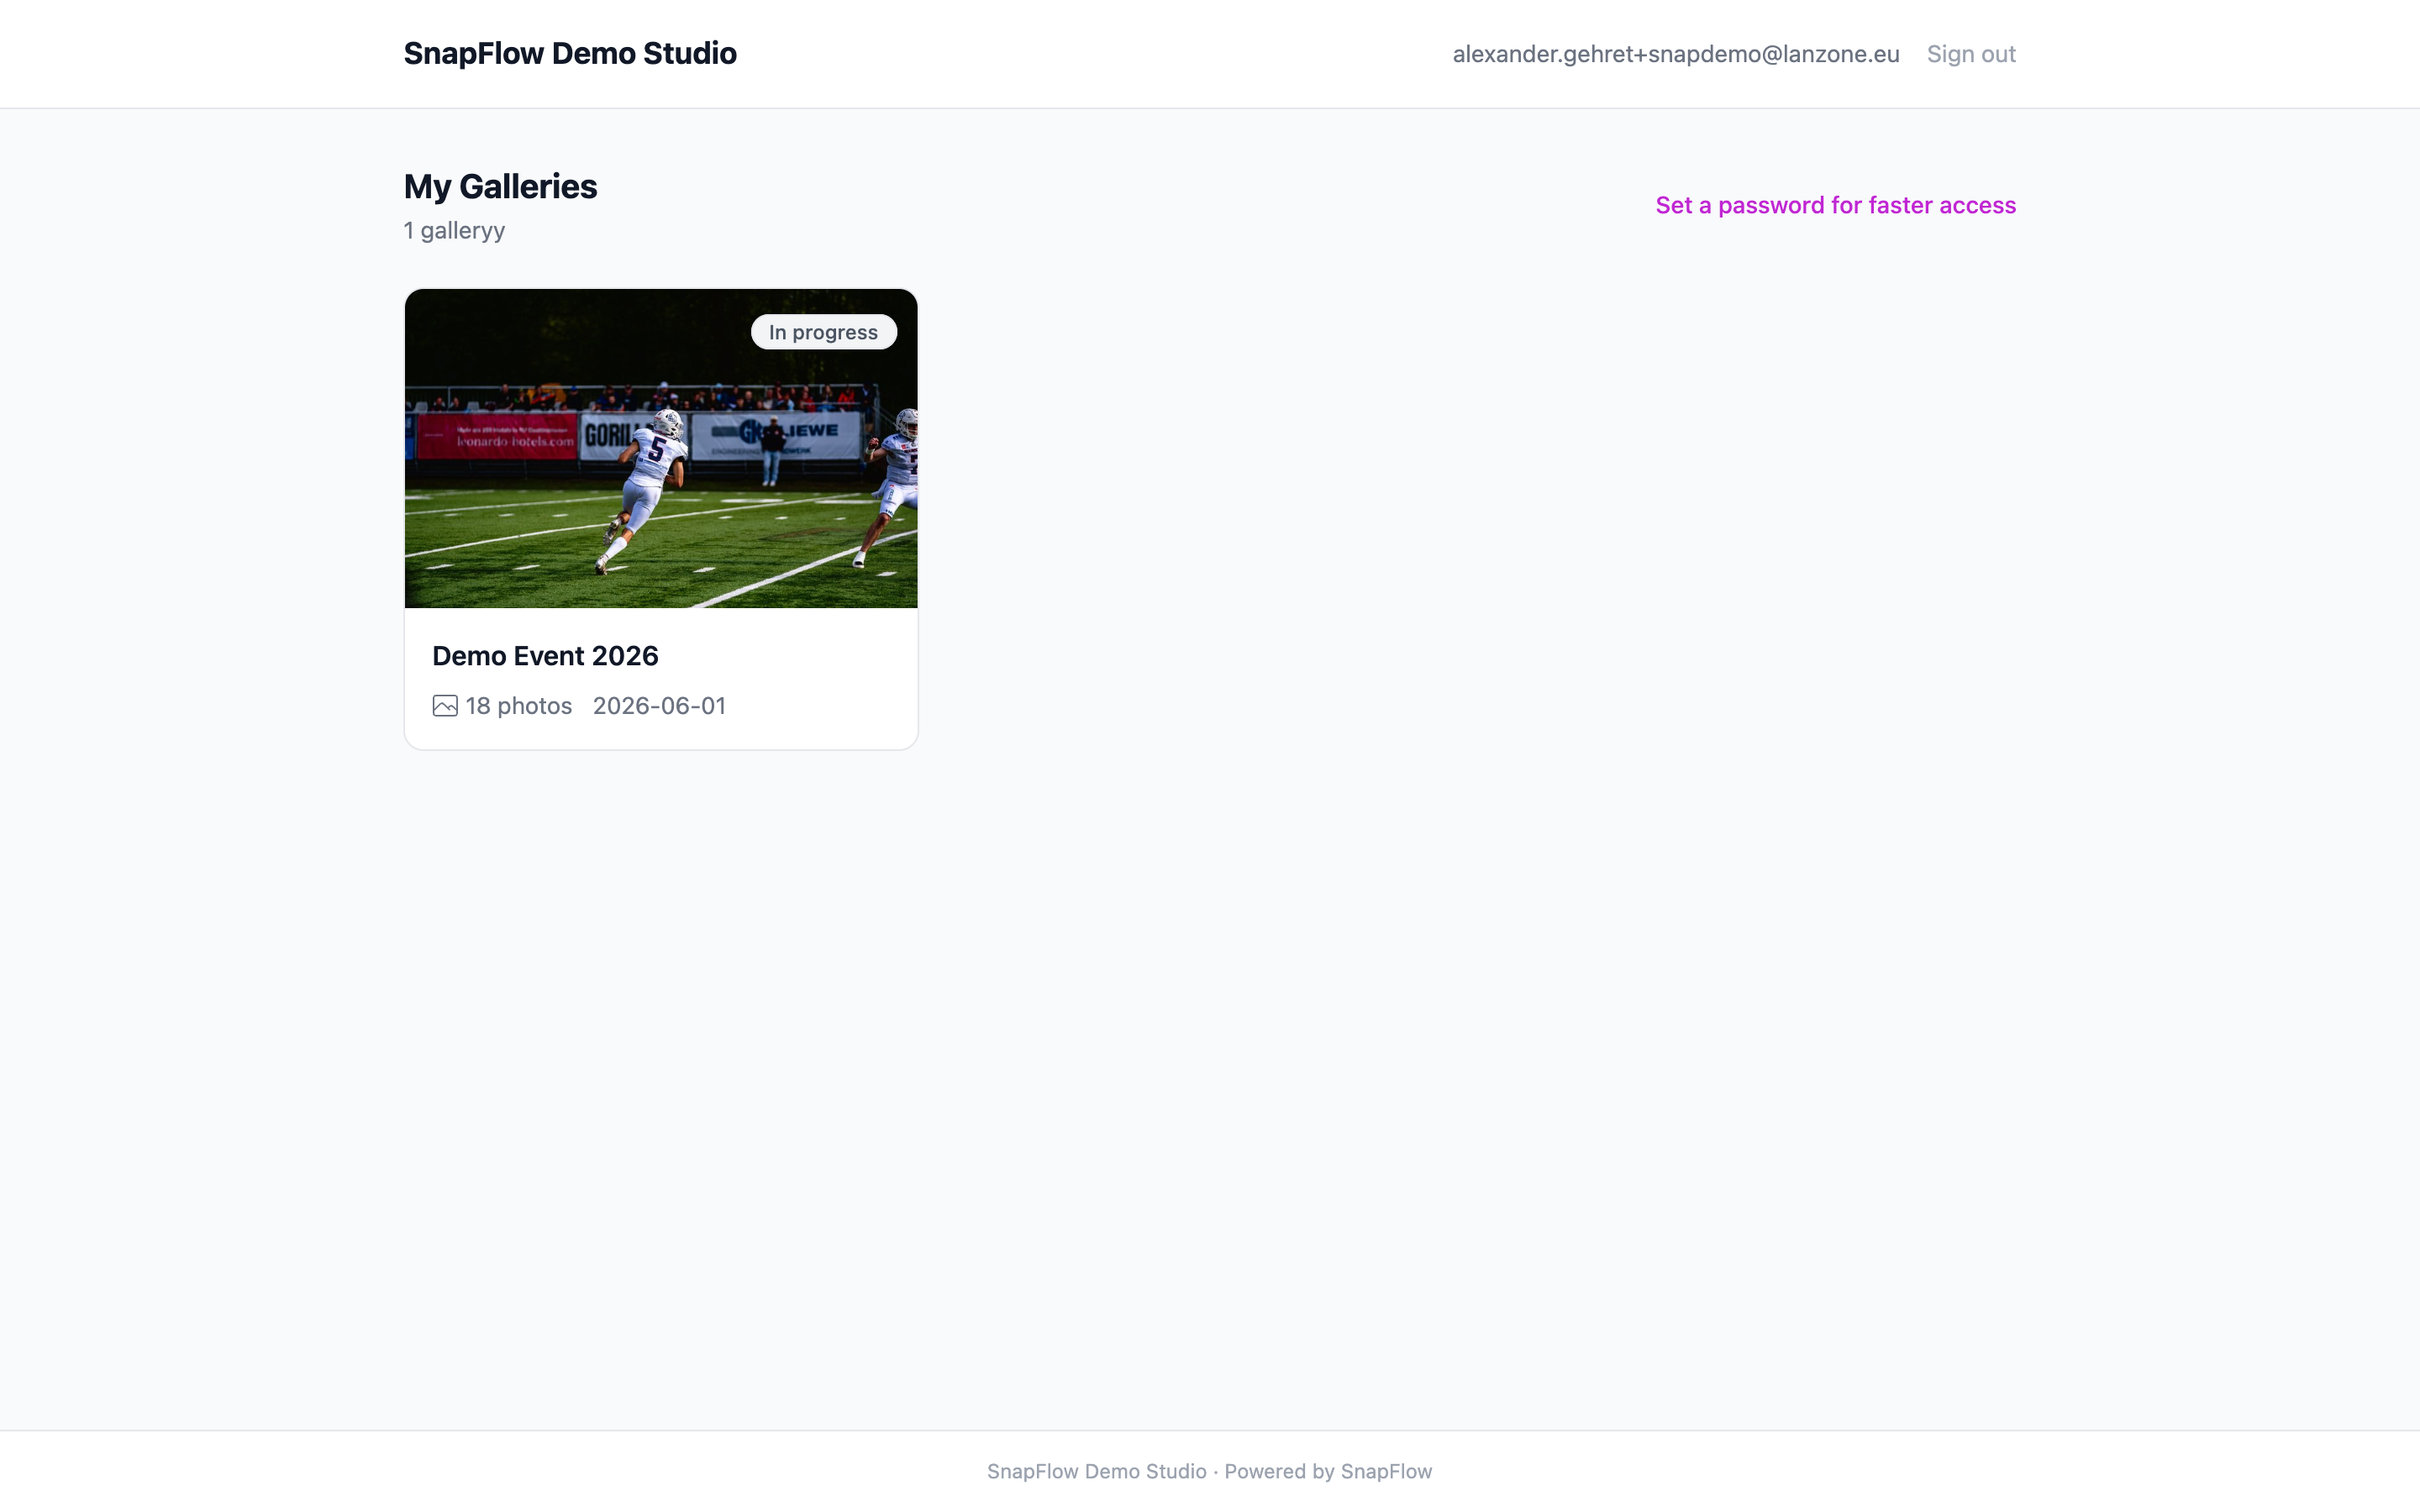 The My Galleries home page. ① the page title My Galleries with a "N galleries" count under it; ② a status badge pill in the top-right corner of each cover; ③ the album name with "N photos" and the event date below it; ④ a purple "N selected" heart pill, which only shows on albums where you've already picked favourites; ⑤ the "Set a password for faster access" link, top-right.
Read a gallery card
Every card on the My Galleries page is laid out the same way, top to bottom:
- The cover photo. A single picture your photographer chose to represent the event. If they haven't picked one yet, you'll see a plain camera icon instead.
- The status badge — a small coloured pill in the top-right corner of the cover. This tells you where the shoot is in your photographer's workflow. We explain every colour in the next section.
- The album name — the name of the event (for example, "Hannah & Marco's Wedding").
- "N photos" — how many finished photos are in the gallery right now. This counts only photos that have finished processing, so the number climbs as your photographer's pictures come in.
- The event date, shown next to the photo count when your photographer set one.
- A purple "N selected" pill — appears only once you've started picking favourites (hearting photos). It shows how many you've chosen so far. No pill means you haven't picked any yet. (Picking favourites is covered in Picking your favourites.)
Galleries are ordered by event date
The newest events sit at the top of your My Galleries grid. If you're looking for an older shoot, scroll down.
To open a gallery, just click anywhere on its card. — the album opens to a grid of all its finished photos, with the newest-captured shots ordered by the time they were taken.
No galleries yet?
If the page reads "No galleries available yet." with the line "Your photographer will share them here when they're ready," that simply means your photographer hasn't published anything to you yet. Nothing is broken — check back later, or ask them when the gallery will be ready.
The status badges — where your photos are
The badge tracks the album's phase — the exact same phase your photographer moves it through on their side. So the badge updates by itself; you never have to ask "are they done yet?" Here is what each one means, with the colour you'll see:
| Badge | Colour | What it means for you |
|---|---|---|
| In progress | Grey | Your photographer is still working — early days. Photos may still be coming in. |
| In review | Amber | The photos are in your photographer's internal review. Not ready for you to pick from yet. |
| Proofing | Blue | Open for you to choose your favourites — look for the heart buttons. |
| Editing | Blue | Your picks are being edited and the final photos are being prepared. |
| Delivered | Green | The final photos are ready. You can download them. |
The badge follows the photographer's workflow, automatically
When your photographer advances an album — say, from review to Proofing, or from editing to Delivered — your badge flips to match the moment they save it on their side. You don't have to refresh or reload anything special; the next time you open the portal, the new badge is there. Nobody has to email you to say "it's ready."
Hearts and the Proofing badge are two different switches
It's easy to assume the heart buttons appear the instant an album shows the Proofing badge. They don't — and knowing the difference saves confusion.
- The status badge comes from the album's phase (the table above).
- The heart buttons appear only when your photographer has turned on a separate switch called Client proofing.
Most of the time these line up: your photographer flips on Client proofing and moves the album to the Proofing phase together, so you see the Proofing badge and the hearts at the same time. But they are independent. An album could read Proofing without hearts (proofing wasn't switched on), or show hearts on a different phase (proofing is on, but the badge says something else).
Photographers: it's the Client proofing toggle, not the phase
If your client can't see the hearts, the fix is to turn on Client proofing in the album's Workflows card — not to change the album's phase. See Proofing & delivery for the exact steps. When Client proofing is on, the album page shows the banner "Proofing mode — click the heart on photos you'd like to keep. Your selections are saved automatically," and a heart sits in the corner of every photo.
When an album has Client proofing on, opening it gives you an extra button in the top-right: My selections (N) — a running list of everything you've hearted, where you can also leave retouching notes. That whole flow lives in Picking your favourites. When the album reaches Delivered, a purple Download button appears in that same row — see Downloading your photos.
Sign in faster next time
The first time you arrive, you usually get in with just your email (your photographer sends a one-time login link). If you'd rather sign in with a password from now on, you can set one right from the home page:
- On the My Galleries page, click Set a password for faster access (top-right, next to the gallery count). — a small box slides open with a single password field.
- In Choose a password (6+ characters), type a password at least six characters long. — the field accepts your typing.
- Click Set Password. — a green bar appears reading "Password set! You can now sign in with your email and password."
From now on you can sign in with your email and that password instead of waiting for a link. (Full sign-in details — including the email login link — are in Getting into your gallery.)
The link is only there until you've set one
Once you've set a password, the Set a password for faster access link disappears — you don't need it any more.