Editing on iPhone
Import a photo, develop it on-device, and save it back to an album.
iOS
The SnapFlow iPhone app has a built-in photo editor called the Edit tab. You import one photo, slide a few controls to brighten it or warm it up, and save the result back into one of your albums — all on your phone. Nothing uploads while you are sliding controls around; the edit only travels to SnapFlow when you choose to save.
This chapter walks you through the whole loop: open the Edit tab, bring a photo in, develop it, and hand it back to an album. Assume you have already signed in (if not, see Getting started on iPhone).
What the Edit tab is for
This is a quick field-edit tool — perfect for fixing one frame on the train home and pushing it straight to a gallery. It is not a replacement for the full desktop develop editor. Heavier work (tone curve, HSL colour mixer, colour grading, crop, masks) lives in the desktop app — see Editing & styles on desktop.
Find the Edit tab
The app has four tabs along the bottom of the screen: Albums, Edit, Posts, and Reels. The Edit tab is the second one, marked with a slider icon (three horizontal sliders).
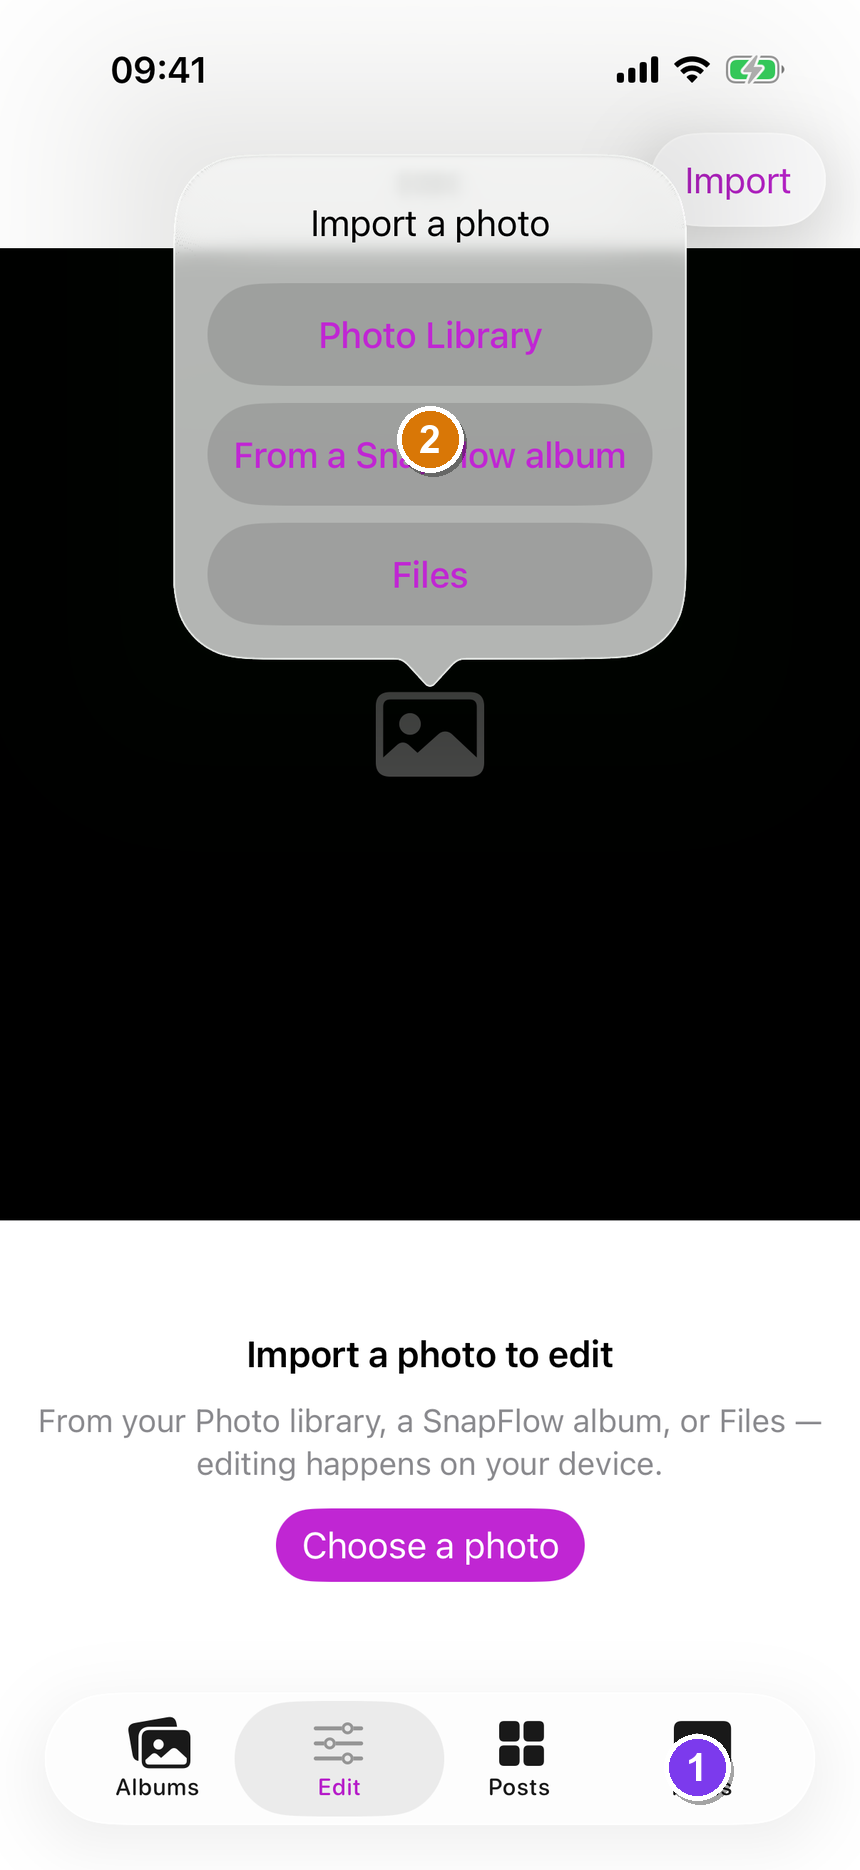 The Edit tab is the second tab in the bottom bar. ① the Edit tab (slider icon); ② the Import menu that opens when you tap Import — Photo Library, From a SnapFlow album, and Files.
- Tap Edit in the bottom tab bar. — the editor opens. Because you have not loaded a photo yet, you'll see a centred prompt: "Import a photo to edit" with the line "From your Photo library, a SnapFlow album, or Files — editing happens on your device."
- There are two ways to start: tap the big blue Choose a photo button in the middle, or tap Import in the top-right corner. — either one opens the same chooser titled Import a photo.
Your edit never leaves your phone until you save
Importing a photo and dragging the sliders all happen on-device. The edited photo only reaches SnapFlow when you tap Save and pick an album (covered below). Your original is never changed.
Import a photo
When you tap Import (or Choose a photo), a chooser titled Import a photo slides up with three sources:
- Tap Import (top-right) or Choose a photo. — the Import a photo chooser appears with Photo Library, From a SnapFlow album, Files, and Cancel.
- Pick where the photo lives: - Photo Library — opens your iPhone's photo picker. Choose any shot. If you captured it in Apple ProRAW, the picker hands SnapFlow the original DNG so you get the full RAW headroom; ordinary HEIC/JPEG photos come through too. - From a SnapFlow album — opens a screen titled Choose album. Tap an album, then tap one photo in the grid. SnapFlow fetches the full-resolution original from your account and loads it into the editor. - Files — opens the iOS document picker so you can grab a RAW or image file you have saved in Files or iCloud Drive.
- After you pick, the photo appears in the large preview at the top of the Edit tab, and the controls slide in below it. — you'll see the develop panel (a column of sliders).
What formats work
The editor decodes camera RAW files through Apple's built-in RAW engine (this is where ProRAW DNGs and most camera RAWs get their extra latitude). Files it doesn't recognise as RAW — like HEIC and JPEG — still open and edit fine; you just don't get the RAW headroom.
If a file won't open
If you pick something that isn't a photo SnapFlow can edit, you'll get a "Couldn't import photo" alert (or "That file isn't a photo we can edit."). Tap OK and try a different file.
Reading the photo label
Just above the sliders, a small grey line names your camera (for example "iPhone 15 Pro") followed by · RAW or · preview:
- · RAW means SnapFlow decoded a true RAW file — you have the most editing room.
- · preview means it loaded a regular image (HEIC/JPEG). It still edits; there's just less highlight/shadow recovery to pull from.
Develop the photo
Below the preview is a column of sliders. Drag any one and the preview updates live so you can see the change as you make it. Every slider starts at 0 (neutral).
The basic panel, top to bottom:
| Slider | What it does |
|---|---|
| Exposure | Overall brightness (in stops). Right = brighter, left = darker. |
| Contrast | Punch between lights and darks. Right = more contrast. |
| Highlights | The brightest areas. Pull left to recover blown-out skies. |
| Shadows | The darkest areas. Pull right to open up shadows. |
| Whites | The white point — how bright the brightest pixels go. |
| Blacks | The black point — how deep the darkest pixels go. |
| Temp | White balance warmth. Right = warmer (more orange), left = cooler (more blue). |
| Tint | Green ↔ magenta balance. Use it to clean up a colour cast Temp can't fix. |
| Vibrance | Boosts the muted colours first, protecting skin tones. |
| Saturation | Boosts every colour evenly. |
- Drag a slider — say Exposure. — the preview brightens or darkens immediately, and the number on the right of that slider row updates as you drag.
- Keep adjusting. Each slider works independently; drag as many as you like. — the photo shows the combined result live.
Temp and Tint are your white-balance pair
To warm a too-blue photo, push Temp to the right. If the photo has a green or magenta cast, nudge Tint until skin looks natural. These two together are your white-balance controls.
This is the basic panel — for now
The iPhone editor ships with these ten basic sliders. The heavier tools — tone curve, the 8-band HSL colour mixer, colour grading wheels, sharpening/noise, crop, and local masks — are on the desktop app today. If you need those, send the photo up to an album and open it on desktop (Editing & styles on desktop).
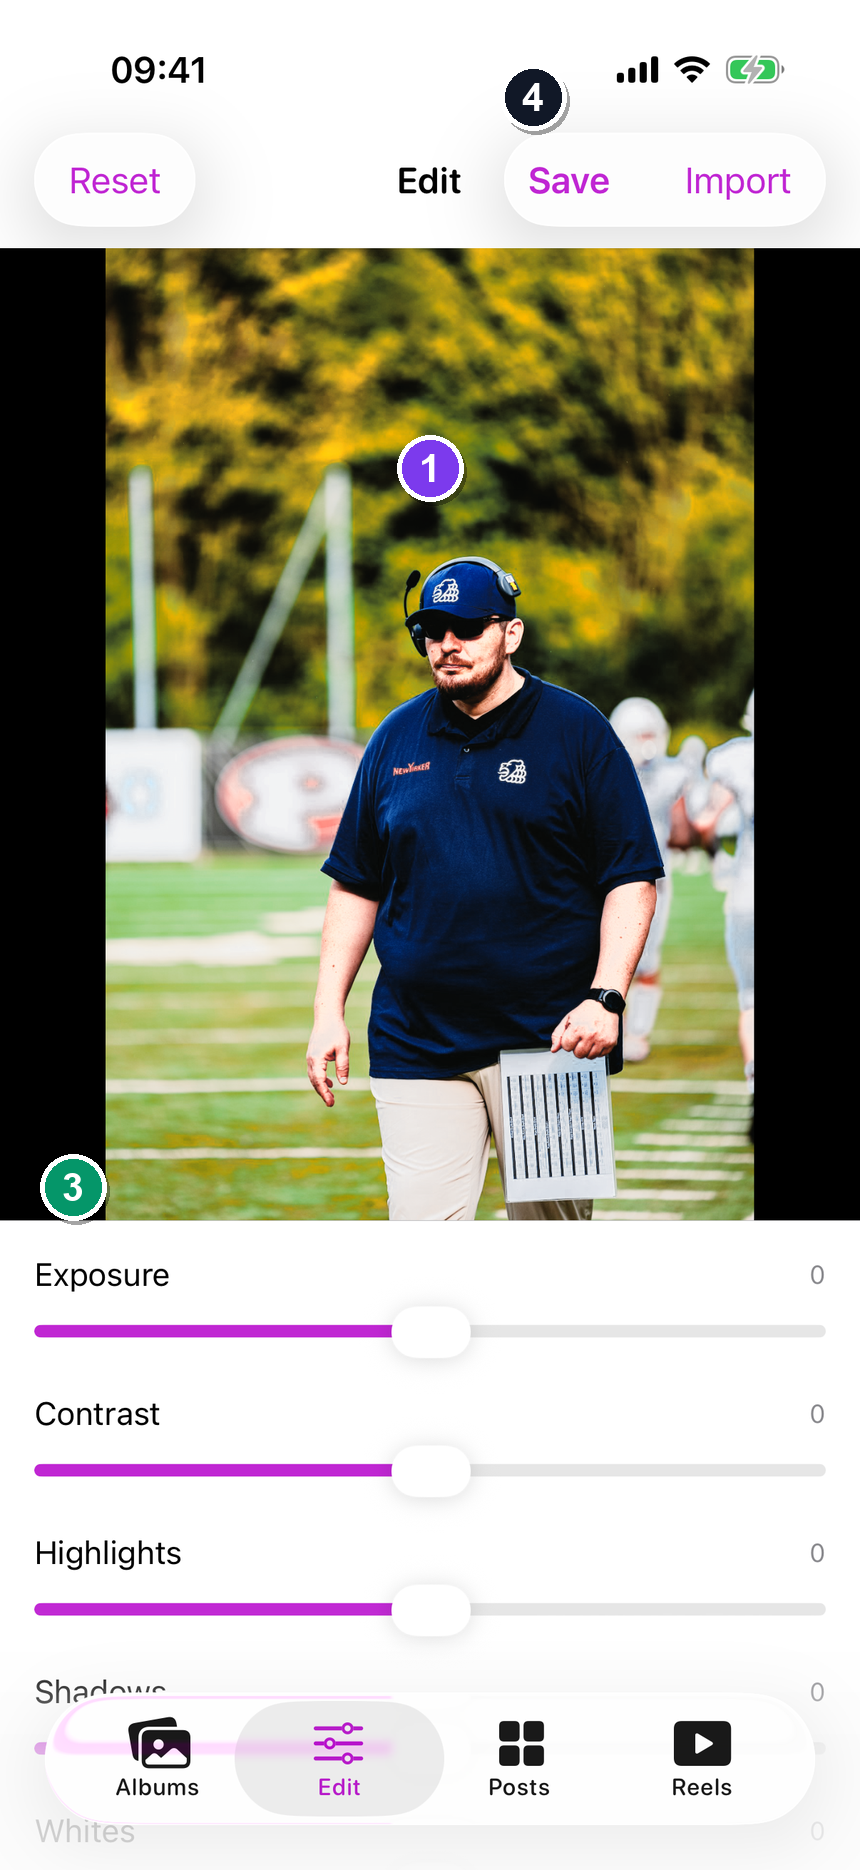 A RAW photo loaded in the Edit tab. ① the live preview (updates as you drag); ② the camera-model line ending in · RAW; ③ a slider row showing its label and current value; ④ the Reset, Import and Save buttons in the toolbar.
Start over
Changed your mind? You don't have to drag every slider back by hand.
- Tap Reset in the top-left corner. — every slider jumps back to 0 (neutral) and the preview returns to the freshly-imported look. Your edit is wiped, but the photo stays loaded so you can begin again.
Save the edit back to an album
When the photo looks right, save it into one of your SnapFlow albums. SnapFlow renders your edit at full resolution on the phone and uploads it as a brand-new photo — your original is left exactly as it was.
- Tap Save in the top-right corner. — a sheet titled Save to album slides up listing your albums (each row shows the album's cover and photo count).
- Tap the album you want to save into. — a dark overlay appears reading "Saving to album…" while SnapFlow renders and uploads the full-resolution JPEG.
- Wait for the confirmation. — a Saved alert pops up: "Your edited photo was added to "
". It may take a few seconds to finish processing." Tap OK. - Open that album (Albums tab → the album). — your edited photo appears as a new frame once processing finishes (give it a few seconds; it goes through the same upload pipeline as any other photo).
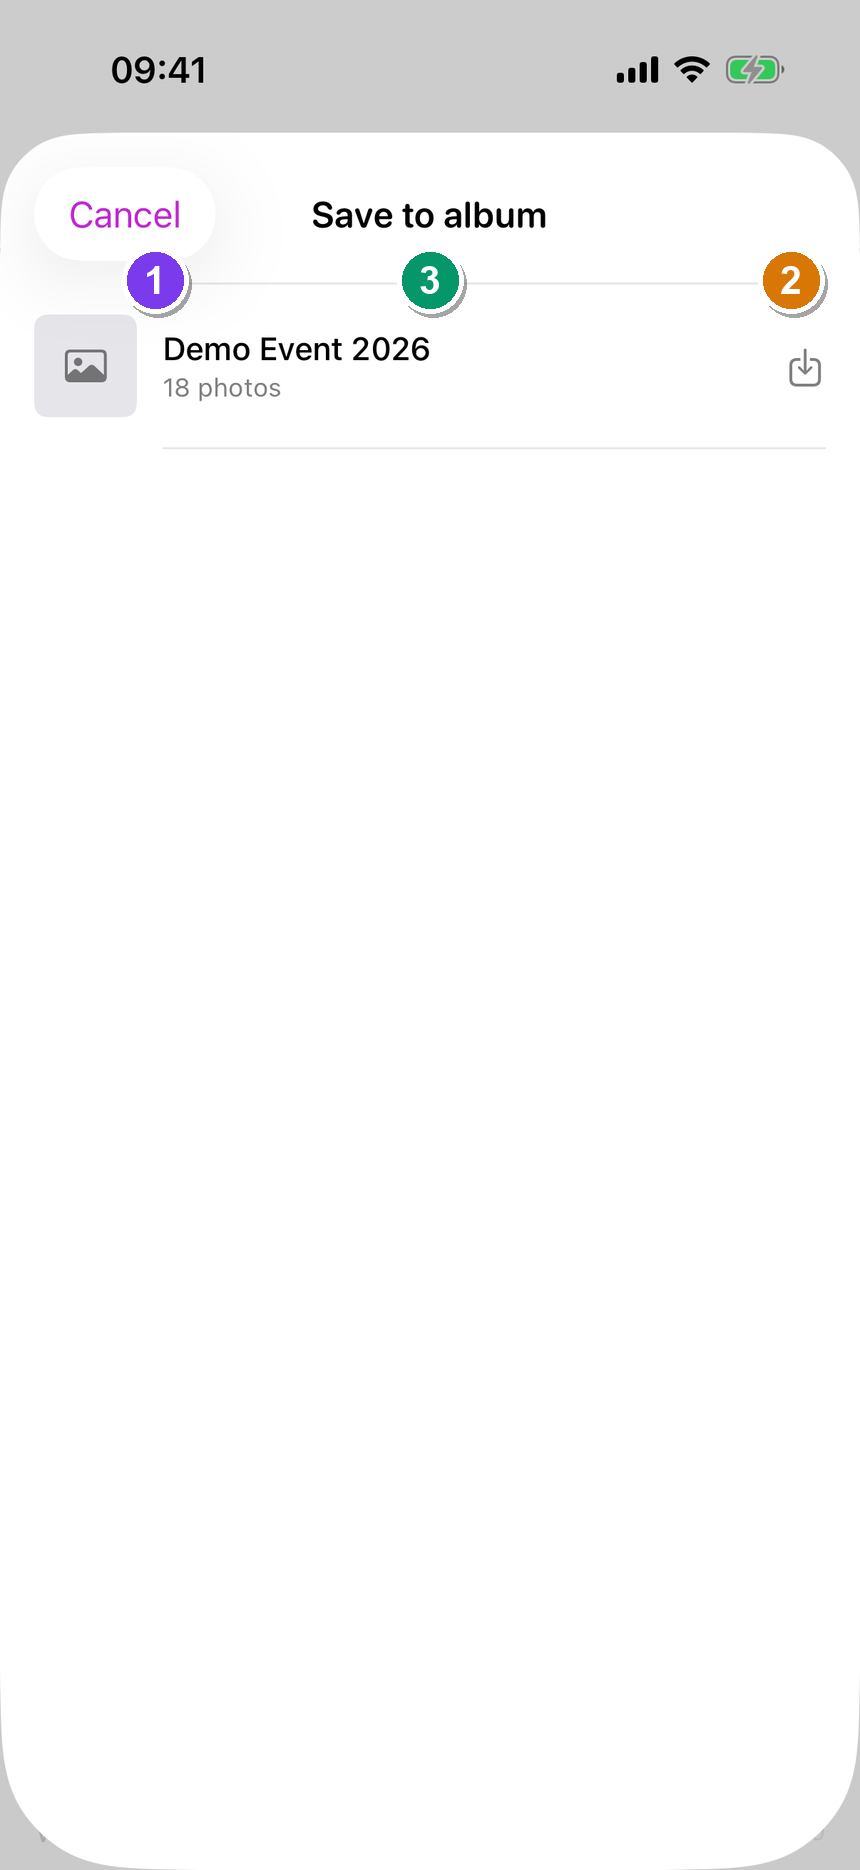 The Save to album sheet. ① an album row with its cover, name and photo count; ② the download/save glyph on the right of each row; ③ tapping a row uploads your edit as a new photo in that album — the original is untouched.
It's added, not replaced
Saving creates a new photo in the album. If you imported the original from a SnapFlow album, the original is still there — you now have both. To swap them, delete the original after the edited copy finishes processing.
You need at least one album to save into
The Save to album list pulls from your own SnapFlow albums. If it's empty, you'll see "No albums" with the line "Create an album on SnapFlow to save photos into it." Create one first — on the Albums tab or on the web — then come back and save.
Tips & limits
- Non-destructive. Nothing you do here changes the file you imported. Reset, re-import, or close the tab any time without risk.
- One photo at a time. The Edit tab edits a single frame. To process a whole take, do it on desktop where you can copy settings across many photos at once — see Editing & styles on desktop.
- RAW gives you the most room. Importing a ProRAW DNG (or a camera RAW from Files) gives you more highlight and shadow recovery than a HEIC or JPEG. The label under the preview tells you which one you've got.
- Save uploads a JPEG. The saved copy is a full-resolution JPEG rendered on your phone, then run through SnapFlow's normal ingest (thumbnails, metadata, recognition if the album has it on). It behaves like any other photo in the album from then on.
- It works offline for the editing part. Importing from Files or Photos and dragging sliders need no connection. You only need to be online to import From a SnapFlow album and to Save back to one.