Live delivery & editor gate
Publish frames live, approve with the editor gate, set gallery visibility.
For events where people want their photos now — a race, a festival, a corporate keynote — SnapFlow can publish frames to the gallery the instant your camera uploads them. The editor gate lets you keep quality control while still going fast. Web
There are three separate things in this chapter, and it helps to keep them straight from the start:
- Live delivery — a checkbox you tick once in the album's settings. It turns the feature on but doesn't do anything by itself yet.
- Go live — a button on the album page you press at the start of the event. It switches the live feed on, lights up the Live badge for guests, and starts pushing new photos to their screens within seconds.
- Editor gate — an optional safety net that holds raw shots back until you (or a teammate) approve them, so a fast feed never leaks a blink or a test frame.
The rest of this chapter walks each one, step by step.
Step 1 — Turn on Live delivery
This is a one-time setting per album. You only do it once, before the event.
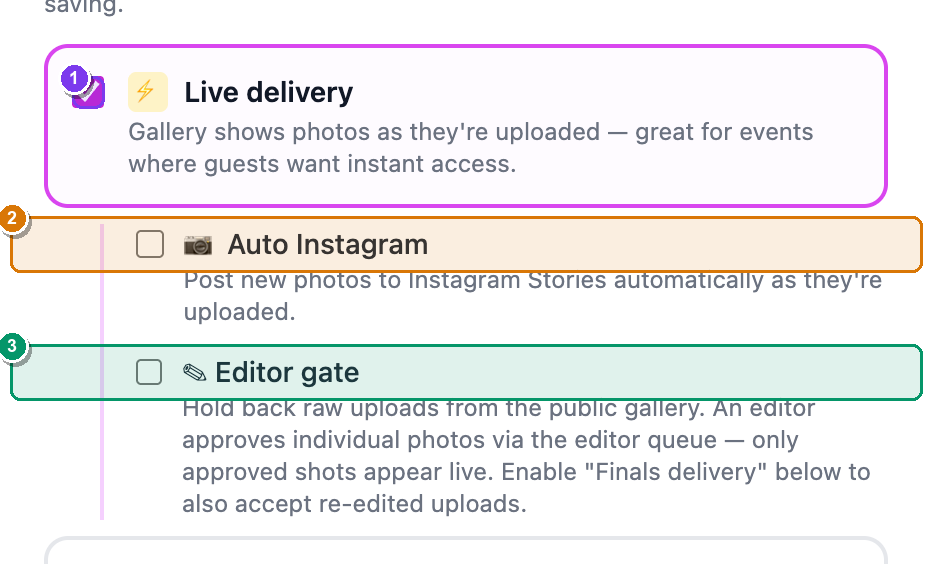 The right-hand Workflows card on the Edit album page. ① the ⚡ Live delivery checkbox; ② the nested 📷 Auto Instagram sub-option; ③ the nested ✎ Editor gate sub-option. The nested box only appears once Live delivery is ticked.
- From your dashboard, open the album, then click More ▾ (top-right) → Edit album…. — the Edit album page opens in two columns.
- In the right-hand Workflows card, find ⚡ Live delivery and tick it. — an indented box slides open underneath with two extra options (📷 Auto Instagram and ✎ Editor gate).
- Scroll to the bottom of the page and click Save changes. — you're returned to the album, and Live delivery is now armed for this event.
Live delivery is on every plan
The Live delivery checkbox is available on Free, Pro and Studio. If you ever see an amber Upgrade pill next to it, your account doesn't have the feature — but on a normal photographer plan it's just there.
Pair it with FTP camera upload
Live delivery shines when your camera uploads straight to SnapFlow over FTP. Tick 📷 FTP camera upload in the same Workflows card, then set up the camera using Getting photos in. Now your shots go camera → gallery hands-free.
Step 2 — Go live (and the Venue display)
Ticking the checkbox only arms the feature. To actually start the live feed — the Live badge, the instant push to guests' phones — you press Go live on the album page when the event begins.
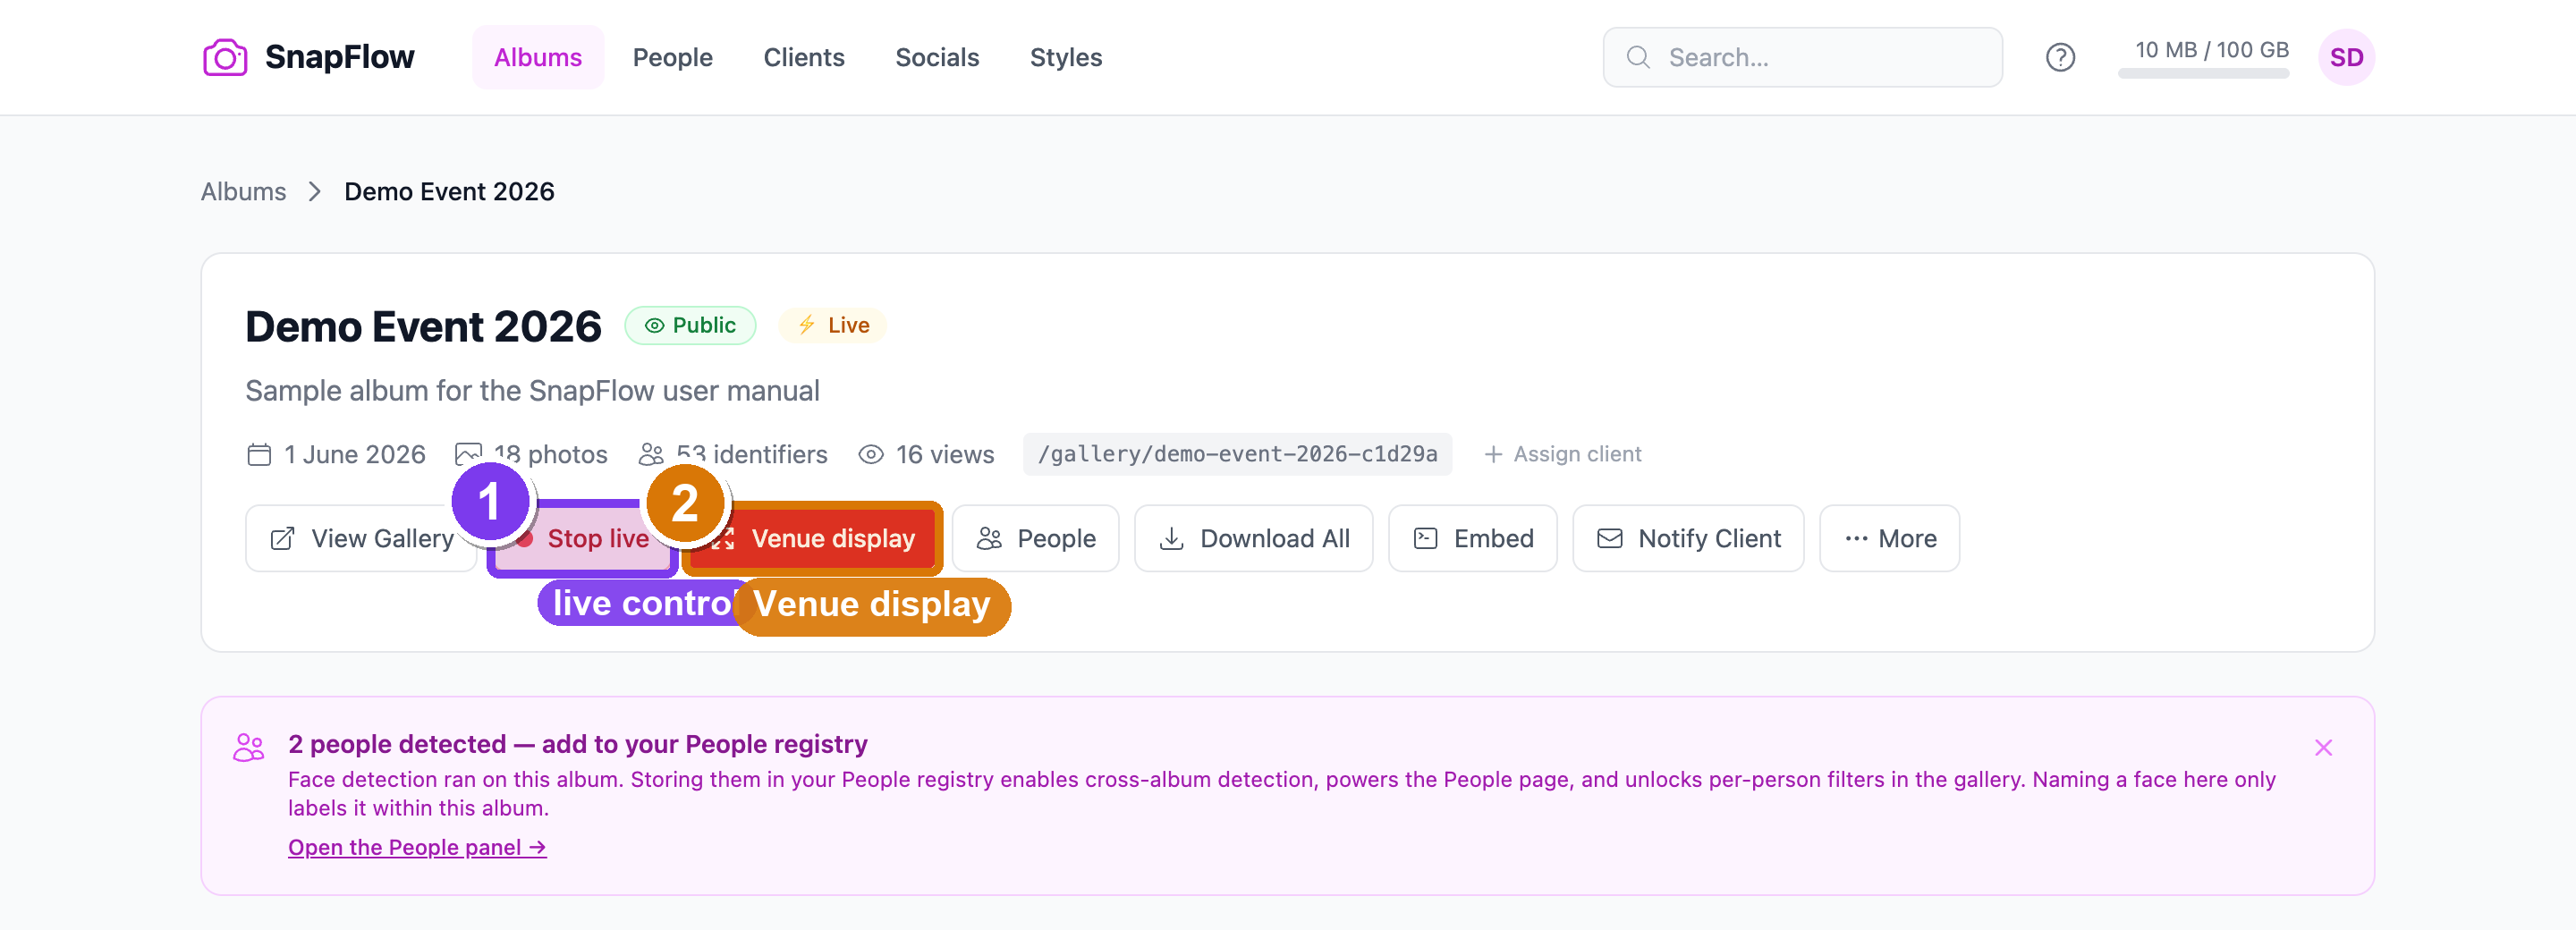 The action row on the album page. ① the grey-dot Go live button (turns into a red-dot Stop live once pressed); ② the red Venue display button, which only appears while you're live.
- On the album page, find the Go live button (it has a small grey dot). — click it. The dot turns red and pulses, and the button now reads Stop live.
- Open the public gallery in another tab (View Gallery, top of the album page). — guests now see a red Live badge, and new photos appear within seconds, all on their own.
- When the event is over, click Stop live. — the live feed switches off, the Live badge disappears, and the gallery goes back to a quiet, normal gallery.
Put it on the big screen — Venue display
While you're live, a second red button appears: Venue display. This opens a full-screen, black-background slideshow that auto-advances through the latest shots and adds each new frame as it lands — perfect for projecting onto a screen at the venue.
- With the album live, click Venue display. — a new browser tab opens with a full-screen slideshow (URL
/gallery/{slug}/live). - Drag that tab to your projector or second monitor and press your browser's full-screen key (usually
F11, or⌃⌘Fon a Mac). — the photos fill the screen with no menus or chrome; new arrivals slot in automatically.
How fast do guests see new photos?
While the album is live, SnapFlow pushes each new photo to open galleries almost instantly (a live "push"), with a 60-second background refresh as a safety net. If you've armed Live delivery but haven't pressed Go live, the gallery still picks up new photos — just on a slower 30-second refresh, and with no Live badge. Either way, a guest sees a small "N new photos just arrived" toast when fresh frames load.
Step 3 — The editor gate (approve before publishing)
Going live doesn't have to mean publishing every frame. Switch on the Editor gate to hold raw shots back until someone approves them. While the gate is on, guests see a friendly placeholder — "Photos from {album} are being edited — N shots taken, check back in a few minutes" — instead of the raw feed. (On the Magazine theme the wording is slightly different: "N frames captured — check back shortly.")
Turn the gate on
- Open the album → More ▾ → Edit album… → right-hand Workflows card. — the ⚡ Live delivery box is already ticked from Step 1.
- In the indented box under Live delivery, tick ✎ Editor gate. — its help text confirms it: "Hold back raw uploads from the public gallery."
- Click Save changes (bottom of the page). — from now on, raw camera uploads stay private until you approve them.
The gate has a quick on/off switch too
Once the album is live, an Editor gate widget appears in the FTP / credentials area of the album page with a small Turn on / Turn off button. Use it to flip the gate during the event without going back into settings.
Approve shots from the queue
You approve held-back shots from the Editor Queue — a focused page that lists every raw shot still waiting for a decision.
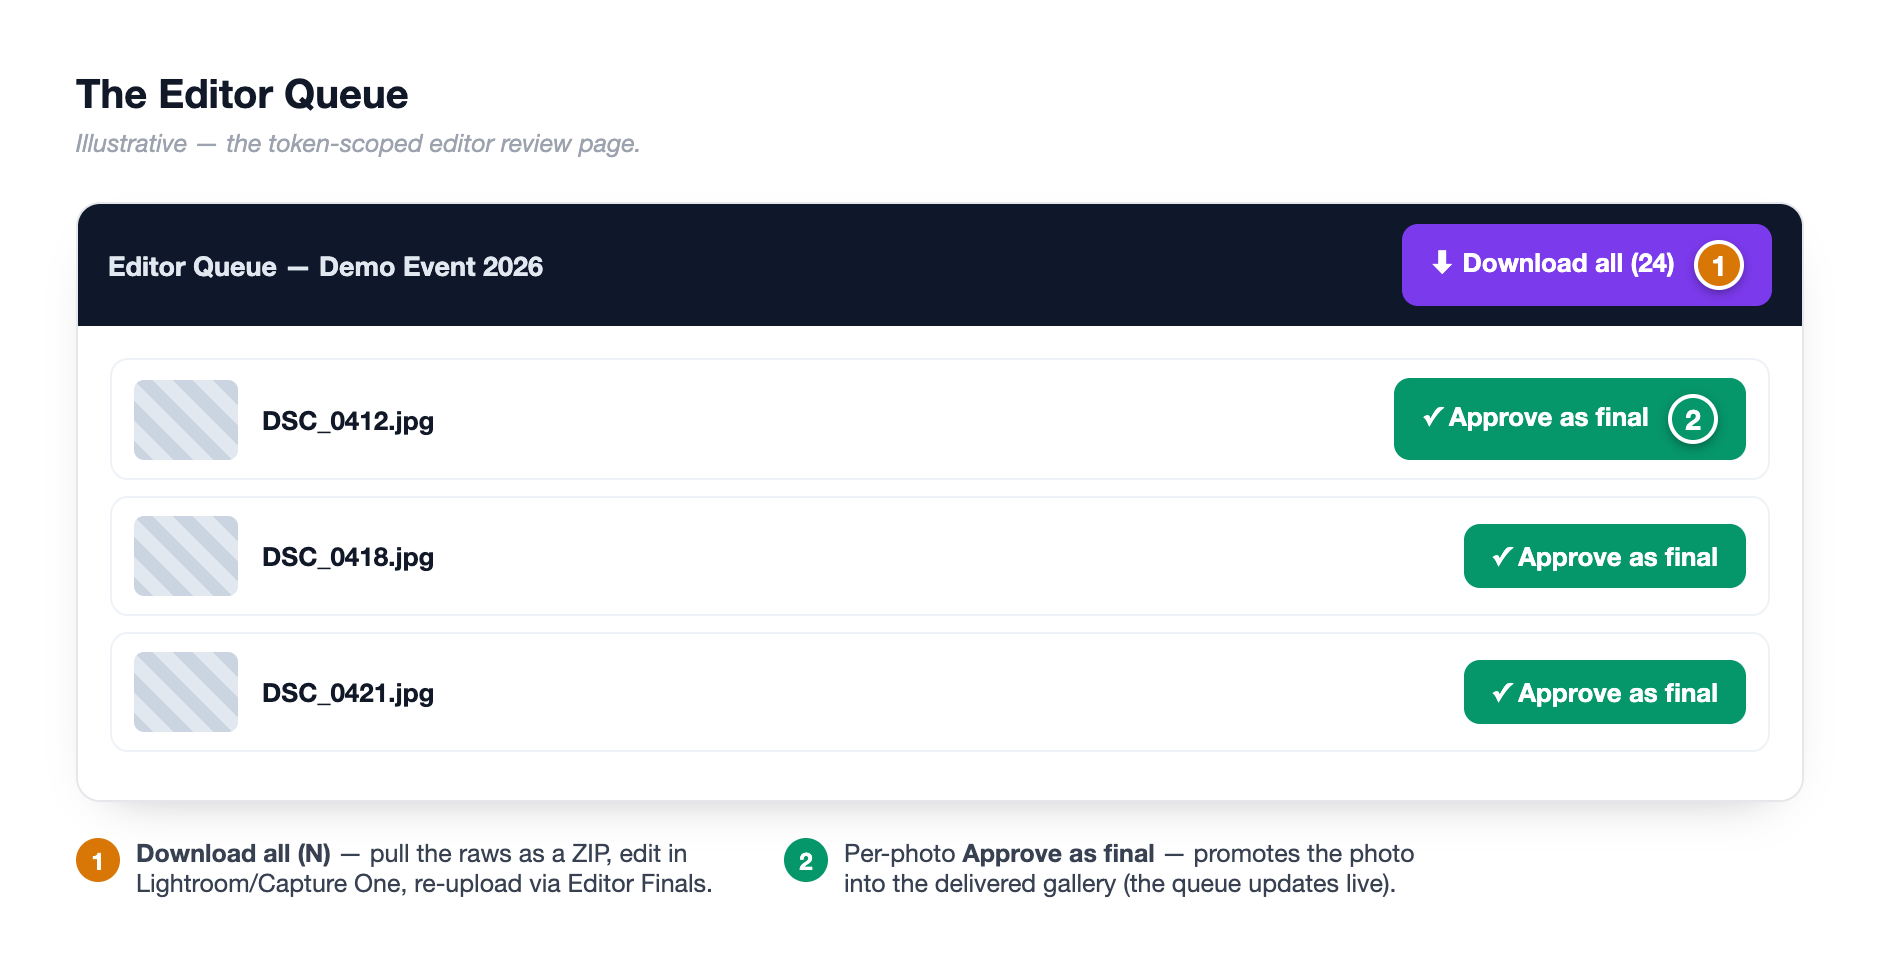 The Editor Queue page. ① the Download all (N) button (grabs every pending raw as a ZIP); ② the green Approve as final button under each shot; ③ the pending / live-in-gallery counter, top-right.
- On the album page, find the credential row for your editor and click Queue → (or the Editor queue — {label} button in the editor-gate widget). — the Editor Queue page opens in a new tab.
- Look over the thumbnails. Under any keeper, click Approve as final. — a confirm box asks "Mark '{filename}' as final? It will appear in the guest gallery." Confirm, and that one shot goes live instantly while the card disappears from the queue.
- To clear the whole queue at once, go back to the album page and, in the Editor gate widget, click Approve all {N}. — a confirm box appears; confirm and every pending raw is published as a final in one go.
Download, edit, re-upload
For a proper edit (not just a quick approve), click Download all (N) on the queue page to grab every pending raw as a ZIP. Edit them in Lightroom or Capture One, export finished JPEGs, then upload them through your Editor Finals FTP credential — the finals slot straight into the gallery and the queue updates live as they arrive. See Account, storage & billing for how to add an Editor Finals credential.
Editor Finals upload is Studio-only
Letting an editor push finished JPEGs straight in over FTP (the Finals delivery workflow) is a Studio feature Studio — you'll see a Studio pill on the toggle if your plan doesn't include it. On Free and Pro you can still use the gate exactly as above with Approve as final and Approve all — you just approve the camera's own JPEGs instead of re-edited ones.
Step 4 — Choose which version guests see
A live album can hold two kinds of photo: raws (straight off the camera) and finals (your edits). The Gallery visibility card on the Edit album page decides which the public sees. It's a separate card, just below the Live delivery box — not nested inside it.
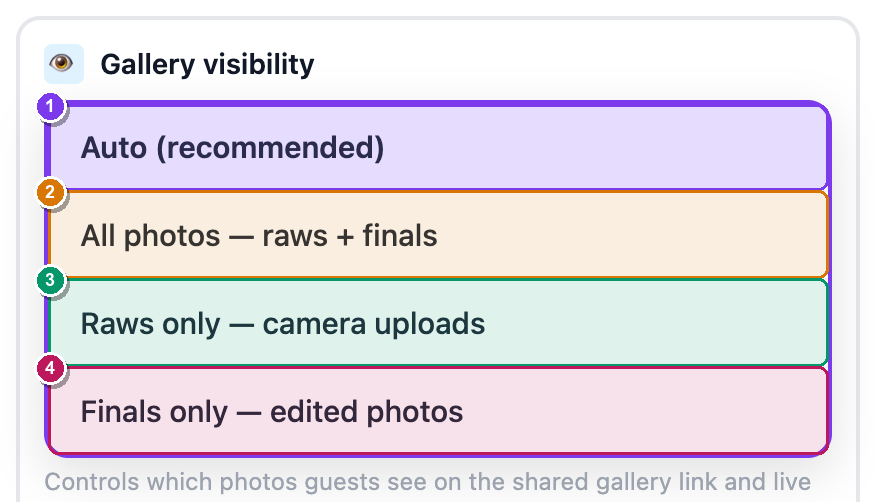 The standalone Gallery visibility card. The dropdown offers ① Auto (recommended), ② All photos — raws + finals, ③ Raws only — camera uploads, and ④ Finals only — edited photos.
Open the dropdown and pick one:
- Auto (recommended) — SnapFlow does the right thing for you. While the editor gate is on it shows finals only; once you've delivered finals it shows those; otherwise it shows everything. Leave it here unless you have a reason not to.
- All photos — raws + finals — show both versions of everything.
- Raws only — camera uploads — the unedited live feed, nothing else.
- Finals only — edited photos — only your finished set.
This setting applies everywhere the gallery is served — the page, infinite scroll, embeds, the Venue display and ZIP downloads — so unapproved raws never slip out through a side door. Remember to click Save changes after you pick.
Live photos not appearing?
Check three things, in order:
- The ✎ Editor gate isn't holding them back unapproved — open the Editor Queue and Approve as final (or Approve all {N}).
- Gallery visibility isn't set to Finals only — edited photos while you've uploaded only raws (the gallery would correctly show nothing).
- You actually pressed Go live. Without it, new photos still arrive but on a slower 30-second refresh, with no Live badge.
Agency delivery (editorial mode & file renaming)
If you deliver to a wire desk or news agency, two extra options on the Edit album page change what ends up in the delivered files (not the gallery). They live in the Agency delivery card on the left column. Studio
- On the Edit album page, find the Agency delivery card (left column, under the metadata defaults).
- Tick Editorial mode to strip AI-generated captions and keywords from delivered files and stamp them as a genuine photograph. — the help text reads "No AI-generated captions/keywords in delivered files; asserts the image is a genuine photograph (IPTC DigitalSourceType)."
- Under Rename delivered files, pick a naming template (or leave Keep original filenames). — every delivered file and per-visitor ZIP follows that pattern, e.g.
{album_slug}_{date}_{frame:04d}. - Click Save changes. — these rules now apply to ZIP downloads and finals delivery for this album.
Where the metadata round-trip is documented
Editorial mode, IPTC stamping and the full Lightroom / PhotoMechanic round-trip are covered end to end in Metadata workflows. The short version: your captions, keywords and credit are baked into every delivered JPEG automatically — your agency downloads files that are press-ready with no re-keywording.
How the pieces fit
The whole flow in one breath
Live delivery (checkbox) = arm the feature. Go live (button) = start the live feed + Live badge + instant push. Editor gate = approve raws before they go public. Gallery visibility = which version (raw vs final) guests see. Venue display = the big-screen slideshow. Agency delivery = how the downloaded files are named and stamped.
Turn on all of it for the classic "fast but curated" event: tick Live delivery + Editor gate, press Go live, project the Venue display, approve keepers from the Editor Queue as you shoot, and let finals replace the raws as you edit.