Proofing & client delivery
Client selects, watermarked preview, ZIP/CSV export, finals, sneak peek.
Proofing is how a client picks their favourites before you spend hours editing. Turn it on and your public gallery becomes interactive: guests tap a heart on the shots they want, you get the selection back as a clean list (and a ready-to-edit ZIP), and you deliver the finished, edited set separately. Web
This chapter covers the whole client loop: turning proofing on, what the client sees, getting their picks back, the agency-delivery options, finals delivery, and the "sneak peek" teaser.
Turn on proofing
"Proofing" lives in the Workflows card on the album's Edit album page. Here's how to switch it on, step by step.
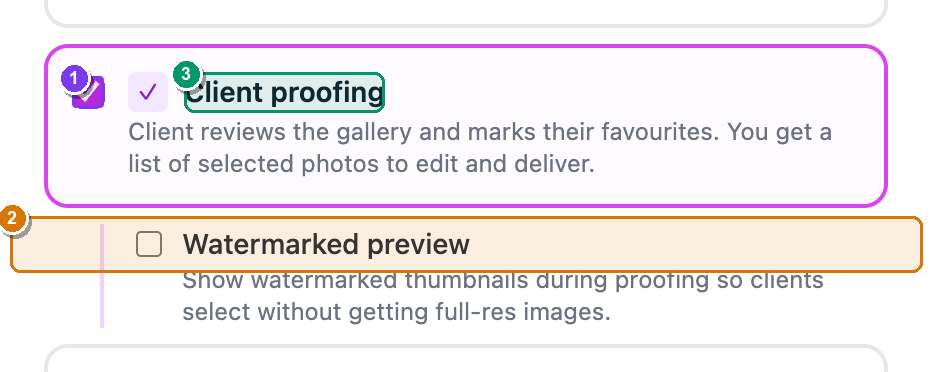 The Workflows card (right column of the Edit album page). ① the Client proofing checkbox — it has a small purple ✓ badge; ② the indented Watermarked preview sub-option that appears once proofing is ticked; ③ the Pro pill that shows on Client proofing when your plan can't use it yet.
- From your dashboard, open the album, then click More ▾ (top-right) → Edit album…. — the Edit album page opens in two columns.
- In the right-hand Workflows card, tick Client proofing. — a purple ✓ appears next to the label, the box border turns brand-blue, and an indented Watermarked preview option slides in below it.
- (Optional, Pro) Tick Watermarked preview. Pro — your clients will now select from watermarked thumbnails and never receive full-res files until you deliver them.
- Scroll down and click Save changes (bottom-left). — proofing is now live on the public gallery.
If Client proofing is greyed out
Client proofing is a Pro feature. On the Free plan the box is dimmed and shows a Pro pill — click it to upgrade. Once you're on Pro or Studio the checkbox is tickable.
When the watermark shows
Watermarked preview only stamps thumbnails while proofing is active. If you haven't typed any Watermark text (in the Privacy & Processing card), it stamps the word Preview. The moment you deliver finals, clients get the clean files. To watermark the download of finished photos instead, use Watermark thumbnails — see Album settings.
What the client sees
With proofing on, your public gallery link turns into a selection screen. No app, no login — the client just opens the link.
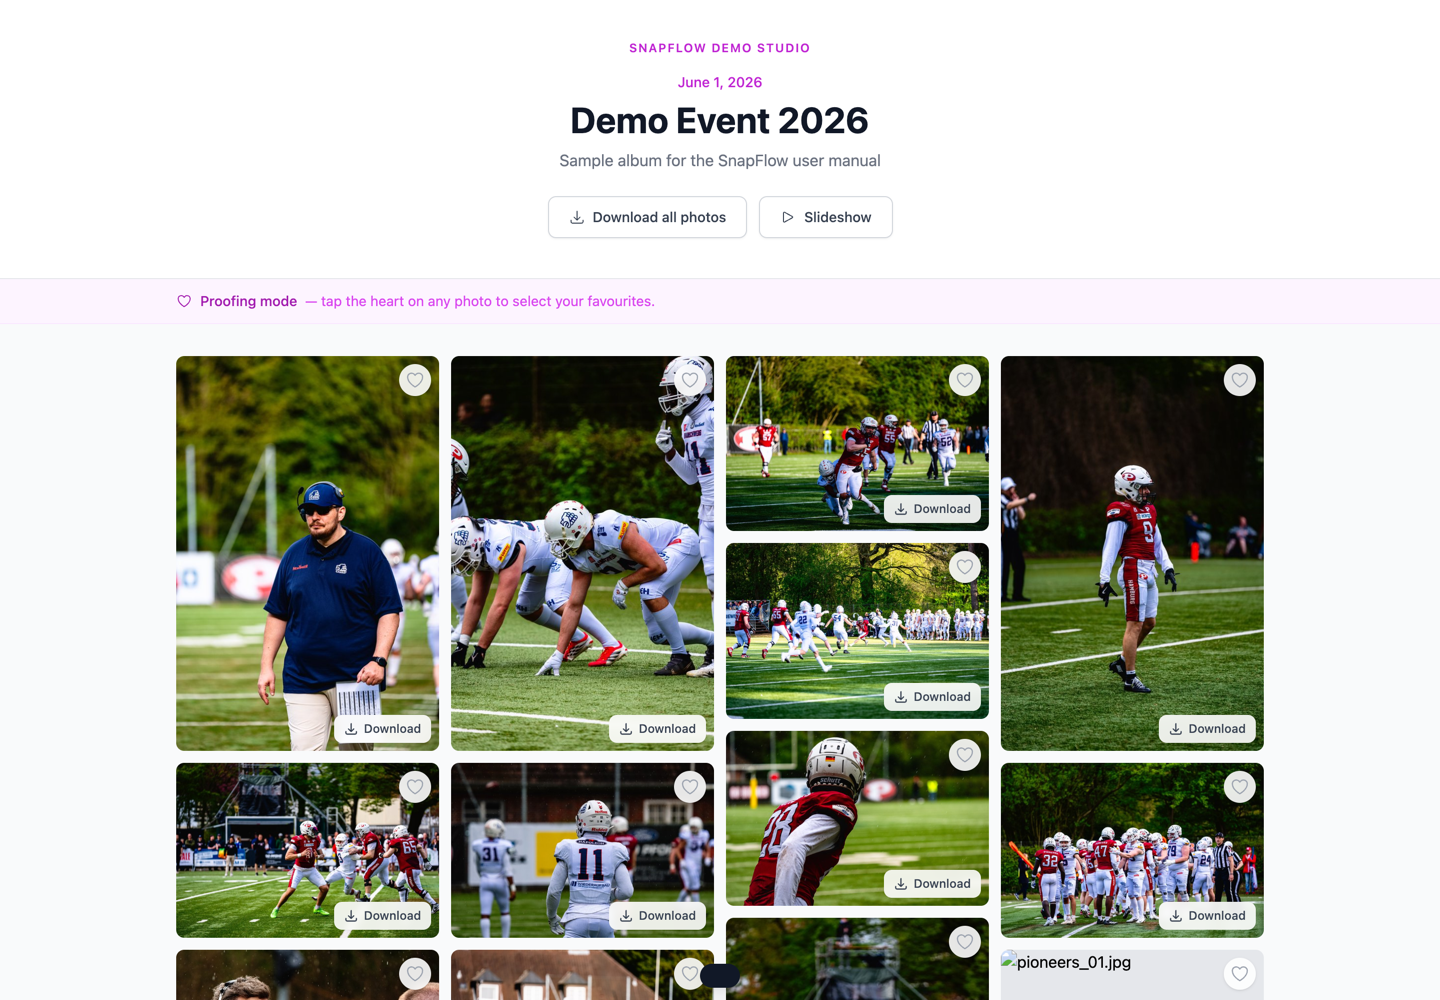 The gallery in proofing mode (phone width). ① the banner across the top reads "Proofing mode — tap the heart on any photo to select your favourites."; ② a heart sits on every photo — tapping fills it red; ③ the floating dark bar at the bottom counts "3 photos selected" and holds the Submit selection button.
Here's the client's journey:
- They open the gallery link you shared. — a banner appears: "Proofing mode — tap the heart on any photo to select your favourites." (the same wording on all gallery themes).
- They tap the heart on any photo they like. — the heart fills red and a floating dark bar at the bottom counts "N photos selected." Their picks save automatically as they go.
- When they're happy they tap Submit selection in the floating bar. — a small Submit your selection box opens.
- They add Your name (optional) and Your email (so they can receive their download link), then tap Submit. — their picks are sent to you, and the box closes.
You get a heads-up
The first time a client starts hearting photos, SnapFlow sends you a push notification — "Client picking favourites — Selections coming in for {album}. Tap to review." — so you don't have to keep refreshing. (Manage notifications in Account, storage & billing.)
Getting the selection back
All the picks land on one page in your dashboard. Open it from the album.
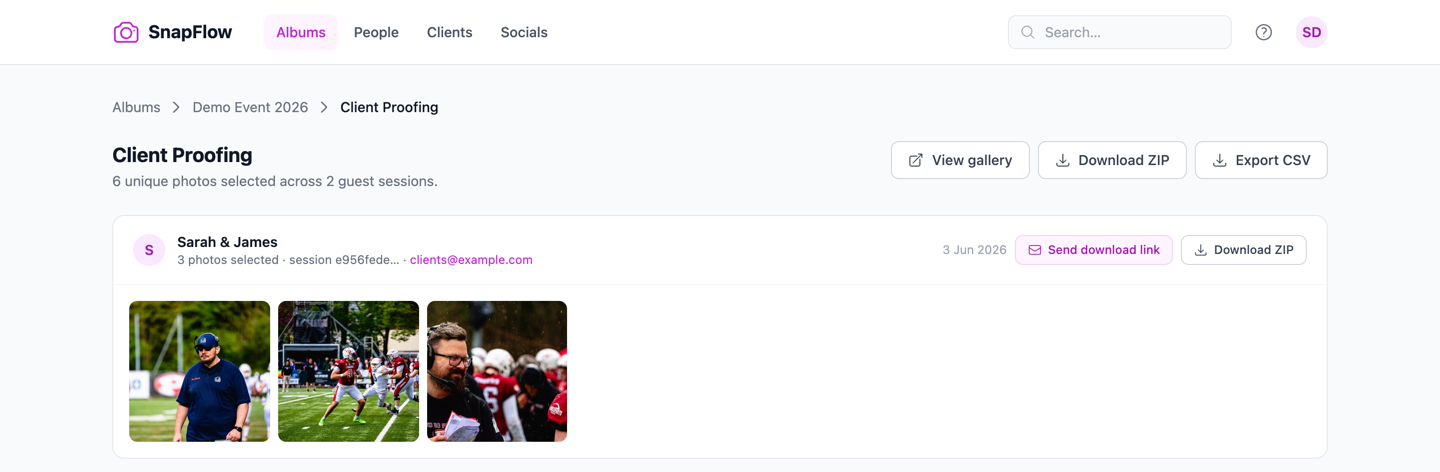 The Client Proofing page. ① the page title Client Proofing and a one-line count of unique photos across guest sessions; ② the top action row — View gallery, Download ZIP, Export CSV (these cover every selection); ③ one card per guest, each with that guest's name/email, their thumbnails, a Send download link button, and their own Download ZIP.
- On the album in your dashboard, click View proofing. — the Client Proofing page opens, with one card per guest who selected photos.
- To pull everything in at once, click Download ZIP (top of the page). — you get one archive named
<album-slug>-selections.zipcontaining the original files, ready to drop straight into Lightroom or Capture One. - To get the picks as a spreadsheet, click Export CSV. — a CSV of filenames plus who chose them downloads — handy for tracking or invoicing.
- To send one guest their own download link, find their card and click Send download link. — SnapFlow emails that guest a link to their selection (valid 7 days). The button only appears if they left an email.
- To grab just one guest's picks yourself, use the Download ZIP button on their card. — you get a ZIP named after them, e.g.
Sarah James-selections.zip.
Your metadata is baked into the ZIP
Every JPEG in a proofing ZIP is stamped with its XMP/IPTC before it's zipped — caption, keywords, credit, copyright, location and any recognised names ride inside the file. Pull the ZIP into Lightroom or Capture One and your keywords are already there — no re-keywording. See Photo metadata for what gets written.
Visitors are tracked per browser
A guest is keyed to their browser session, so the same person on two devices shows as two cards, and a couple sharing one phone shows as one. Tell them apart by the name and email they enter on submit. If nobody has selected yet, the page shows No selections yet with your gallery link to share.
Delivery options (Agency delivery)
If you hand finished files to a picture desk, wire service, or agency, two extra controls shape what's inside every delivered (and ZIP'd) file. They live in the Agency delivery card in the left column of the Edit album page.
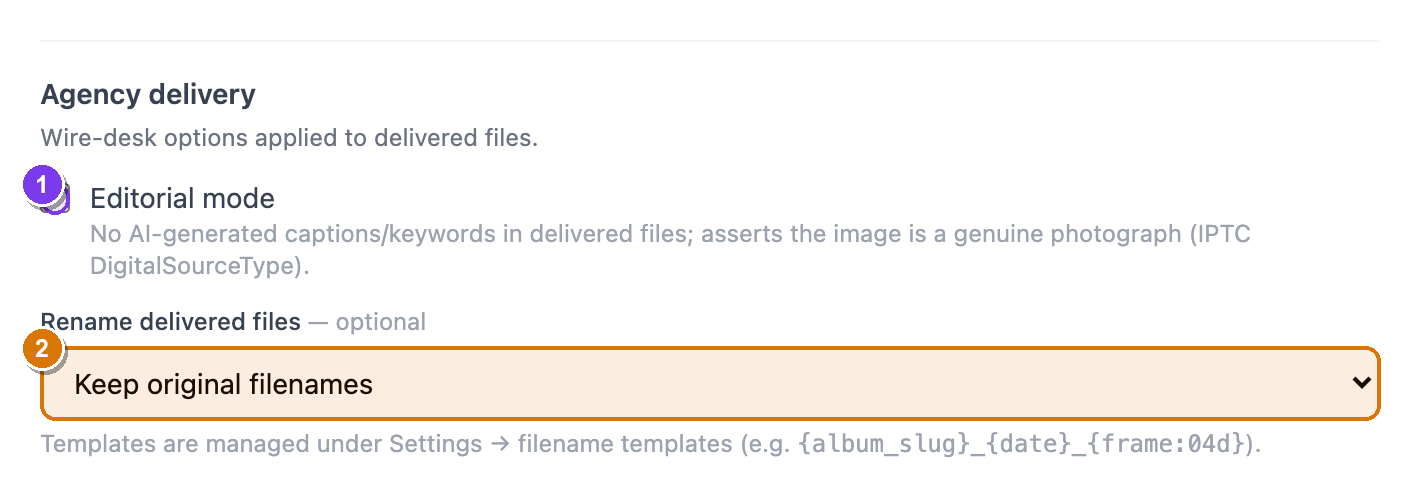 The Agency delivery card. ① the Editorial mode checkbox with its helper line; ② the Rename delivered files dropdown, set to Keep original filenames by default.
- Open More ▾ → Edit album…, then find the Agency delivery card (left column).
- To keep delivered files free of AI text, tick Editorial mode. — delivered files carry no AI-generated captions or keywords, and SnapFlow stamps an IPTC tag asserting the image is a genuine photograph (DigitalSourceType). Your own typed metadata still goes out.
- To rename files on the way out, pick a template from Rename delivered files. — leave it on Keep original filenames to ship the camera filenames, or choose a saved template (e.g.
{album_slug}_{date}_{frame:04d}). The names inside every proofing ZIP follow this too. - Click Save changes. — these rules now apply to every download and ZIP from this album.
Where templates come from
Filename templates are created once under Settings → filename templates,
then they show up in the Rename delivered files dropdown for any album.
Build one with tokens like {album_slug}, {date} and {frame:04d}.
Finals delivery
Proofing gives you the picks; finals delivery is how you hand back the finished edits. It's a separate switch in the Workflows card and works with or without proofing.
- Open More ▾ → Edit album… → Workflows card.
- Tick Finals delivery. Studio — a green 📦 badge sits beside it; if your plan can't use it yet you'll see a Studio pill instead.
- Click Save changes. — you can now upload your edited JPEGs back to SnapFlow.
Finals are stored separately from the camera raws and can replace them in the gallery, so clients see your polished set rather than the unedited feed. You can push edits up from Lightroom or Capture One via a dedicated Editor Finals FTP credential — find it under More ▾ → FTP credentials (and see Account, storage & billing for the full credential list).
Raws vs finals — who sees what, when
Exactly what the gallery shows (camera raws, edited finals, or both) is set by the Gallery visibility card, and the live editor approval flow is its own thing. Both are covered in Live delivery & editor gate.
Sneak peek
Want to tease a few hero shots while the full gallery stays under wraps? Sneak peek shows guests only the photos you flag, with a teaser banner, until you open the rest.
- Open More ▾ → Edit album…, find Sneak peek in the left column, tick it, and Save changes. Pro — back on the album, a "Sneak peek mode on" banner appears above your photos.
- Hover any photo in the album grid and click its ☆ button (top of the card). — the star fills (★) and that photo joins the sneak-peek set. Click again to remove it.
- Open your gallery link to check. — guests now see only the starred photos, under a banner reading "Sneak peek — a curated preview. The full gallery arrives soon."
- When you're ready to reveal everything, turn Sneak peek back off in Edit album…. — the whole gallery opens to guests.
The ★ here is not a star rating
The sneak-peek ★ only marks a photo for the teaser gallery. It has nothing to do with the 1–5 star ratings you give while culling — those live in Culling & ratings.
A typical client job
Shoot → cull → turn on Client proofing (+ Watermarked preview) → send the gallery link → client hearts their picks and taps Submit selection → open View proofing → Download ZIP of the selects → edit → turn on Finals delivery and upload the finished set → Send download link to the client. Sneak peek keeps them excited in between.