The sync model
Local-first pull/push, the push filter, and 'Pull N missing'.
Desktop app
SnapFlow Sync is local-first: the files on your Mac are the source of truth. Each album you work on lives in a folder on disk, and the app keeps that folder and the album on the server in step. The grid shows your local photos and the album's server photos side by side, so you always know what is where.
This chapter explains how a sync is set up and run. It does not cover importing from an SD card (SD-card import), culling (Culling & rating) or developing (Editing & styles) — those have their own chapters.
Where your photos live on disk
When you sync an album, the app makes a folder for it under a single home folder on your Mac:
~/SnapFlow Sync/
└── <album name>/
    ├── raws/        ← original camera files (CR2, NEF, ARW, DNG, JPEG…)
    ├── finals/      ← edited JPEGs you want to deliver
    └── proofed/     ← the photos a client picked (when proofing is on)
raws/is where SD-card imports and camera files land. This is what "Push raws" uploads.finals/is where you drop edited JPEGs. This is what "Push finals" uploads. It only appears once the album has finals delivery turned on.proofed/is filled by "Pull proofed" — the photos your client selected.
Open the folder fast
On an album page, click ⋯ (the album-actions button, top-right) and pick Show in Finder to jump straight to that album's folder on disk.
Receive and Send — what to sync
Every album has four sync switches, split into two directions. They live in the album's settings, on the Sync tab.
To open them:
- Click Library in the bottom bar (or press ⌘1). — the left rail lists your albums.
- Click the album you want. — the album page opens with a Sync summary strip near the top.
- Click the gear icon on the right end of that strip (or click ⋯ → Album settings…). — the Album settings sheet opens.
- Click the Sync tab (the sheet has General · Style · Recognition · Sync). — you'll see two cards, Receive and Send.
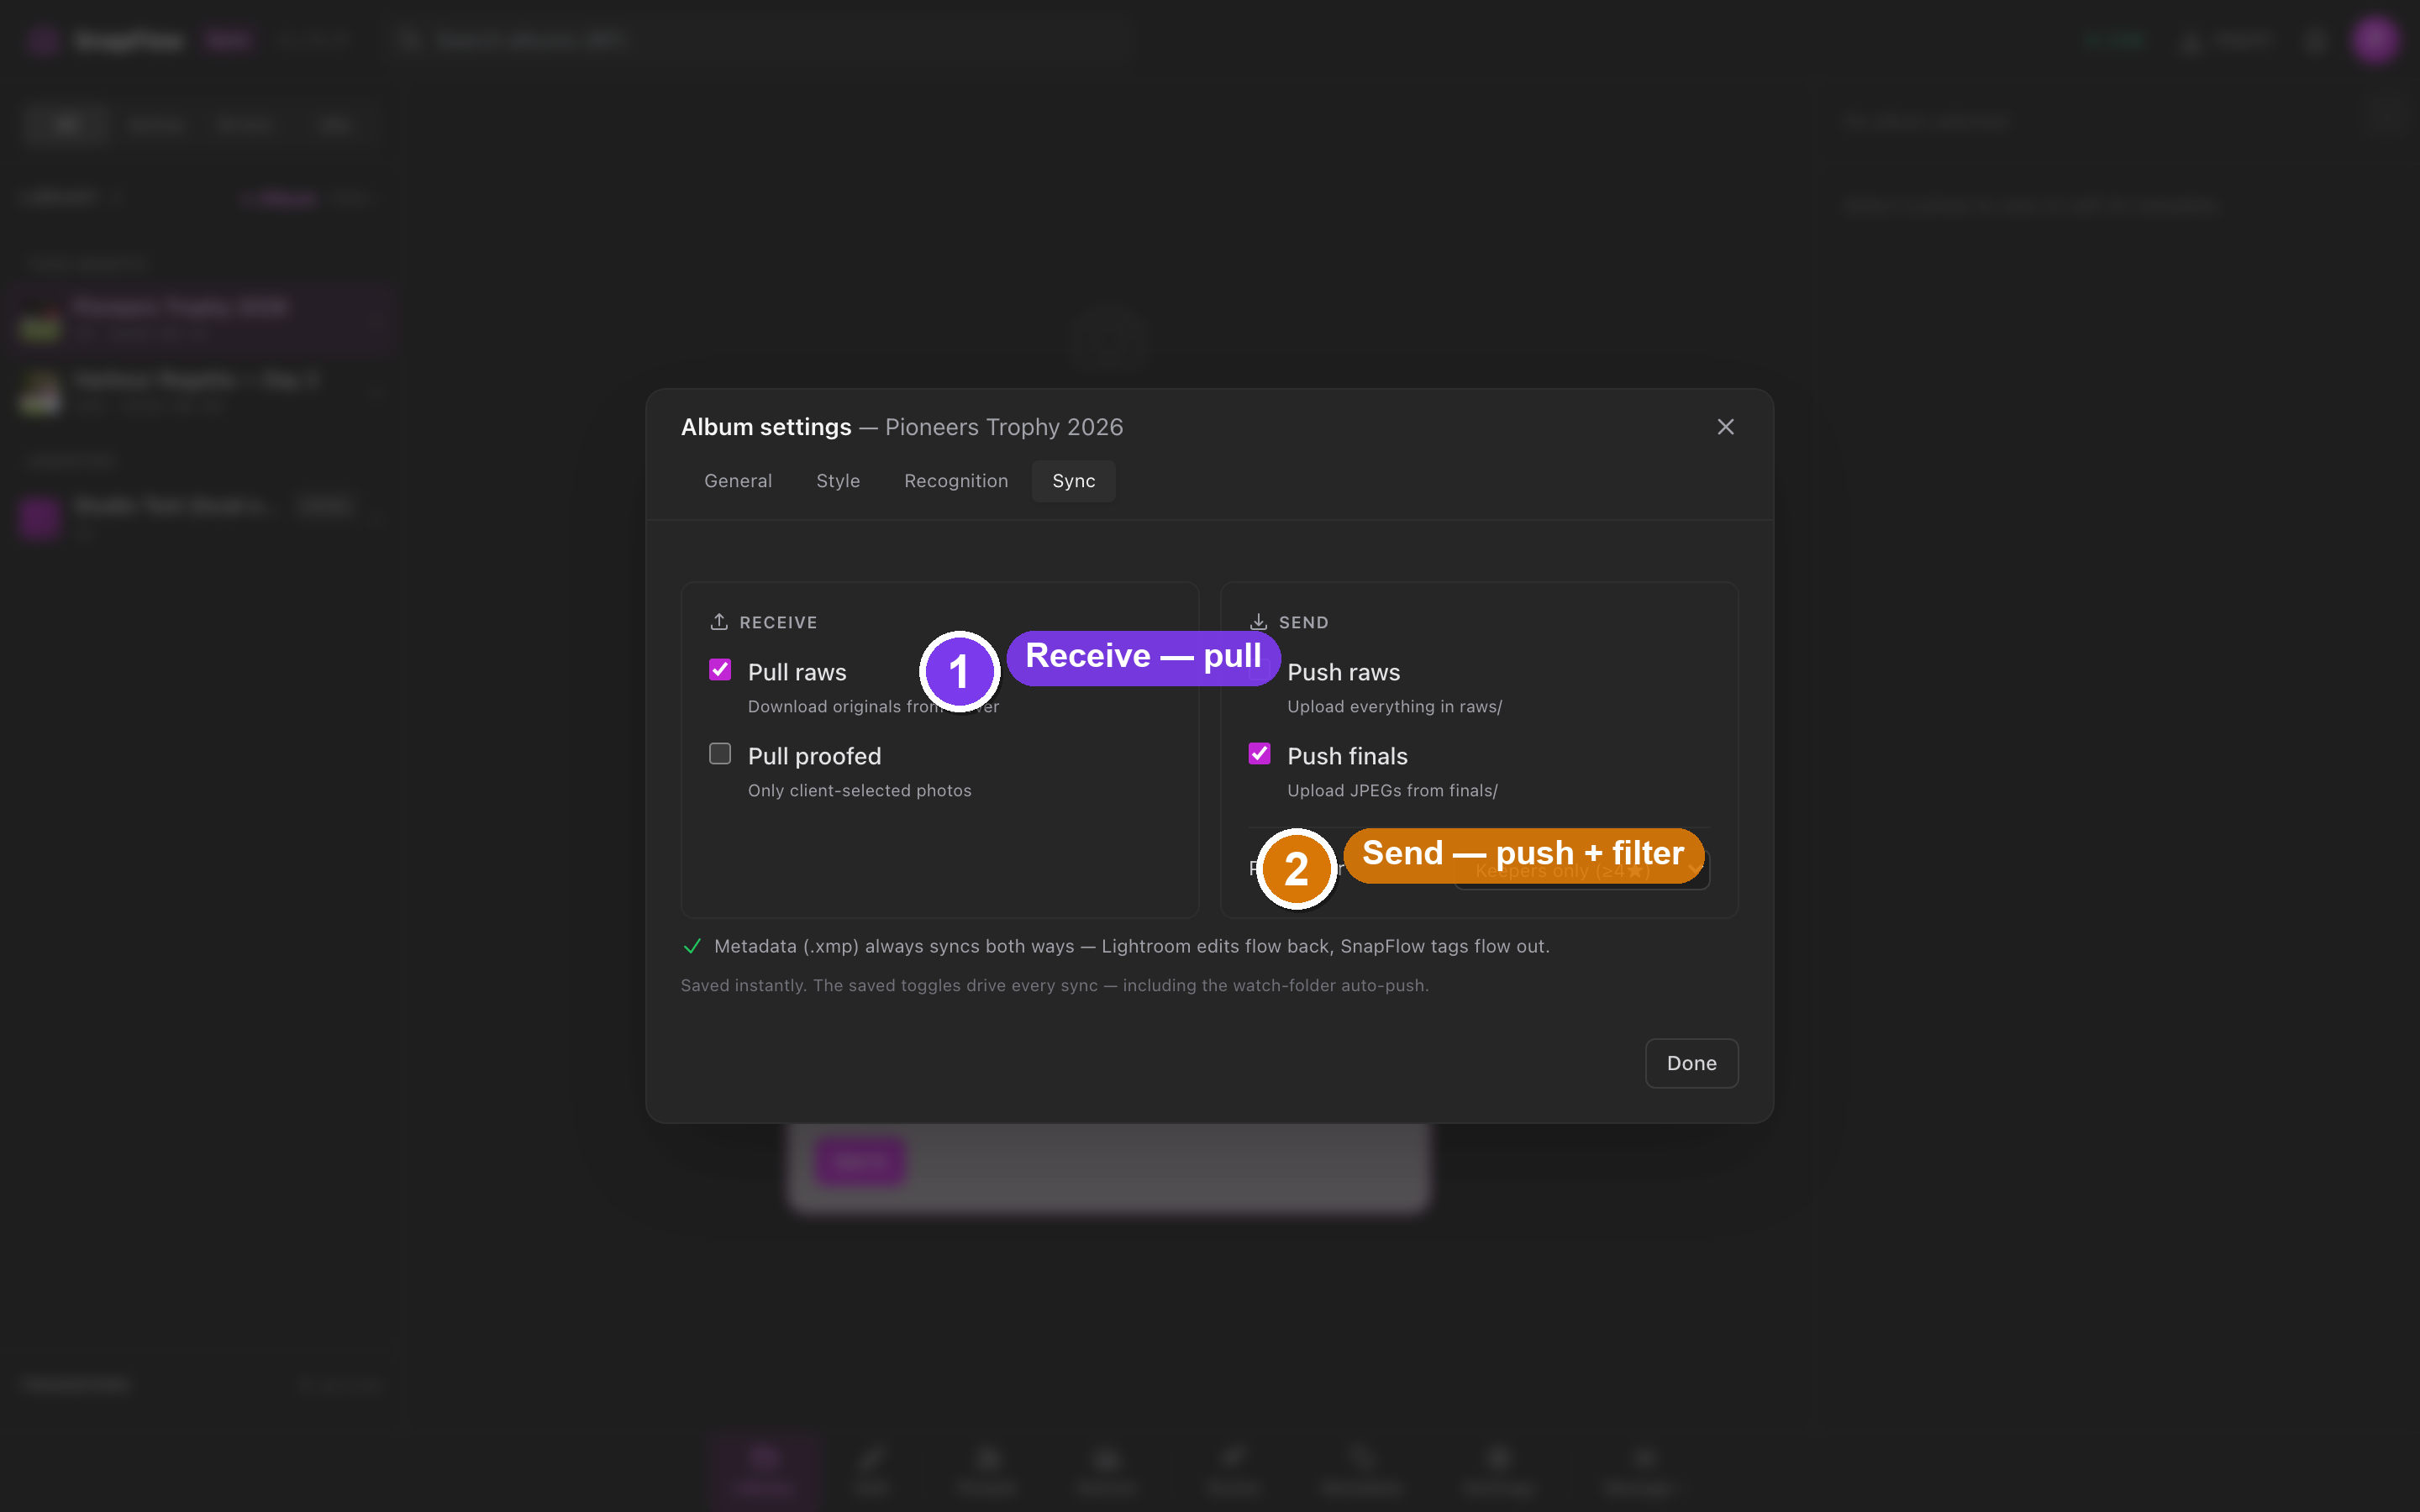 The Sync tab of Album settings. ① the Receive card (Pull raws, Pull proofed). ② the Send card (Push raws, Push finals). ③ the Push filter dropdown under Send. ④ the green line reminding you that metadata always syncs both ways.
Receive (pull down from the server)
- Pull raws — download the original files from the server into the album's
raws/folder. - Pull proofed — download only the photos your client selected, into
proofed/. This switch only lights up when proofing is in use on the album.
Send (push up to the server)
- Push raws — upload everything in
raws/. - Push finals — upload the edited JPEGs you've dropped into
finals/. This switch only lights up once the album has afinals/flow.
Metadata isn't a switch
There is no Pull XMP toggle. Metadata sidecar files (.xmp) always sync
both ways on their own — the green line on the Sync tab says it plainly:
"Metadata (.xmp) always syncs both ways — Lightroom edits flow back,
SnapFlow tags flow out." So a rating or keyword you set in Lightroom rides
back to SnapFlow, and a caption you typed in SnapFlow rides out to the file.
See Metadata tools for the full round-trip.
Every change you make here is saved instantly — there is no separate save button on this tab.
The push filter
Under the Send card sits the Push filter dropdown. It decides which
photos a push actually includes, by reading each file's star rating from its
local .xmp sidecar. It has four options:
| Filter | Uploads |
|---|---|
| All photos | everything in the folder |
| Keepers only (≥4★) | only photos you rated 4 or 5 stars |
| Pick-flagged only (⚑) | only photos you flagged with the ⚑ pick flag (the P key in the loupe) |
| Non-rejected (skip ✗) | everything except photos you rejected |
So a typical flow is: pull raws → cull → set the filter to Keepers only (≥4★) → Push raws to send just your selects. Culling and the difference between stars and the ⚑ flag are covered in Culling & rating.
The filter drives automatic pushes too
The Sync tab reminds you: "The saved toggles drive every sync — including the watch-folder auto-push." That means if you leave the app watching the folder, any new file the camera drops in is pushed using the same saved filter. Set it to Keepers only and a fresh, unrated frame will not auto-upload until you rate it 4★ or higher.
"Sync now" and the summary strip
Once your switches are set, you run a sync from the album page.
- Go to the album (Library / ⌘1 → click the album).
- Click Sync now (a blue button near the top of the page). — the status chip switches to syncing and a Stop button appears next to it.
A sync pulls whatever your Receive switches ask for, then pushes whatever your
Send switches plus the filter allow. Raws go up as the raw phase; finals go up
as the final phase.
 The album page. ① the Sync now button. ② the one-line Sync summary strip showing what's configured. ③ the gear on the strip that opens Album settings → Sync. ④ the live count (
▲ 12 to push · ▼ 40 to pull).
The Sync summary strip near the top of the album page is your at-a-glance status. It reads like this:
Sync ▲ push: raws · ▼ pull: raws · filter: Keepers ≥4★
- ▲ push: lists what your Send switches will upload (
raws,finals, oroff). - ▼ pull: lists what your Receive switches will download (
raws,proofed, oroff). - filter: shows the current push filter (
all,Keepers ≥4★,Pick-flagged ⚑, orskip ✗).
Once the grid finishes loading and the app knows the counts, live totals appear in front of that line:
▲ 12 to push · ▼ 40 to pull
The grid summary line
Under the Photos heading on the grid, a second line tells you how the album sits on this Mac. It is toggle-aware — it only nags about work your switches actually enable:
365 local— how many photos you have on this Mac.12 finals to push— only shown when Push finals is on and there are local-only files.61 raws to pull— only shown when Pull raws is on and the server has files you don't.all synced— shown when at least one switch is on and nothing is pending.
With every switch off, you just see the count — no nagging.
Pull N missing
At the bottom of the grid, an amber Pull N missing button fetches
everything you're missing in one click. Its count is sized to your enabled
pull switches, so it never promises a pull the engine would skip. Next to
it, 120 shown · 365 on this Mac tells you how much of the album is on disk.
Filtering the grid
Above the grid, an inline row of rating chips narrows what you see by cull state: All / Keepers / 5★ / Rej / Unr.
- All — every photo.
- Keepers — rated 4★ or 5★ (distinct from the ⚑ pick flag).
- 5★ — five stars only.
- Rej — rejected (✗).
- Unr — not rated yet.
The rest of the filters live behind a Filter ▾ button (top-right of the grid). Click it to open a popover with:
- Source — All / Synced / Server only / Local only.
- Stage — All / Raws / Finals / Proofed.
- Sharpness — All / Sharp / Blurry (from an automatic blur score).
- (plus Faces, Recognition and Label rows when those pipelines have run)
- ⚑ Picked only — show only ⚑-flagged photos.
- Hide rejected — drop ✗ photos from the grid.
- Clear all filters — reset everything in one click.
Bursts collapse automatically behind a +N cover so a 12-frame sequence takes
one tile, not twelve. Use the Bursts: button to expand or collapse them all.
It refreshes itself
The app watches the album folder and the server live, so new camera files
and teammates' changes appear without a manual refresh. A +N badge marks
files that just showed up. The background refresh loop is only a safety net.
Metadata round-trips with Lightroom
Because metadata always travels with your photos, editing in Lightroom is
seamless. Save your Lightroom edits to the .xmp sidecar (in Lightroom:
Metadata → Save Metadata to Files / ⌘S), and on the next sync SnapFlow
reads the rating, colour label, caption and keywords back into the album.
Anything you typed in SnapFlow flows the other way into the file. The full
behaviour — which fields travel, the five colour labels, and how raws and finals
stay linked — is in Metadata tools.