Clients
A lightweight CRM linking contacts to projects and deliveries.
Your organisation shoots for the same customers again and again. The Clients page is a lightweight address book (a small CRM): each client is one contact card that ties a customer to the projects and events you've delivered for them. Open a client and their whole history is on one screen. Web
This is the org/agency version of the page. It lives at /admin/clients and is shared across everyone in your organisation. (Solo photographers have their own copy at /dashboard/clients — same idea, different address.)
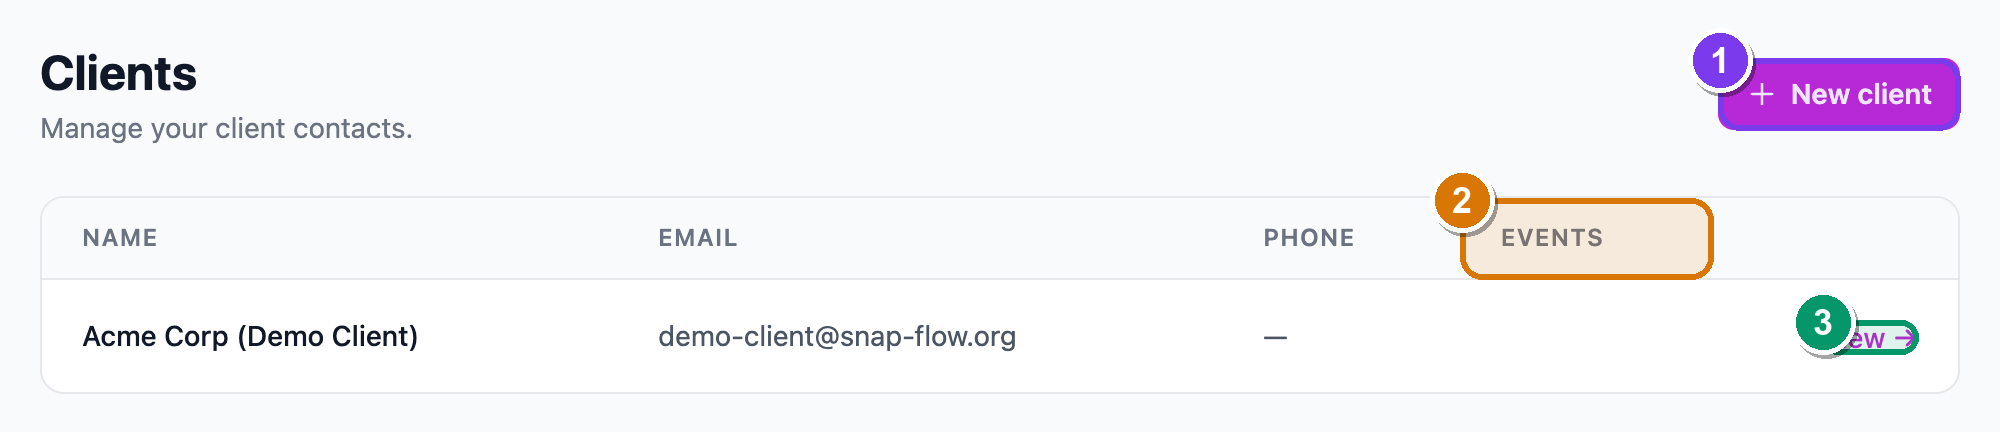 The Clients list. ① the New client button (top-right), ② the Events column showing how many events each client is linked to, ③ the View → link that opens a client's full history.
Who can add clients
Creating and editing clients needs an org role that can manage the team (Owner or Manager). Photographers and Viewers can see clients but not add them. See Team & roles for what each role can do.
Add a client
A client record is just four fields, and only the name is required. Here's the whole thing, step by step.
- In the top nav, click Clients. — the Clients list opens (or an empty "No clients yet." card if this is your first one).
- Click New client (top-right). — the New client form opens. On an empty list you can also click Add your first client; it goes to the same form.
- In Name (the only required field, marked with a red
*), type the customer's name, e.g. Acme Corp. — the field accepts the name; leaving it blank and saving shows the error "Client name is required." - Optionally fill Email (e.g. contact@acme.com), Phone, and Notes (placeholder "Any relevant details about this client…" — a free-text box for anything you want to remember about them). — each field is optional; skip any you don't have.
- Click Create client (bottom-right). — the record is saved and you land straight on that client's detail page, ready to link to work. Click Cancel instead to back out without saving.
Notes is just for you
The Notes box is internal. The client never sees it. Use it for booking quirks, the contact's job title, parking instructions — whatever helps the next person on your team pick up the job.
Open a client
Click View → on any row in the Clients list to open that client's detail page. This is the one-screen history: how much you've shot for them, every project and event, and their contact details.
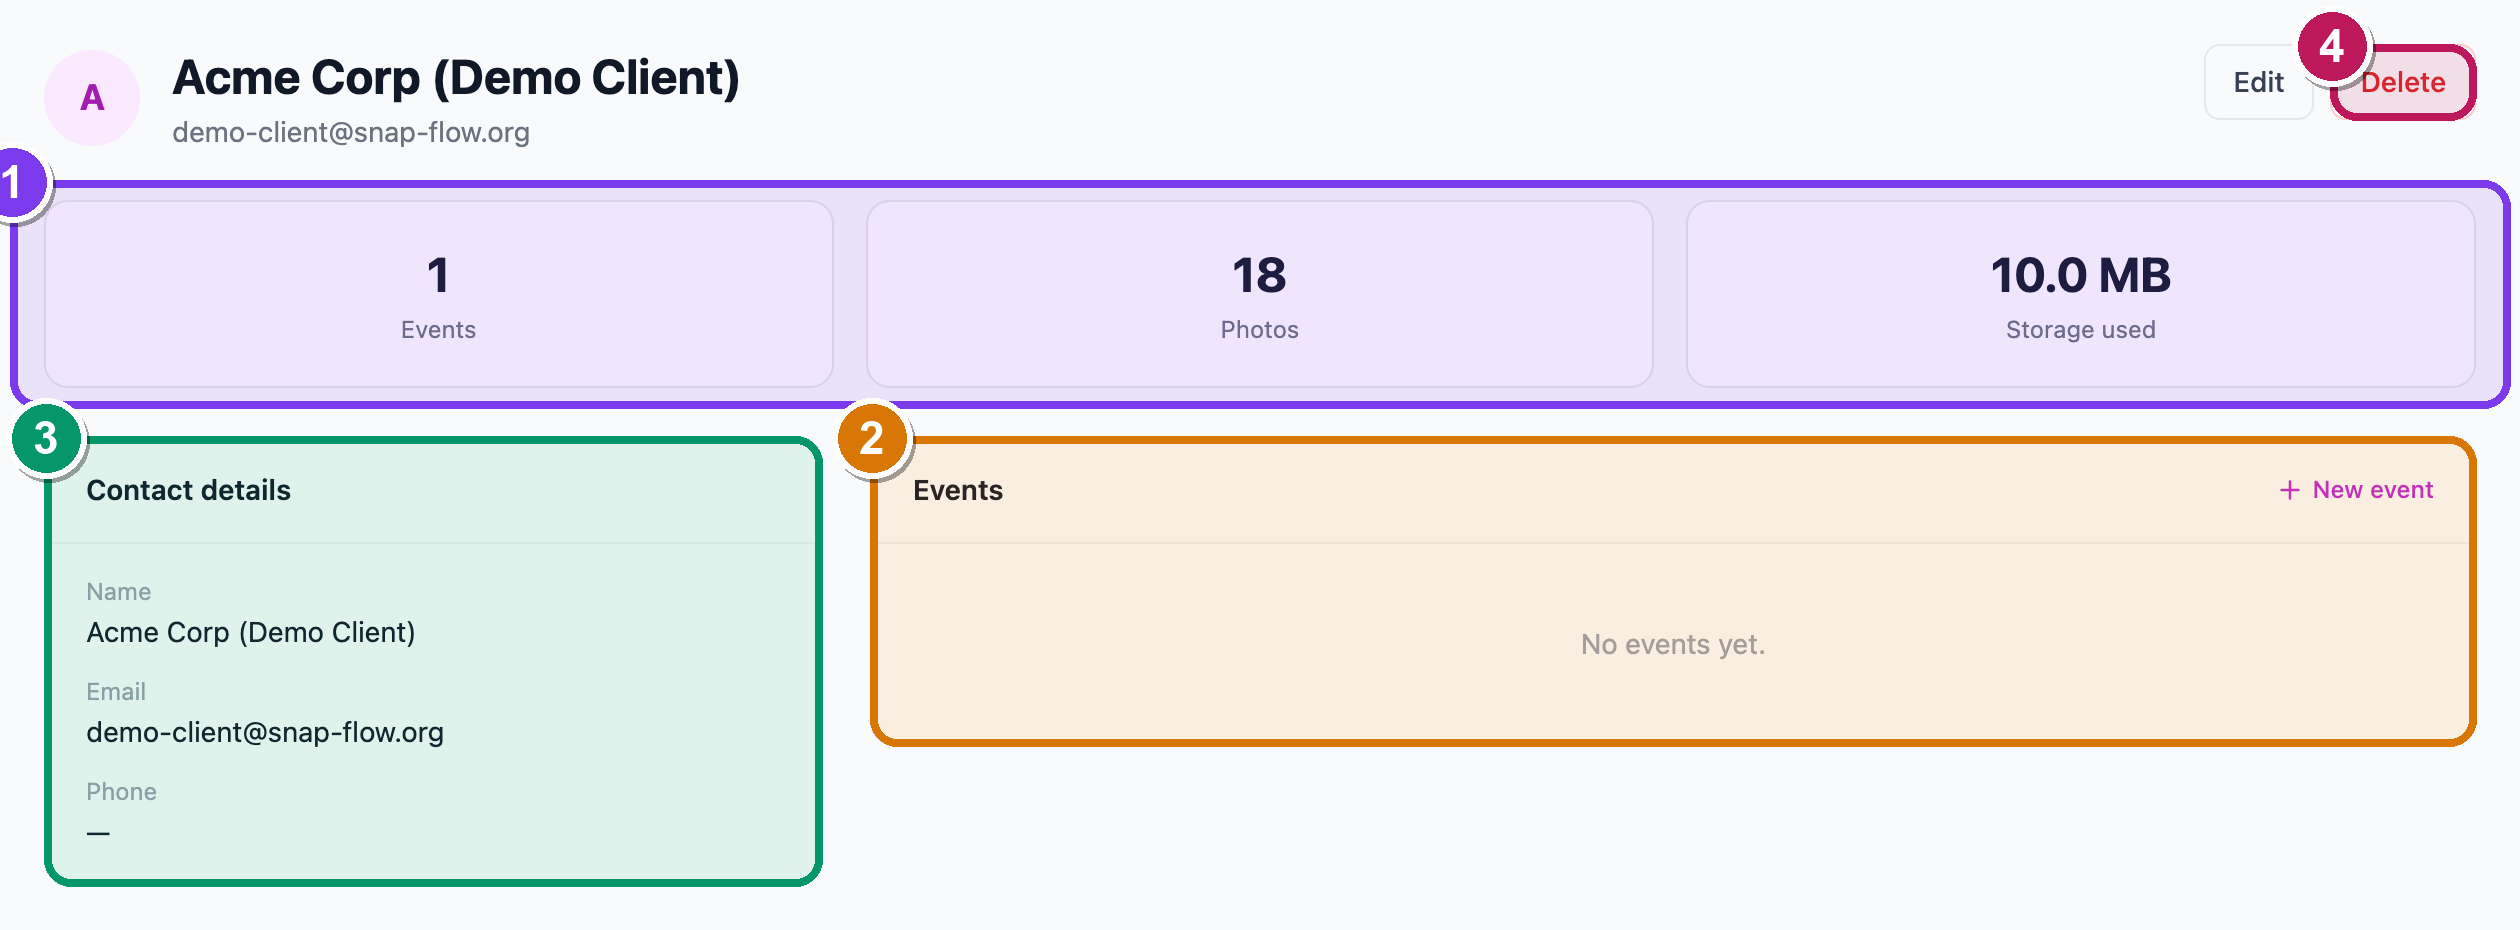 A client detail page. ① the three stat tiles — Events, Photos, Storage used; ② the Projects and Events lists with View → links; ③ the Contact details card (Name, Email, Phone, Notes); ④ the Edit and Delete buttons (top-right).
What you'll find on this page:
- Three stat tiles across the top — Events (how many events are linked to this client, in any phase), Photos (total photos across those events), and Storage used (the disk those photos take up).
- Contact details — the Name, Email, Phone and Notes you entered. Notes only appears here if you wrote something.
- Projects — every project tied to this client, each a link to that project (see Projects & event phases). This card is hidden if the client has no projects yet.
- Events — a table of every event for this client, with its Date, Phase and Photos count, plus a View → link to open the event. There's a New event shortcut in the corner that pre-fills this client for you.
To change the contact, click Edit (top-right), update any field, and save. To remove the client, click Delete (top-right, red) and confirm the pop-up "Delete <name>? This cannot be undone."
Delete only removes the contact card
Deleting a client deletes the address-book entry, not their photos or events. The events still exist; they just lose the link back to this client.
Link a client to work
You don't link a client from this page — you pick the client when you create the work, and it shows up here automatically.
- Create a project (see Projects & event phases) and choose the client from the Client dropdown. — every event you add under that project inherits the client link.
- Or create a single event and pick the client there. — the event appears in this client's Events table the moment it's saved.
Once linked, the client's Events stat tile and table update on their own. A returning customer's entire run of shoots is one click away from the Clients list.
Linking ≠ the delivery email
Linking a client is about history and reporting. The address the delivery email actually goes to is the client email you set on each event (covered in Internal review, proofing & delivery). They're usually the same person — but they're stored separately, so double-check the event's client email before you hit send.
Why bother linking
A linked client turns a pile of loose albums into an account history. When the same customer books you again next season, you open their card and instantly see what you shot, how many frames, and which projects — handy for quoting, for spotting repeat business, and for making sure the right contact gets the gallery.