Account, storage & billing
Profile, FTP credentials, storage, plans, data export and deletion.
Everything about your account — your name and password, your camera login, how much storage you've used, your plan, your privacy choices, and a copy of your data — lives in one place: the Settings area. Web
This chapter walks you through it tab by tab. Every step names the exact button you click and tells you what you'll see, so you never have to guess.
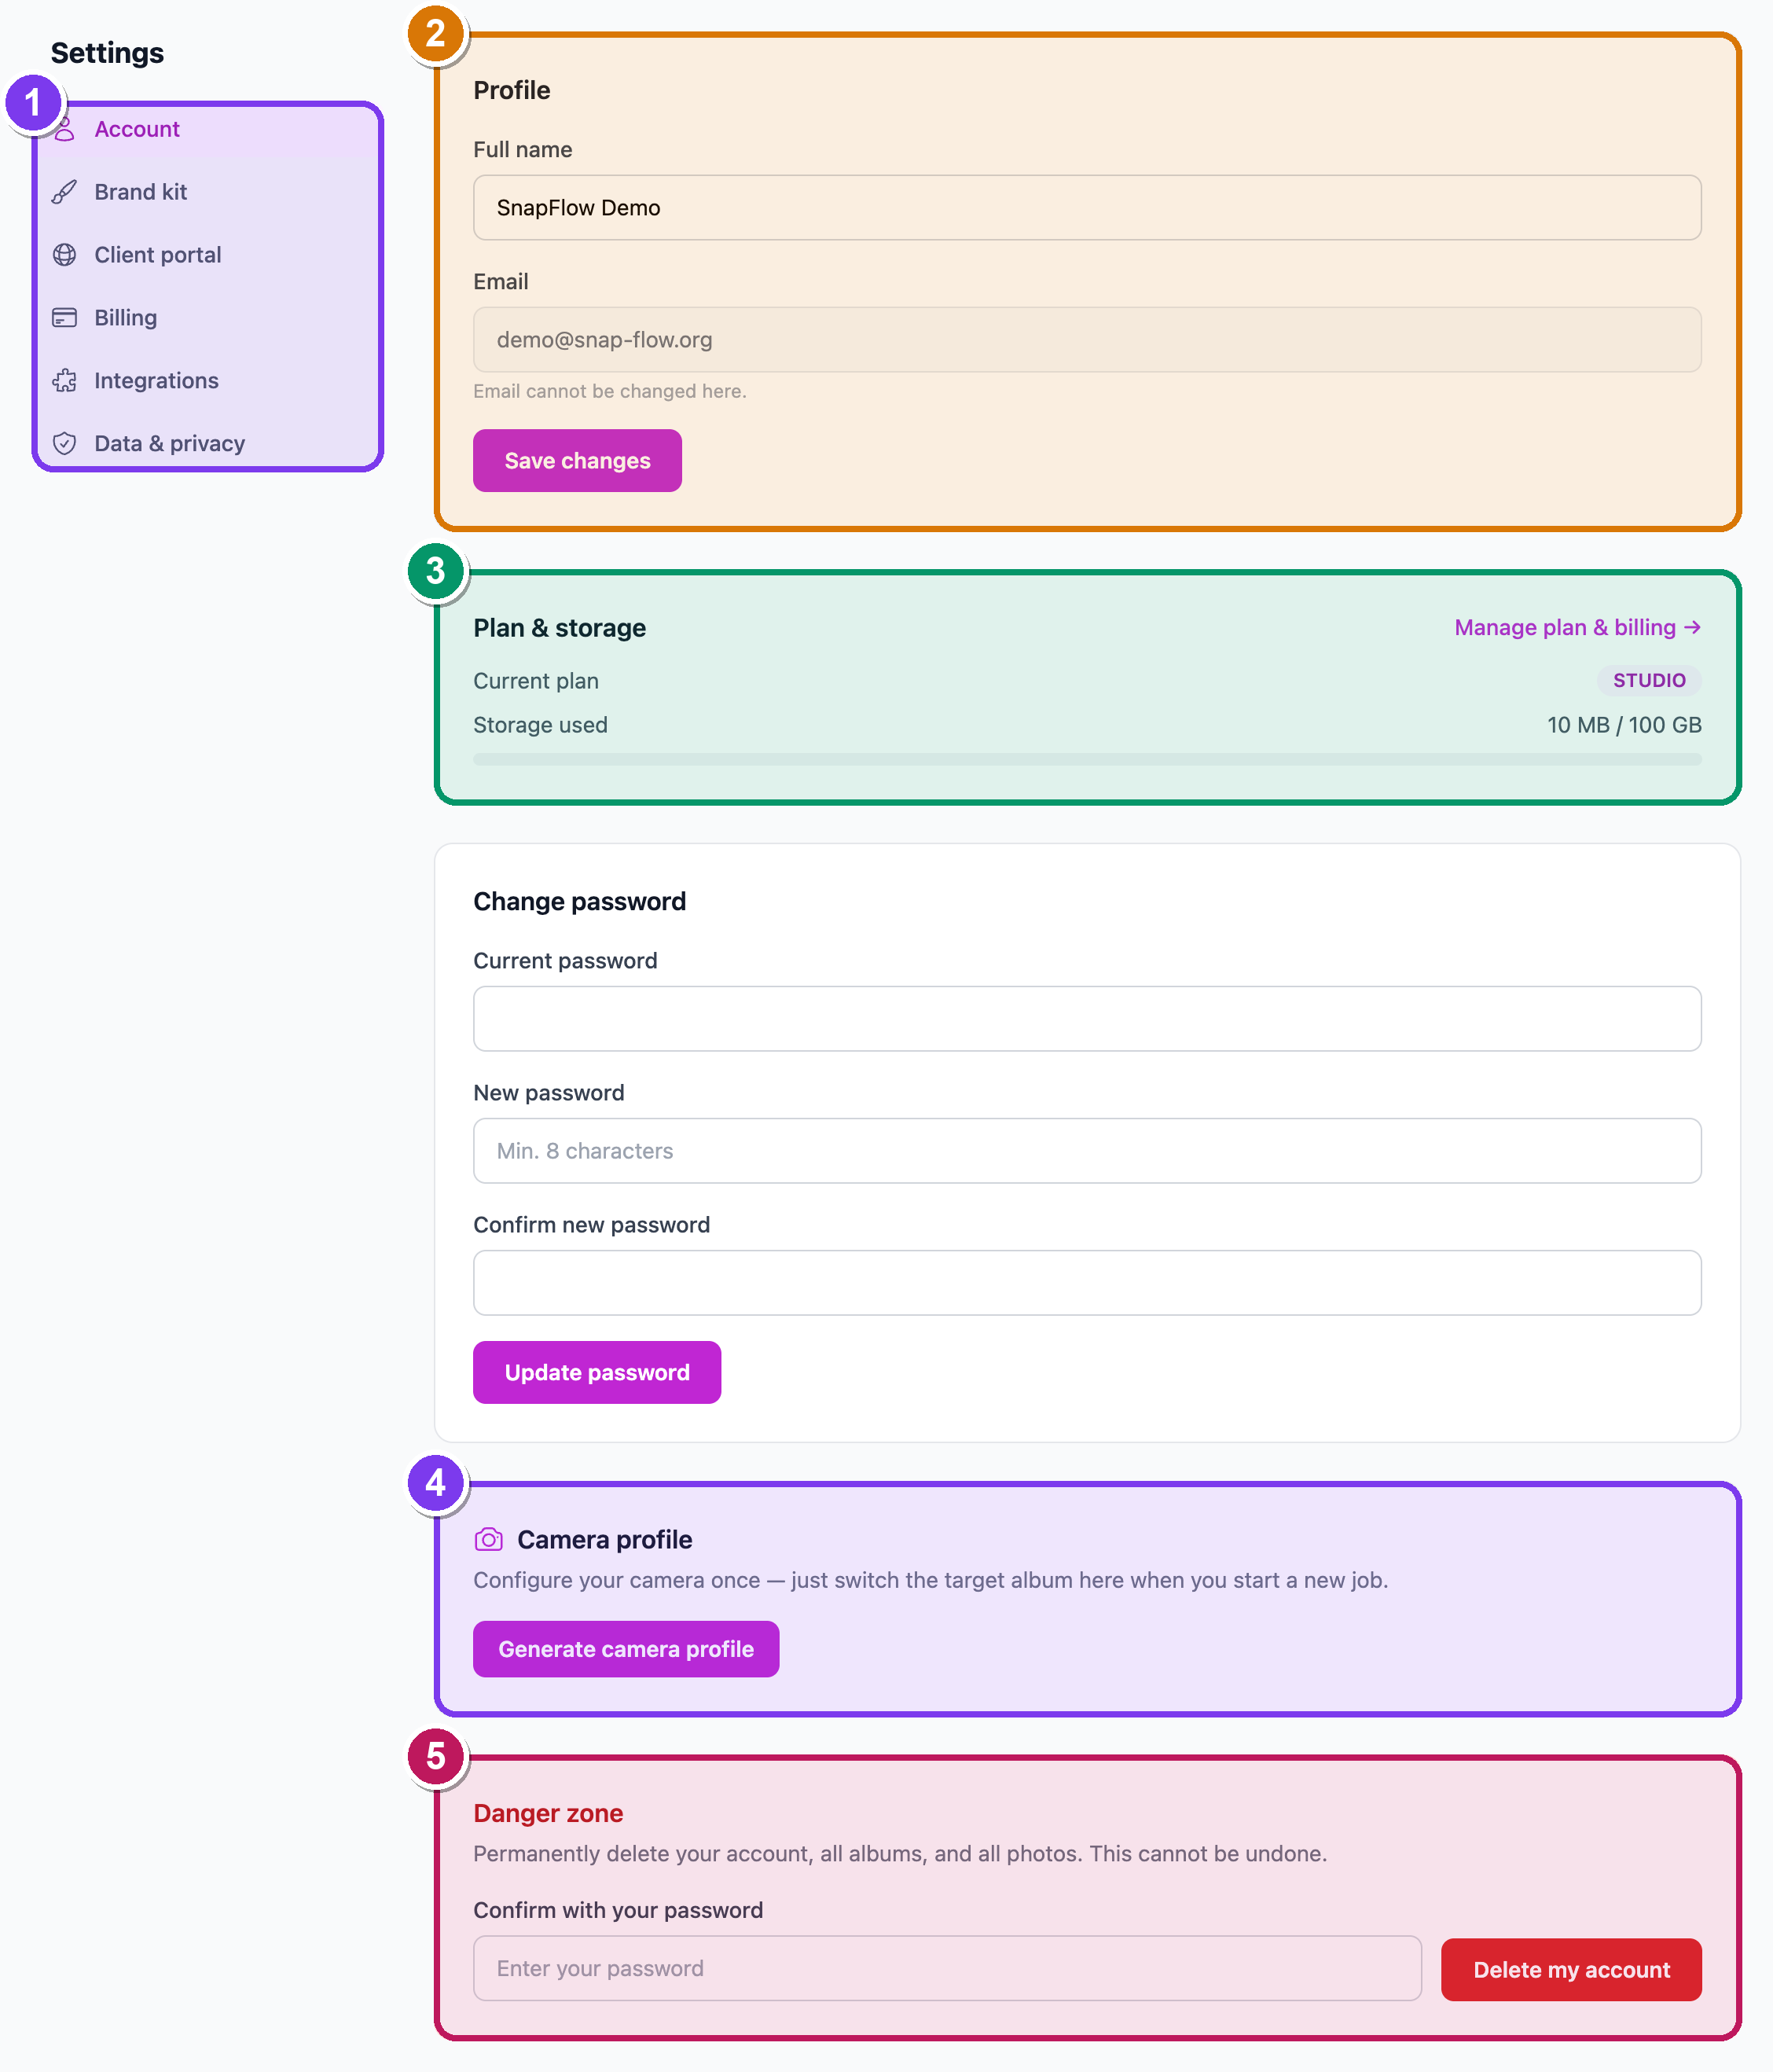 The Settings area. ① the six-tab left rail (Account · Brand kit · Client portal · Billing · Integrations · Data & privacy); ② the Profile card with your name and email; ③ the Plan & storage gauge; ④ the Camera profile card; ⑤ the red Danger zone at the bottom.
How to open Settings
- Look at the very top-right of any page — there's a small round button with your initials in it (your avatar). Click it. — a little menu drops down showing your name, your email, Settings, and Sign out.
- Click Settings. — the Settings area opens on the Account tab.
The web address
Opening Settings sends you to /settings, which lands you on /settings/account. Each tab has its own address (for example /settings/billing), so you can bookmark the one you use most.
Down the left side you'll see six tabs. Click any of them to switch — the page stays put and only the right-hand panel changes:
- Account — your name, password, storage gauge, camera login, and the delete-account button.
- Brand kit — your logo, colours and fonts (covered in Galleries & sharing).
- Client portal — your branded client login page (covered in the Client portal guides).
- Billing — your plan, payment card, codes, billing address and receipts.
- Integrations — connect Instagram, download the desktop app and the Lightroom plugin.
- Data & privacy — your consent switches, a data export, and legal documents.
Org owners get one more link
If you run an organisation (an agency or corporate account), a seventh link appears under the six tabs: \<your org> (org) →. It opens the separate org Account settings page. See Branding & white-label.
The Account tab
This is where you land. It's a stack of cards, top to bottom.
Your name and email
- In the Profile card, type your name into the Full name field.
- Click Save changes. — a green Saved. bar appears at the top.
Your Email is shown but greyed out — it's your sign-in, so it can't be edited here. You'll see the note "Email cannot be changed here." underneath it.
Plan & storage gauge
If you're a solo photographer, the Plan & storage card shows your current plan and a bar of how much storage you've used:
- The bar is brand-blue when you have plenty of room.
- It turns amber once you pass about 60% full.
- It turns red past about 85% — time to tidy up or upgrade.
Click Manage plan & billing → (top-right of this card) to jump straight to the Billing tab.
No recalculate button here
The Settings storage gauge reads straight from your account total, so there's nothing to recalculate. (The old /profile page had a recalculate button; Settings doesn't need one.)
Change your password
- Scroll to the Change password card.
- Type your existing password into Current password.
- Type a new one into New password — it must be at least 8 characters.
- Re-type it into Confirm new password.
- Click Update password. — a green Saved. bar confirms it; use the new password next time you sign in.
Camera profile (your reusable FTP login)
A camera profile is one FTP login (the file-transfer details you save into your camera) that you can point at any album. Set the camera up once, then just switch which album new shots land in.
- In the Camera profile card, click Generate camera profile. — the card turns into a credentials table showing Host, Username and Password.
- Copy the Password straight away — it shows with the note "— copy now, won't be shown again". Reload the page and the password hides behind dots forever.
- Under Active album, pick the album you're shooting from the dropdown (the first option is "— no active album —").
- Click Set album. — a little confirmation appears; every photo your camera uploads now lands in that album. Come back and change it whenever you start a new job.
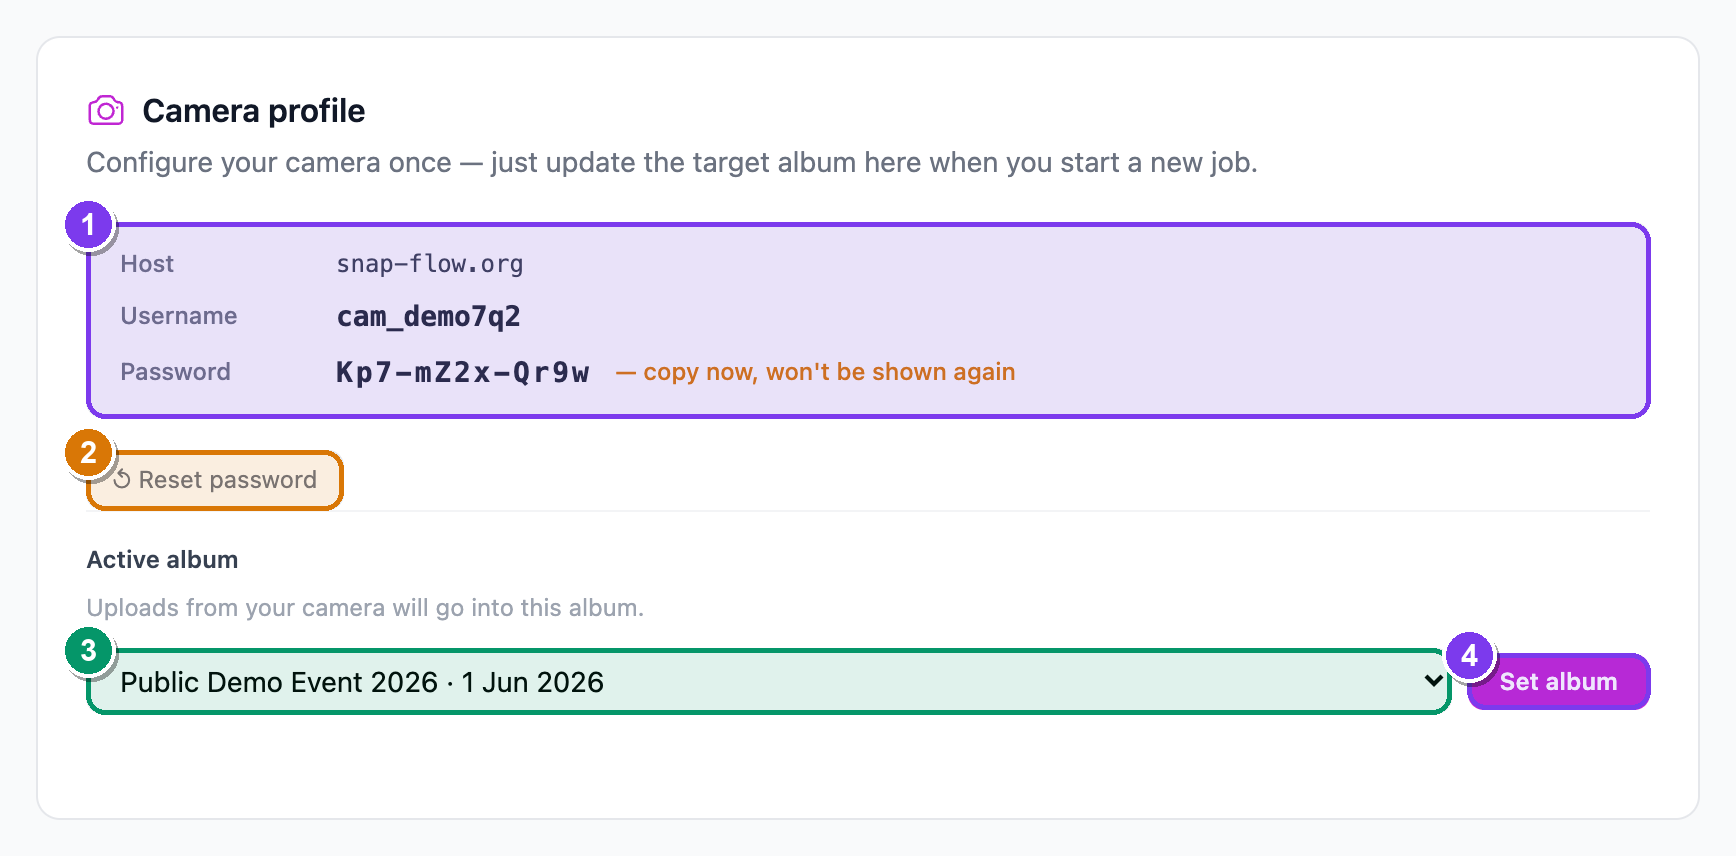 The Camera profile card. ① Host / Username / Password rows (the password warns "— copy now, won't be shown again"); ② the ↺ Reset password button; ③ the Active album dropdown and ④ the Set album button that routes uploads.
Passwords are write-once
If you ever lose the camera password, click ↺ Reset password. You'll be asked to confirm, then a fresh password is generated — "Your old password will stop working immediately." So only reset when you're ready to update your camera too. For the full camera/Lightroom setup, see Getting photos in.
Danger zone — delete your account
At the very bottom is a red Danger zone card.
- Type your password into Confirm with your password.
- Click Delete my account. — your browser asks you to confirm one more time.
- Confirm. — your account, every album, and every photo are permanently erased, and any subscription is cancelled.
This cannot be undone
There is no recovery. A wrong password aborts the delete. Demo and admin accounts are blocked from deleting here. If you only want to pause uploads or free space, do that elsewhere — deleting is final.
The Billing tab
Everything about money and plans lives here. (This whole tab is for solo photographers; org accounts manage money on their own admin pages — see Org billing.)
Switch plans
The Plan card shows your plans side by side. Your current one carries a Current badge in the corner.
- To move up, click Subscribe on a paid plan card. — secure Stripe checkout opens (your card details go to Stripe; SnapFlow never sees them).
- To drop back to the free tier, click Switch to Free on the Free card.
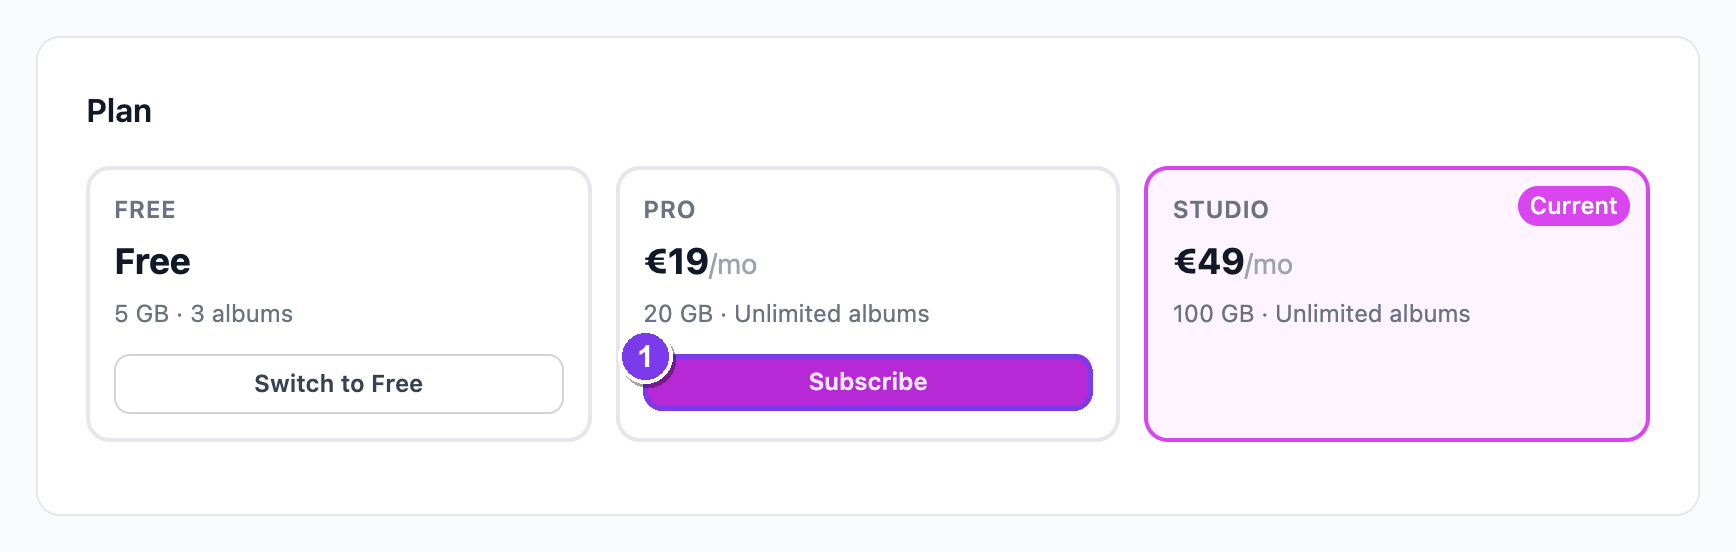 The Billing tab. ① plan cards with the Current badge and Subscribe buttons; ② Manage billing & subscription; ③ the Have a billing discount code? box (Apply); ④ the Have a plan access code? box (Redeem).
Manage your card, invoices, or cancel
If you're a paying subscriber, click Manage billing & subscription. — the Stripe customer portal opens in a new tab where you can update your card, view invoices, or cancel.
Two different code boxes — don't mix them up
They look similar but do different jobs:
- Have a billing discount code? → type the code and click Apply. This is a Stripe promo for an active subscriber (it shows only when you have a live subscription).
- Have a plan access code? → type the code and click Redeem. This is a SnapFlow voucher that grants or upgrades a plan.
Enter whichever one you were given, in its matching box.
Billing address & receipts
- Billing address — fill in Billing name, address lines, City, State / Province, Postal / ZIP code, Country, and an optional VAT / Tax number, then click Save billing details. These appear on your Stripe invoices.
- Payment history — a table of every charge, with a date, a status pill (paid, failed, trial ended, cancelled), the plan, and the amount.
Plans gate features
Some workflow switches are Pro or Studio only — for example client proofing and sneak peek (Pro), and finals delivery (Studio). When a feature is locked you'll see an Upgrade to unlock → prompt instead of a switch; subscribing turns it on right away. See Plans & feature gates.
The Integrations tab
This tab connects SnapFlow to your other tools.
- Click + Connect (top-right of the Instagram accounts card) to link an account — Instagram's own login opens. Once linked, you can add a label and click Save, or click Disconnect to remove it.
Desktop app & Lightroom plugin
The Editing tools card gives you two downloads:
- SnapFlow Sync (carries a Recommended pill) — click Download for Mac. This is the desktop app that pulls raws for editing, pushes finals back, and runs the power-user metadata tools. Open the downloaded .dmg and drag SnapFlow Sync into your Applications folder.
- Lightroom Classic Plugin — click Download to publish edited photos straight from Lightroom into SnapFlow.
Power-user metadata tools live in the desktop app
Filename templates, ingest profiles, IPTC presets, photographer profiles, the Stationery Pad and code-replacement shortcuts all live in the SnapFlow Sync desktop app you download here. They're covered in Metadata & IPTC (desktop) and the rest of the desktop guides in the sidebar.
The Data & privacy tab
This tab is your control over what SnapFlow does with your data, plus a way to take a copy of it with you.
Consents — three switches
You'll see three checkboxes, each with its own Save consents button and, once ticked, a small "Consented on \<date>" line so you can see when you agreed.
- AI processing of my photos and content — lets SnapFlow send your photos and text to Anthropic (Claude) for AI captions, keywords, identifier detection, and auto-pilot planning. This is the one that unlocks the AI features across the app; turning it off stops all new AI calls. (Faces are never sent to a third party for naming.)
- Store my IP address for analytics — keeps your IP in our logs beyond the short security window, for usage analytics.
- Occasional product-update emails — release notes and tips, roughly one email a month.
Tick or untick whichever you like, then click Save consents. — a green "✓ Your consent preferences have been updated." line confirms it. You can revoke any of these at any time.
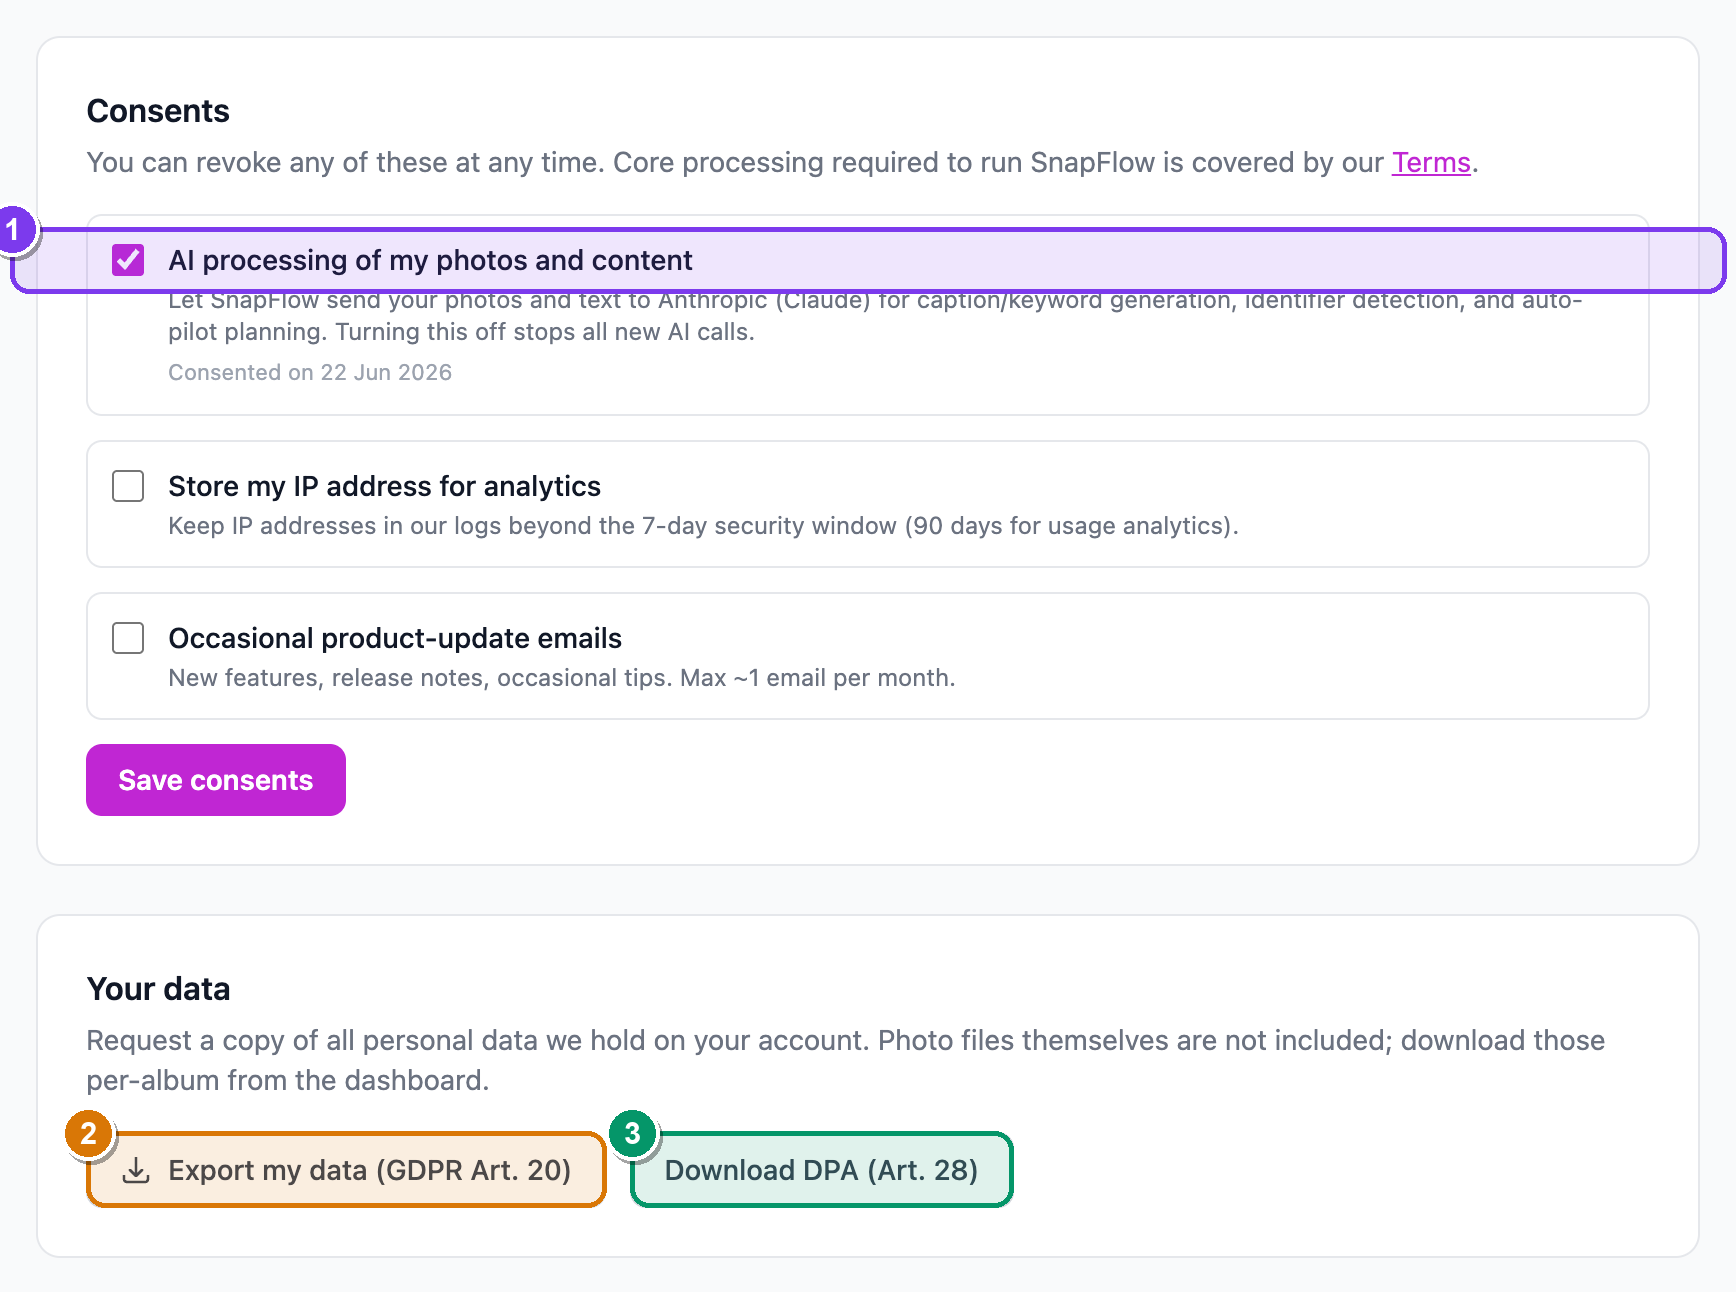 The Data & privacy tab. ① the three consent checkboxes, each with Save consents and a "Consented on …" date; ② Export my data (GDPR Art. 20); ③ Download DPA (Art. 28).
Export your data (GDPR)
- Click Export my data (GDPR Art. 20). — a green line confirms "Export queued — check your email in a few minutes. The link is valid for 24 hours."
- Open the email and download the ZIP within 24 hours.
What the export contains — and what it doesn't
The ZIP is your account data: your account record, your album and photo metadata (captions, keywords, ratings), your proofing selections, and your connected-account info. Instagram access tokens are excluded for security.
Your actual photo files are NOT in this export. To download the images themselves, use the per-album Download options on your dashboard. See Galleries & sharing.
Legal documents
Click Download DPA (Art. 28) to open the Data Processing Agreement in a new tab — handy if a client or agency asks for it.