Getting started
Sign in, the Albums/Posts/Reels tabs, and your profile.
The SnapFlow iPhone app is your event-day companion. Upload from your phone, rate and cull between shots, kick off recognition, share galleries by QR code, post to Instagram — and now do a quick on-device develop pass in the Edit tab. Heavier editing (curves, masks, batch sync) still lives on the desktop app and the web.
This chapter gets you from "app just installed" to "signed in and finding your way around." If you have never opened SnapFlow before, start here.
Sign in iOS
When you open the app and you are not signed in yet, you land on the Sign in screen. You'll see the camera-aperture icon, the SnapFlow wordmark, and the tagline "Event photography, on the go."
- Tap the Email field and type the email you use on the web. — the keyboard appears and the field fills in.
- Tap the Password field and type your password. — dots appear as you type, so nobody can read over your shoulder.
- Tap Sign in (the big blue button). — you'll see a spinner, then the app drops you into the main tab bar.
The web address you are signing in to is shown in tiny grey text at the very
bottom of the screen. On the standard hosted app that reads snap-flow.org.
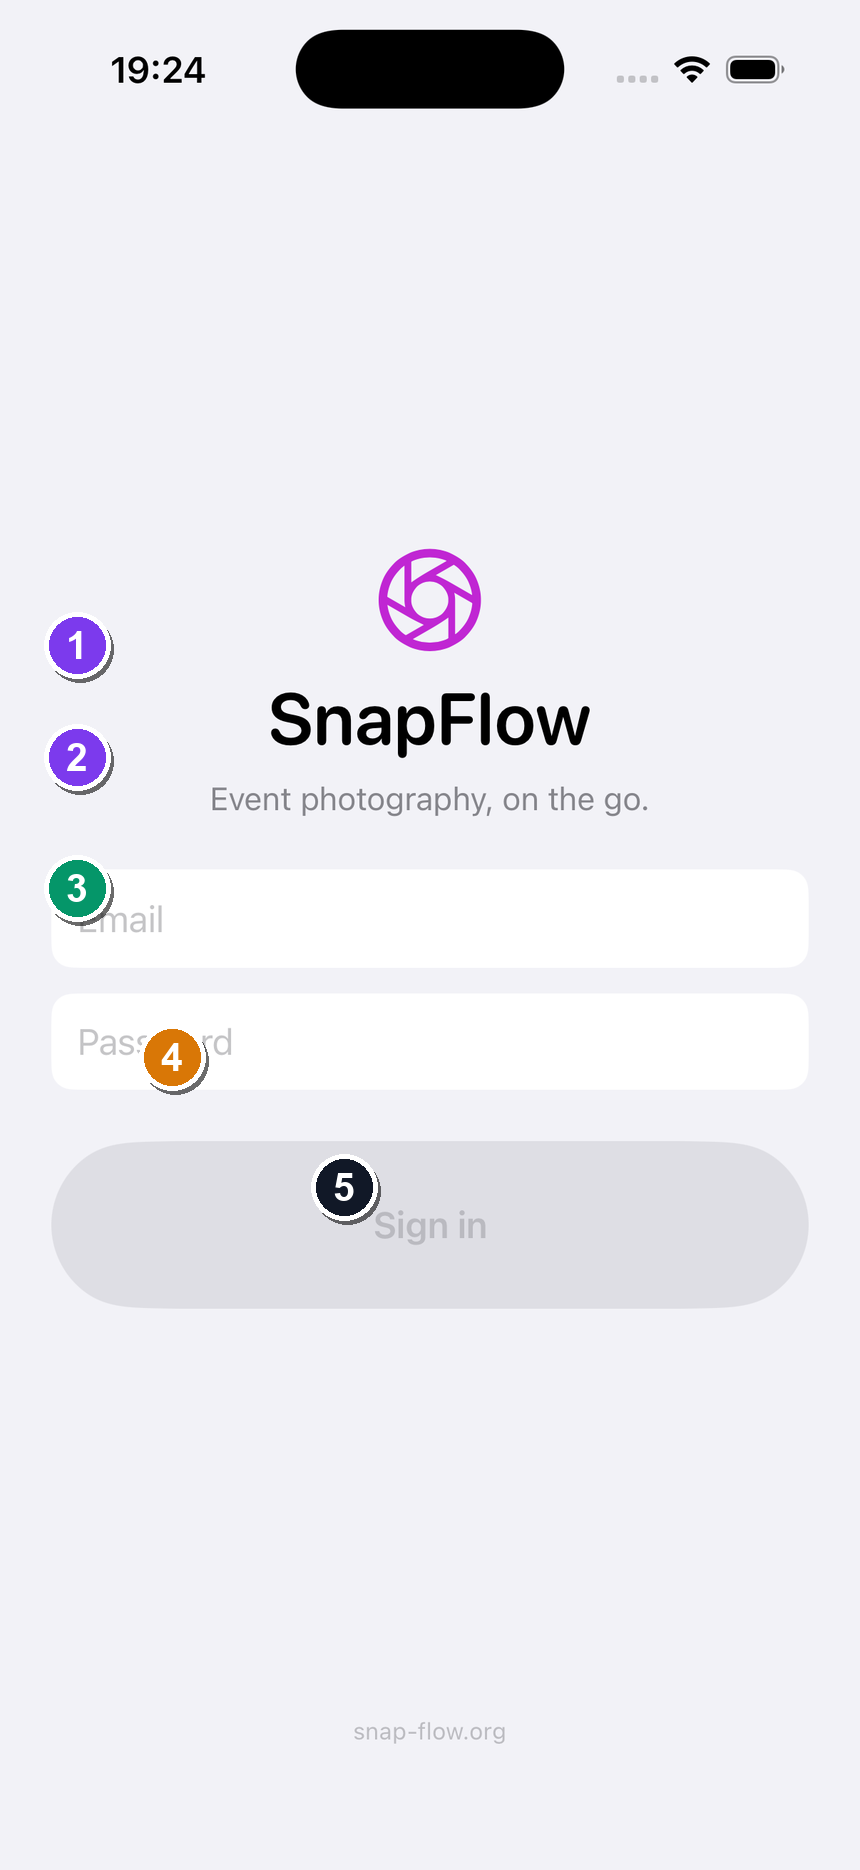 The Sign in screen. ① the Email field, ② the Password field, ③ the blue Sign in button, ④ the Create your free account link below it, and ⑤ the server host in small grey text at the bottom.
Can't sign in?
Use the same email and password as the web. If the details are wrong, a red line appears under the password box telling you what went wrong — just try again. Signed in fine before but suddenly bounced back to this screen? Your session was signed out (for example from the web). Sign in again and you're back.
Create a free account
No SnapFlow account yet? You can make one right inside the app — no Safari, no web form. This creates a free photographer account. (Paid Pro and Studio plans are set up later on the web, because they need card details.)
- On the Sign in screen, tap New to SnapFlow? Create your free account (the link under the Sign in button). — a sheet titled Create account slides up.
- (Optional) Type your Full name (optional). — you can skip this and add it later.
- Tap Email and type your email address. — this becomes your login.
- Tap Password and type a password of at least 8 characters. — if it's too short, a grey reminder "Use at least 8 characters." appears.
- Tap Confirm password and type the same password again. — if the two don't match, you'll see "Passwords don't match."
- (Optional) If a studio gave you an invite code, tap Have an invite code? and type it in. — most people skip this.
- Tick I agree to the Terms & Conditions and Privacy Policy. — the checkbox fills in. You can tap Read Terms or Read Privacy Policy first if you want to read them.
- Tap Create account (the big blue button at the bottom). — the app creates your account, signs you straight in, and drops you into the main tab bar.
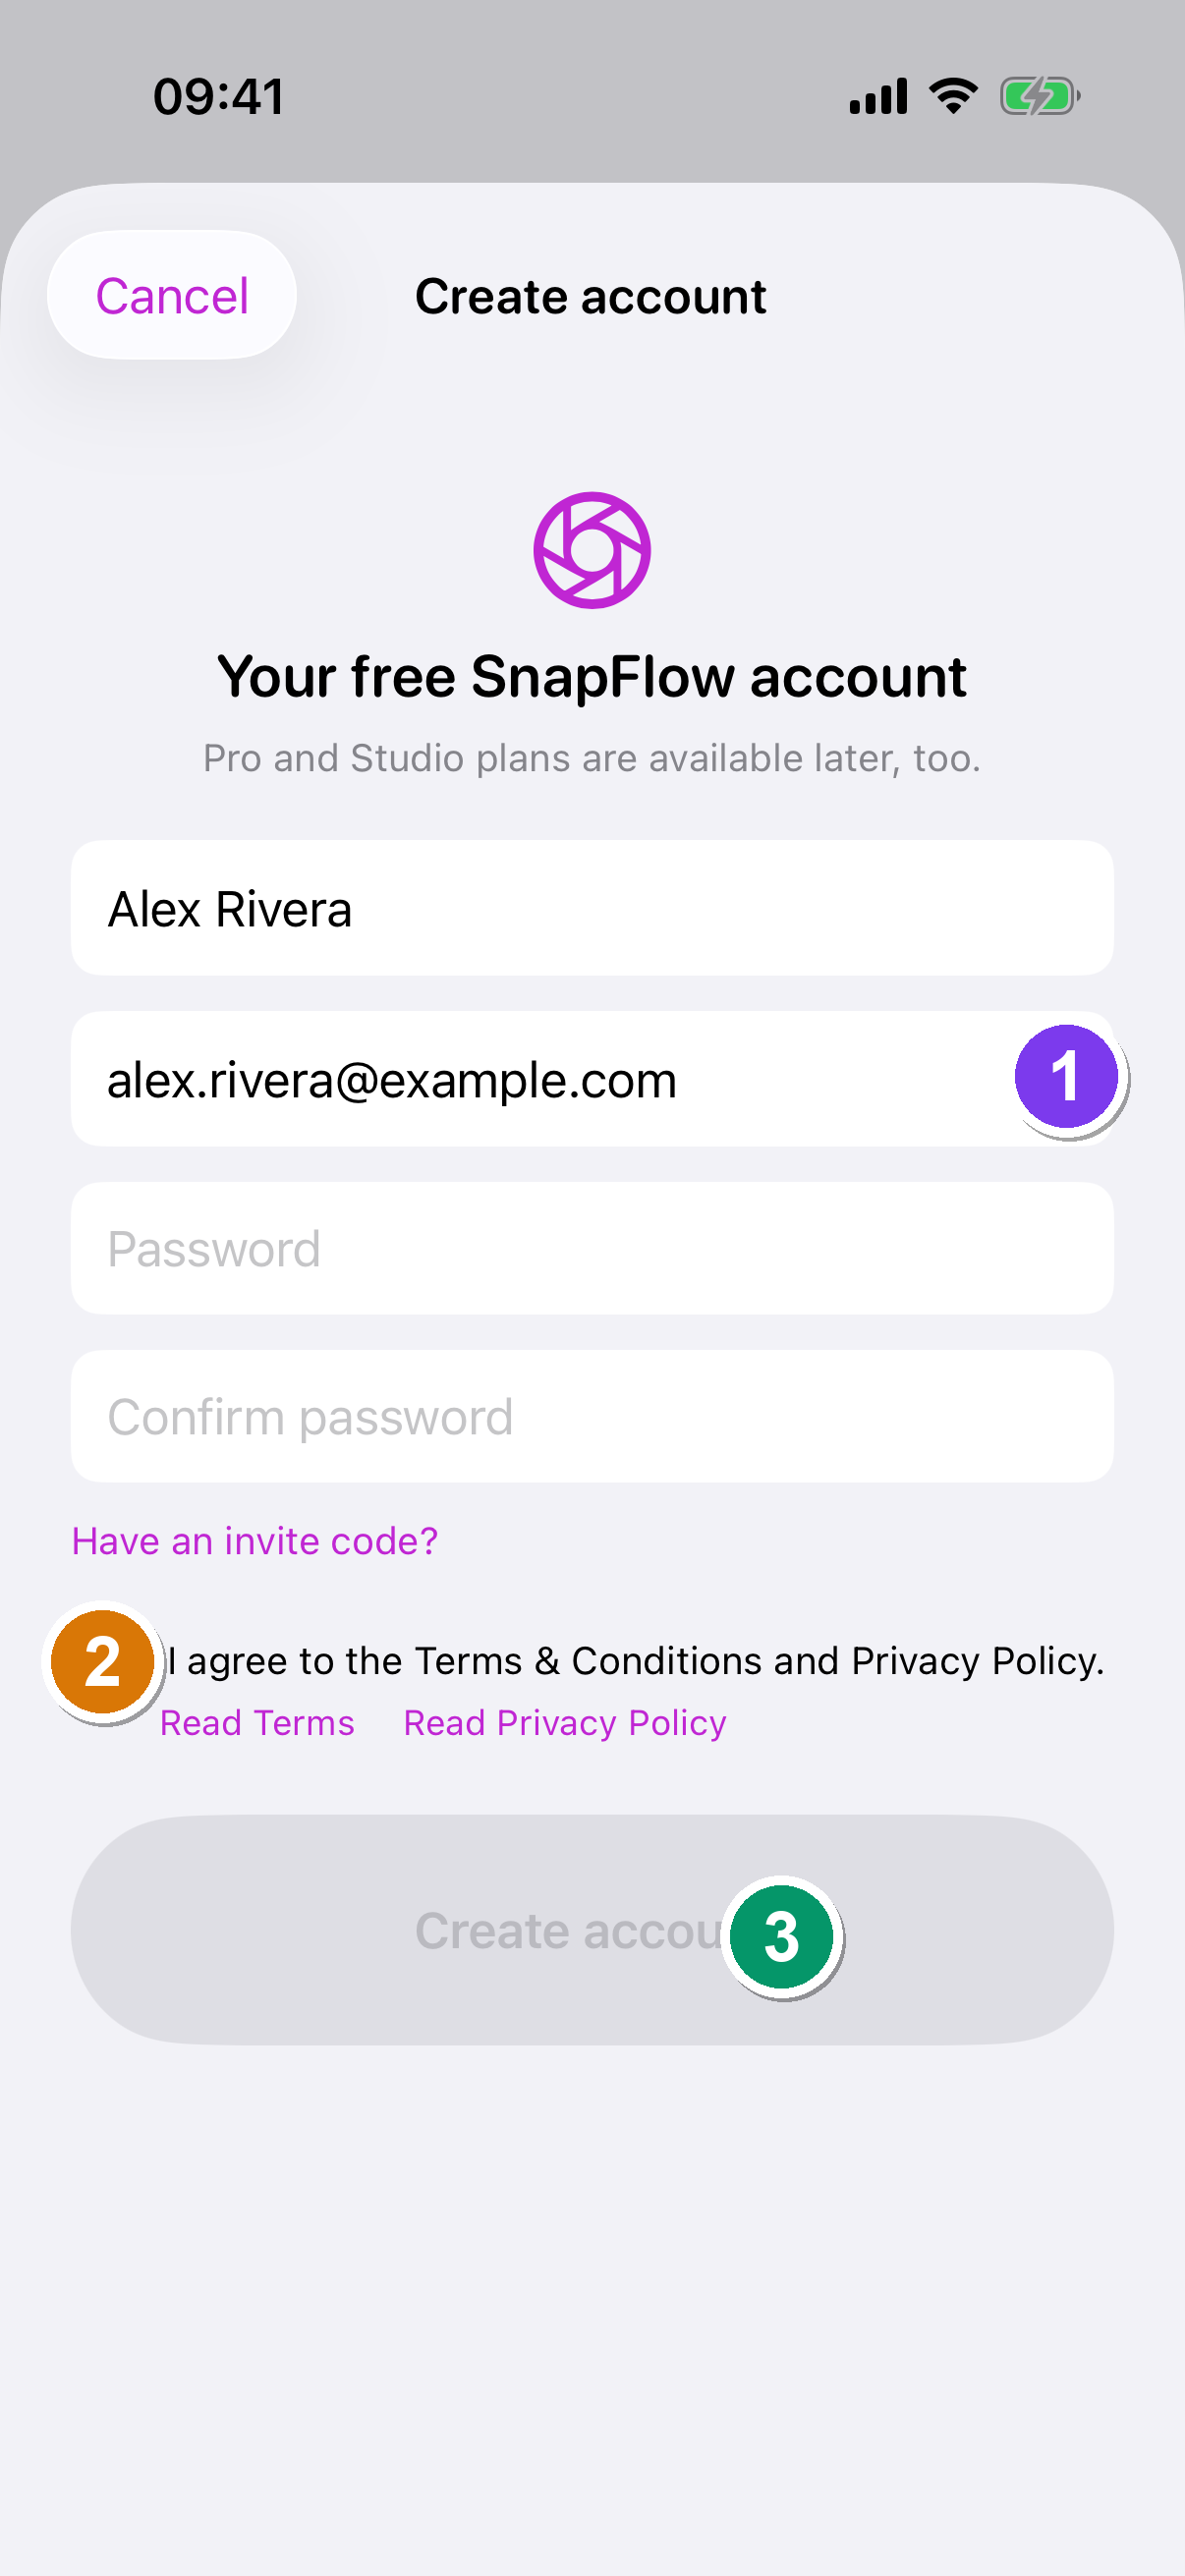 The native Create account sheet. ① Full name (optional), ② Email, ③ Password and Confirm password, ④ the I agree to the Terms & Conditions and Privacy Policy. checkbox, and ⑤ the blue Create account button (greyed out until the email, both passwords, and the agree box are all filled in).
The button stays grey until you're ready
Create account only turns blue once your email looks valid, your password is at least 8 characters, both password fields match, and you've ticked the terms box. If it's grey, one of those four is missing.
The four tabs
After you sign in you land in the main tab bar along the bottom of the screen. Tapping a tab switches what fills the screen above it.
| Tab | Icon | What it's for |
|---|---|---|
| Albums | photo stack | Browse your albums, upload, rate and cull, run recognition, and share galleries. A small badge shows how many client proofing picks are waiting on you. |
| Edit | sliders | The on-device photo editor — import a photo, develop it locally (nothing uploads while you edit), and save it back to an album. See Editing on iPhone. |
| Posts | grid | Compose Instagram posts — standard posts, tips carousels, AI drafts, and Stories. See Posts & Stories on iOS. |
| Reels | play button | Upload finished videos or build reels with AI text overlays. |
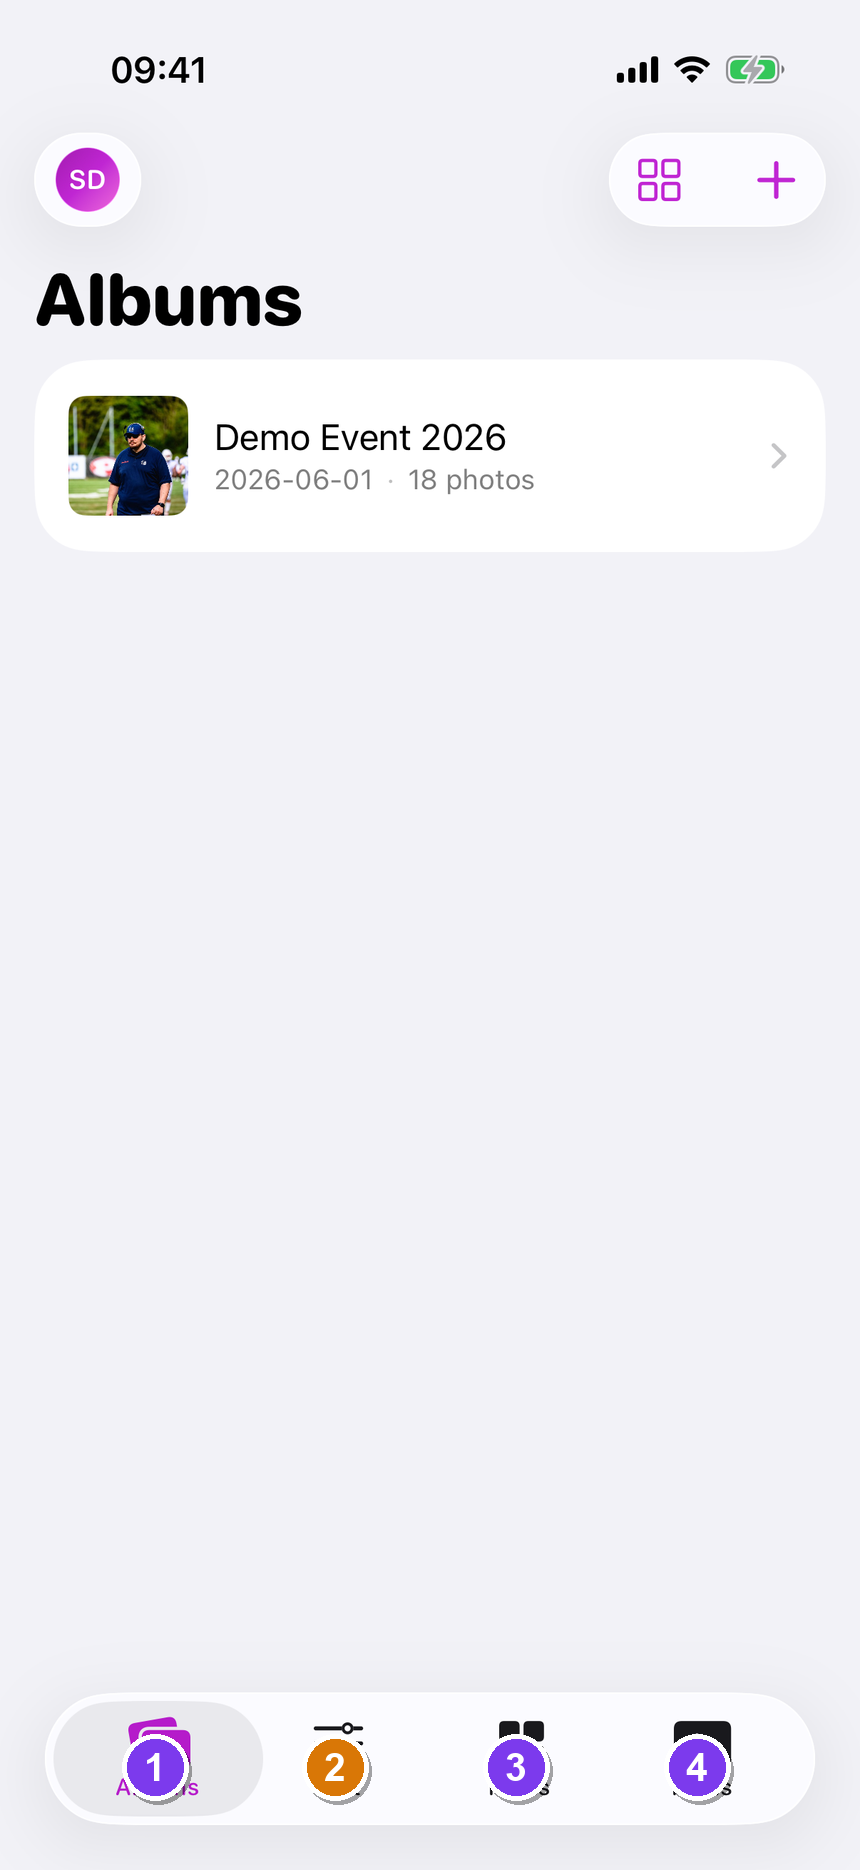 The bottom tab bar. ① Albums (with a proofing badge when picks are waiting), ② Edit — the new on-device develop tab, ③ Posts, and ④ Reels.
The Edit tab is new
Earlier versions of the app had only three tabs and all editing lived on the web. There's now an Edit tab for a quick develop pass on your iPhone — handy for fixing one frame in the field before you post it. It's a field tool, not a replacement for the desktop editor. Full walkthrough in Editing on iPhone.
Your profile
Your account, your camera's upload target, the AI toggle, sign out, and delete account all live on the Profile sheet.
- Open the Albums, Posts, or Reels tab. — the round avatar appears at the top-left.
- Tap the avatar. — the Profile sheet slides up.
Where's the avatar on the Edit tab?
The Edit tab doesn't show the avatar — its top bar holds Reset, Import, and Save instead (those control the photo you're editing). To reach Profile, switch to Albums, Posts, or Reels first.
On the Profile sheet you'll find:
- Account — your Email, your Plan (Free, Pro, or Studio), and your Name if you set one.
- AI processing — an AI photo processing toggle. Turn it on to let recognition and AI captions work; turn it off any time to stop sharing photos with the AI provider. (Faces are never sent to the AI provider — face grouping runs only on SnapFlow's own servers.) Full detail in Notifications & privacy.
- Camera FTP — your camera-upload Host, Port, and Username, plus an Active album picker. The active album is where photos pushed from your camera over FTP land. Pick None — pause uploads to stop uploads for now.
- Sign out — signs you out of the app (red, near the bottom).
- Delete account — permanently deletes your account and all your albums, photos, and posts. You confirm with your password. (This isn't offered on admin accounts.) See Notifications & privacy.
When you're done, tap Done (top-left) to close the sheet.
Switch events in two taps
Walk into a new event, open Profile → Camera FTP → Active album, and pick the new album. The very next photo your camera pushes over FTP lands in that album — no fiddling with camera settings. To set up your camera's FTP credentials in the first place, sign in to the SnapFlow web dashboard and open Profile → Camera Profile (see Your account & settings).
Notifications turn on automatically
The first time you sign in, iOS asks permission to send notifications. With it on, the app quietly refreshes an album when new photos arrive — there's no separate notifications settings screen to configure. More on this in Notifications & privacy.
Where to go next
- Make and fill your first album — Albums on iOS.
- Find people, numbers, and teams in your shots — Recognition on iOS.
- Share a gallery by QR code — Sharing on iOS.
- Draft posts and Stories — Posts & Stories on iOS.
- Develop a frame on your phone — Editing on iPhone.